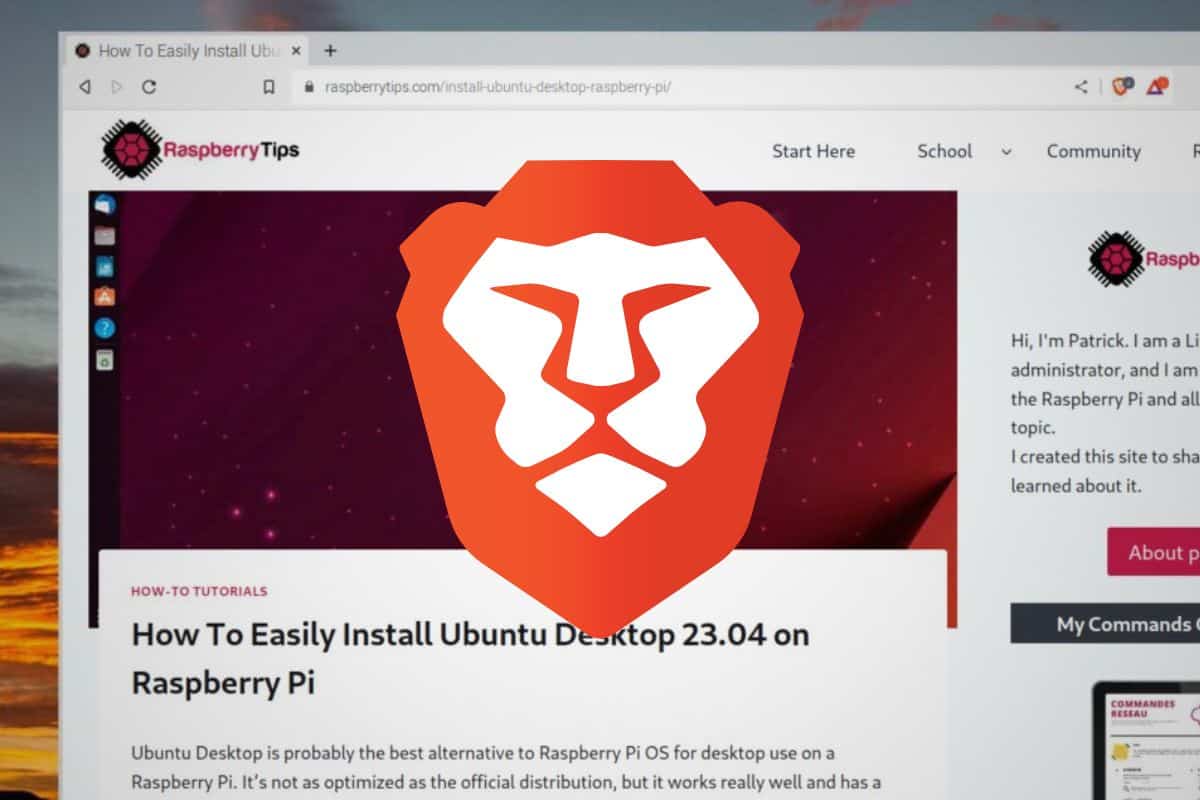
Brave on Your Pi: A Quick Guide to Install the Brave Browser
Brave is a fairly new web browser based on Chromium with your privacy in mind. Until recently, it wasn’t possible to install it on Raspberry Pi, but it’s now an option. If you are using it on your computer, you may want to give it a try on your Pi too. Here’s how to do this.
A custom repository can be added to the APT package manager to install the Brave browser on any 64-bit Raspberry Pi distribution. Once the repository is added, Brave can be installed and updated like any other application on the system.
You’ll need a few commands to do this, but don’t worry, I’ll give you everything in this tutorial. Stay with me, and you’ll have Brave running on your Pi in less than 5 minutes.
If you’re looking to quickly progress on Raspberry Pi, you can check out my e-book here. It’s a 30-day challenge where you learn one new thing every day until you become a Raspberry Pi expert. The first third of the book teaches you the basics, but the following chapters include projects you can try on your own.
Requirements to use the Brave browser on Raspberry Pi
The Brave Browser requires a 64-bit environment to run on Raspberry Pi, so it won’t work on all Raspberry Pi models or operating systems.
Here are the mandatory requirements to follow this tutorial:
- A recent Raspberry Pi model.
A Raspberry Pi 3, 4, 400, or Zero 2 is required. I didn’t test it on other models, but I don’t think it will work. - Raspberry Pi OS 64-bit.
The only version of Brave available currently is for ARM64, so using the 64-bit edition of Raspberry Pi OS is required. It should work with other 64-bit distributions though. - Curl.
It’s a command line allowing you to access a URL. We’ll use it to install the Brave Browser on your Pi. In theory, it’s preinstalled on Raspberry Pi OS so it shouldn’t be an issue. However, you can check if you have it (and install it if needed), with:sudo apt install curl
For your information, I did the tests for this article with this configuration:
- Raspberry Pi 4 (4 GB).
- Raspberry Pi OS with Desktop (Bullseye, 64-bit) installed on this USB drive.
- My usual monitor and my favorite Raspberry Pi keyboard (links to my reviews if you need one).
Aside from that, nothing more is required. Once you have these requirements, you can follow the next section to install it on your Raspberry Pi with a few commands.
Add the Brave browser repository to Raspberry Pi OS
Here are the steps to install Brave on your Raspberry Pi:
It's a free PDF guide containing every Raspberry Pi Linux command you should know!
Download now
- Download the GPG key for the Brave repository.
- Add the repository to your package sources for APT.
- Use ATP to install the main packages.
Let’s see how to do this in detail.
Download the GPG key
We’ll add a new repository to the operating system, which means a new source of applications will be added. To tell the system we trust this new source, a new GPG key must be downloaded first.
That’s why you need curl, and you can download the key in one line with this command:sudo curl -fsSLo /usr/share/keyrings/brave-browser-archive-keyring.gpg https://brave-browser-apt-release.s3.brave.com/brave-browser-archive-keyring.gpg

Join Our Community!
Connect, learn, and grow with other Raspberry Pi enthusiasts. Support RaspberryTips and enjoy an ad-free reading experience. Get exclusive monthly video tutorials and many other benefits.
Learn moreIt gets the key from the official Brave website, and puts it into your keyrings folder, all in one command. Sudo is required to write in this folder, so you’ll be asked for your password.
Are you a bit lost in the Linux command line? Check this article first for the most important commands to remember and a free downloadable cheat sheet so you can have the commands at your fingertips.
Add the repository
You can now add the repository to the package manager configuration (APT).
Once again, only one command is required:echo "deb [signed-by=/usr/share/keyrings/brave-browser-archive-keyring.gpg] https://brave-browser-apt-release.s3.brave.com/ stable main"|sudo tee /etc/apt/sources.list.d/brave-browser-release.list

It’s good practice when adding a new repository for APT to create a new file under /etc/apt/sources.list.d (and keep the /etc/apt/sources.list file for the OS repositories). So, if you no longer use the app in the future, you can just delete the file.
That’s exactly what this command does.
Run apt update
The next step is to run the APT command to connect to the Brave repository and sync the packages available on it. You probably already know this command:sudo apt update
It's a free PDF guide containing every Raspberry Pi Linux command you should know!
Download now
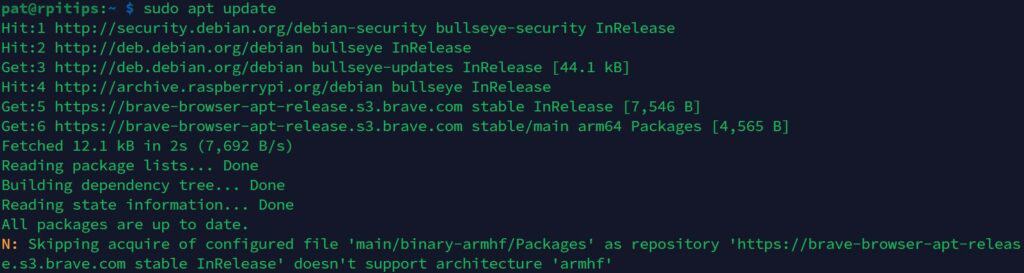
It will connect to all your repositories and get the latest list of packages available on all of them so that the other APT commands will work properly.
If any update is available, it’s a good idea to do them right away so we don’t have any issues with the Brave installation later:sudo apt upgrade
Note: You’ll probably get the same error as me at the end of the apt update command (“Skipping acquire of configured file ‘main/binary-armhf/Packages’ as repostitory […] doesn’t support architecture ‘armhf’“). You can safely ignore it, but if you want to remove it, here is what to do:
- Edit the sources list file:
sudo nano /etc/apt/sources.list.d/brave-browser-release.list
You can read my Nano tutorial here if you are not used to it. - Replace this part:
[signed-by=/usr/share/keyrings/brave-browser-archive-keyring.gpg]With:[signed-by=/usr/share/keyrings/brave-browser-archive-keyring.gpg arch=arm64]
- Save and exit
Run “apt update” again, it should be fine now. It looks like it’s trying to get the amrhf packages (32-bit edition), even if you’re running the 64-bit version.
It's a free PDF guide containing every Raspberry Pi Linux command you should know!
Download now
Install & use the Brave browser on Raspberry Pi
Once the Brave repository is added to your system, you can simply install Brave via the package manager. You can use the “Add/remove software” app to do this if you prefer, but I think one last command for today should be fine.
Here’s the command to install the Brave Browser with APT:sudo apt install brave-browser
If you use the GUI, use the search engine, and type “brave” in it:
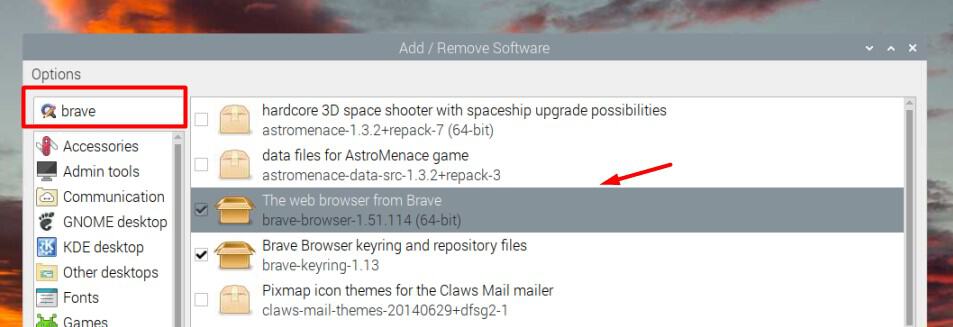
A few minutes later, Brave should be available in your main menu under the “Internet” category. Brave is not set by default automatically (it will ask you if you want to do it), but the Internet icon in your top bar will now open Brave instead of Chromium.
You can now enjoy reading your favorite Raspberry Pi website with this powerful browser :-).

Please let me know how it works for you, I may need to update my top web browsers list for the Raspberry Pi to add it after doing a bit more testing.
In terms of features, you should have access to the same ones you are used to on your computer (sync is available, ad-blocker works, etc.).
It's a free PDF guide containing every Raspberry Pi Linux command you should know!
Download now
If you are looking for exclusive tutorials, I post a new course each month, available for premium members only. Join the community to get access to all of them right now!
Related questions
Is the Brave Browser faster than Chromium on Raspberry Pi?
According to the Speedometer browser test, Brave is slightly faster than Chromium on Raspberry Pi OS (around 20% faster).

I got around 22 with Brave and 18 with Chromium, keeping the default settings. So, the benchmark is clear, but a bit more time with both of them is required to know if you’ll really see the difference in daily use.
Can you install the Brave Browser on Raspberry Pi via the GUI?
The Brave browser is available via Pi-Apps, a useful tool you can install on Raspberry Pi OS to download and install the most popular applications in one click.
That would be the easiest way if you already have it on your Raspberry Pi. But installing Pi-Apps also requires the command line, so I wouldn’t bother if it’s only for Brave.
How to change the Internet icon application shortcut on Raspberry Pi OS?
After installing the Brave Browser, it now starts Brave instead of Chromium. Here’s how to change this behavior:
- Right-click on icons and choose “Application Launch Bar Settings”.
- On the left, click on “Internet” and the “Remove” button.
- Then, on the right, go to “Internet”, pick the web browser you want, and click on “Add”.
I didn’t find any way to keep the “Internet” icon and change the associated browser, so I think it’s the easiest way (and this way, you’ll have the real browser icon, not the generic one).
If you want even more privacy online, you can also try Tor Browser, that fits in the same category, but uses the Tor network by default, to hide your data.
Whenever you’re ready, here are other ways I can help you:
The RaspberryTips Community: If you want to hang out with me and other Raspberry Pi fans, you can join the community. I share exclusive tutorials and behind-the-scenes content there. Premium members can also visit the website without ads.
Master your Raspberry Pi in 30 days: If you are looking for the best tips to become an expert on Raspberry Pi, this book is for you. Learn useful Linux skills and practice multiple projects with step-by-step guides.
The Raspberry Pi Bootcamp: Understand everything about the Raspberry Pi, stop searching for help all the time, and finally enjoy completing your projects.
Master Python on Raspberry Pi: Create, understand, and improve any Python script for your Raspberry Pi. Learn the essentials step-by-step without losing time understanding useless concepts.
You can also find all my recommendations for tools and hardware on this page.