

The 3 Best Ways to Use Spotify on Your Raspberry Pi
If you like to listen to music at home, you can use your Raspberry Pi as your personal stereo. In this post, I’ll show you the different ways you can play Spotify on your Raspberry Pi.
There are three ways that you can use Spotify on a Raspberry Pi: Volumio, Kodi or MusicBox. All of these are available as a system image that can be downloaded and flashed on a mini-SD card. Then Spotify will be available as an additional plugin.
I do want to warn you that a premium account is required to use Spotify on your Raspberry Pi. If you’re interested in learning how to use Spotify on your Raspberry Pi, keep reading!
If you’re looking to quickly progress on Raspberry Pi, you can check out my e-book here. It’s a 30-day challenge where you learn one new thing every day until you become a Raspberry Pi expert. The first third of the book teaches you the basics, but the following chapters include projects you can try on your own.
Play Spotify with Volumio
The best way to play Spotify on a Raspberry Pi is to use the Volumio music player.
What is Volumio?
Volumio is a software dedicated to being a music player.
You can play any file type with good quality and use the web interface to manage it.
It’s the perfect solution for a Raspberry Pi, as you can keep the Raspberry Pi wireless, with a speaker on the jack port (or use the HDMI output). Then you can use it as your home stereo, by controlling Volumio from your smartphone.
Install Volumio on Raspberry Pi
The installation is straightforward.
You need to have an SD card available (you can find my benchmark here if you need to buy one first), then you can follow this procedure:
- Download Volumio from the official website.
Click on Download in the Raspberry Pi part. - If needed, download and install Etcher from this website.
It’s a free tool that allows you to easily create an SD card. - Start Etcher, you’ll see something like this:
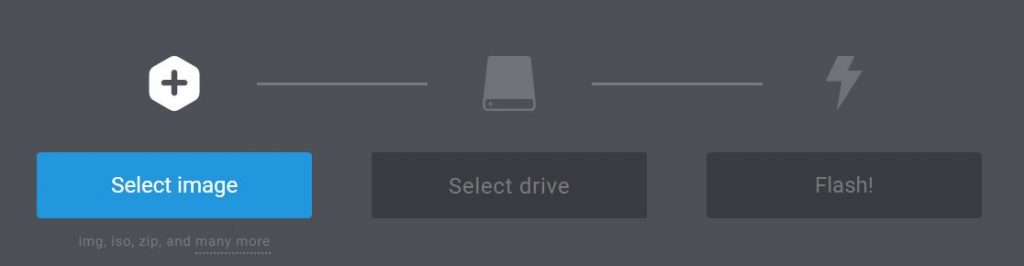
- On the left, choose the Volumio image file (no need to extract it).
Then click on Flash! - After a few minutes, your SD card is ready.
Note: Volumio is now included in the OS list on Raspberry Pi Imager. If you have it installed on your computer, it’s probably the easiest way to install it on a new SD card. You can also use network boot to flash your current SD card directly from your Pi.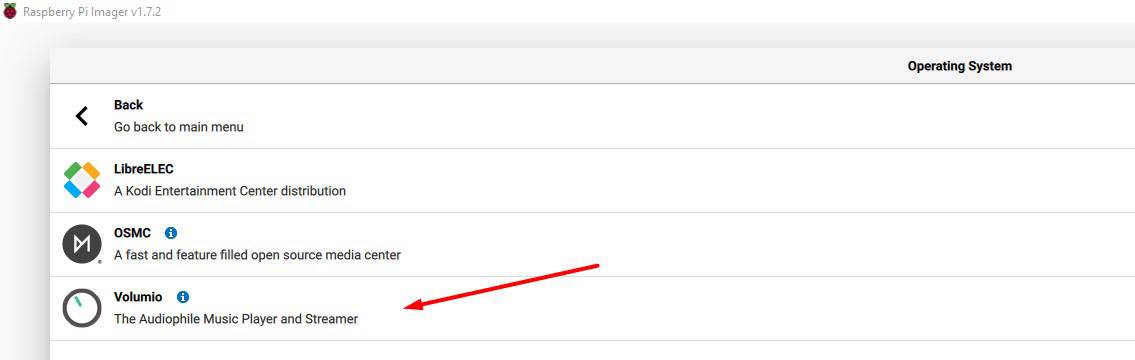
Insert the SD card into your Raspberry Pi and start it.
Access the web interface
Everything can be managed from the web interface.
If you have only Wi-Fi available, there is an extra step:
- From your computer, connect to the Volumio Wi-Fi network.
There is no password (on old versions it’s volumio2 for your information).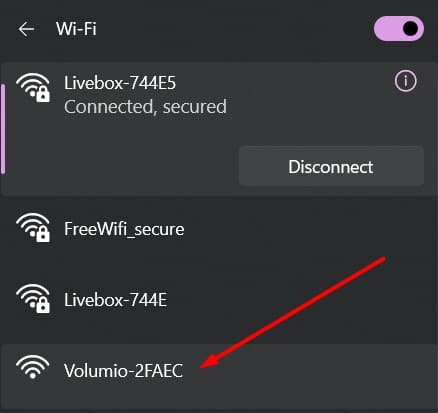
- A web page will open with a configuration wizard.
If it doesn’t open automatically, you may need to click on the link in your network list: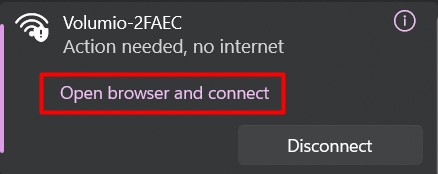
- Follow all the steps and enter your Wi-Fi settings.
You can keep most of the default values. The most important is to pick your SSID and type the password, all the other options can be updated later. - Once finished, Volumio will apply the configuration and restart in normal mode.
You’ll switch back automatically to your usual Internet connection.
You can now access the web interface:
- Find your Raspberry Pi IP address (click on the link if you don’t know how).
Basically, you can scan the network or check your Wi-Fi access point.
If you have a monitor, the IP address is indicated just before the login prompt. - Enter this IP address in your browser: http://A.B.C.D
For example, http://192.168.1.17.
Make sure to use HTTP and not HTTPS, sometimes web browsers switch automatically to HTTPS. - If you use Ethernet, you’ll first get a welcome wizard to configure the main settings (same things as during the Wi-Fi configuration):
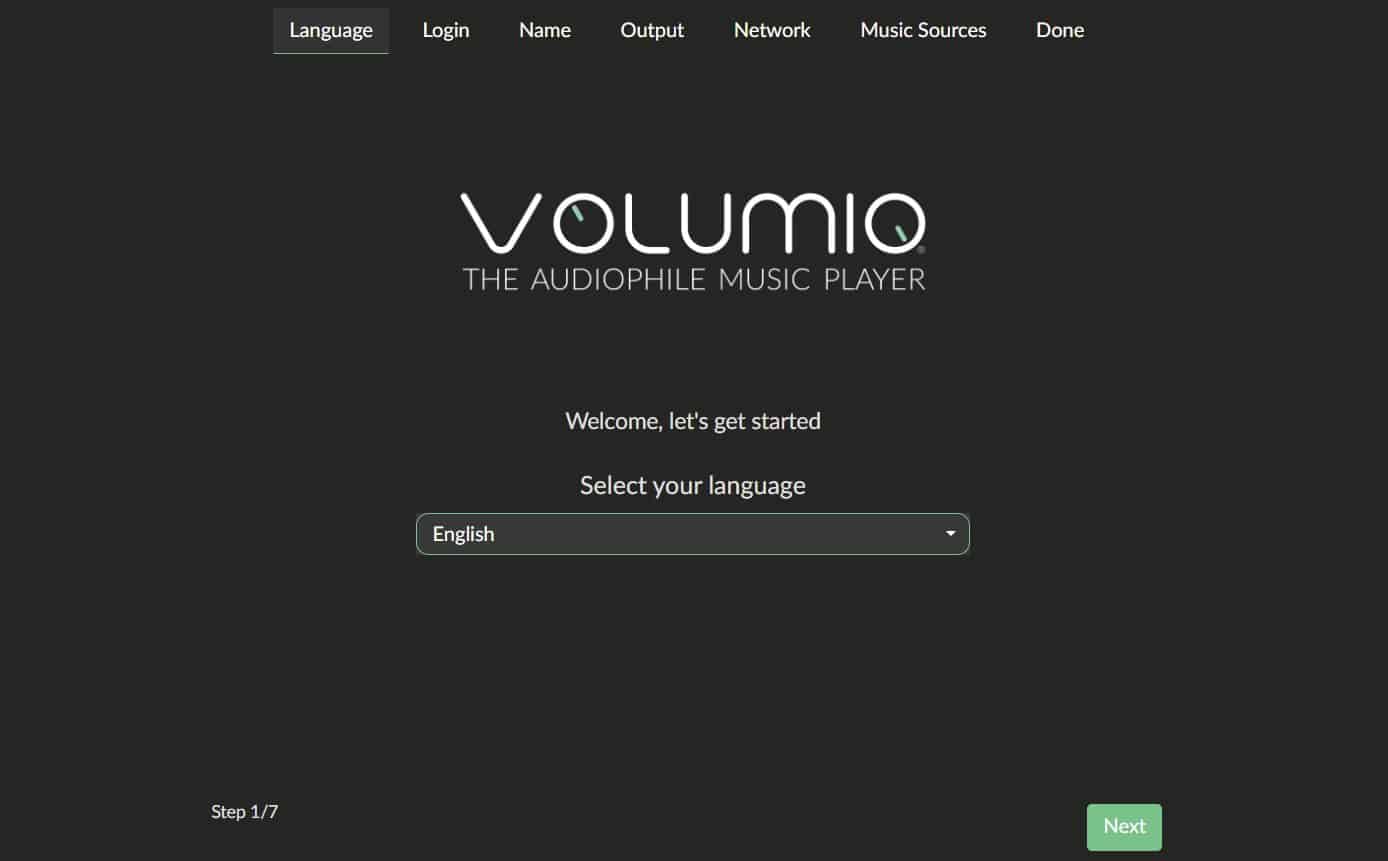
It will ask you several times to create an account, this is not mandatory to play local music, but you need one to install the Spotify plugin later on (a free account is fine).
So take a few minutes now to create the account, you’ll need it later. - Then you’ll get to the Volumio interface, something like:
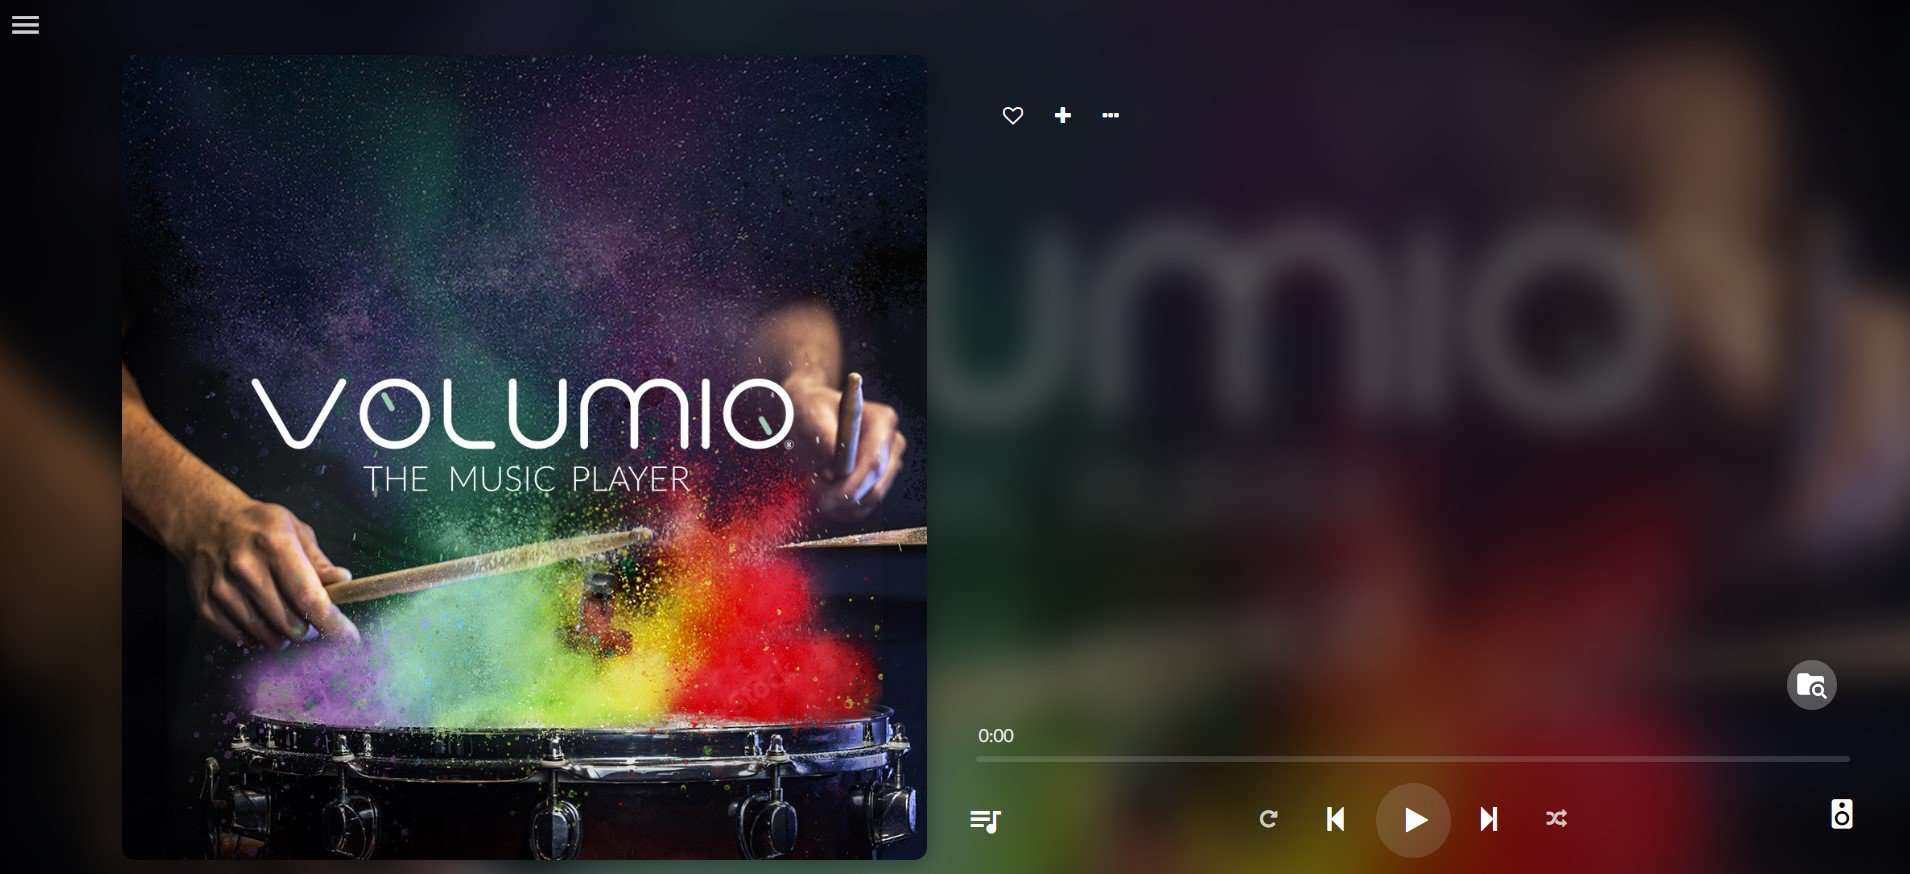
That’s it, you’re ready to move to the next step.
Remember that it’s also accessible from your smartphone if you’re on the same network.
Install & Play Spotify
The last step is to install Spotify.
- Open the menu on the left (the hamburger icon) and go to “Plugins”.
- Then find Spotify in the list and click on “Install”.

- A few seconds later, Spotify is installed.
Then you need to activate and configure the plugin.
It's a free PDF guide containing every Raspberry Pi Linux command you should know!
Download now
- Once the installation completed, a pop-up shows up, inviting you to enable it:
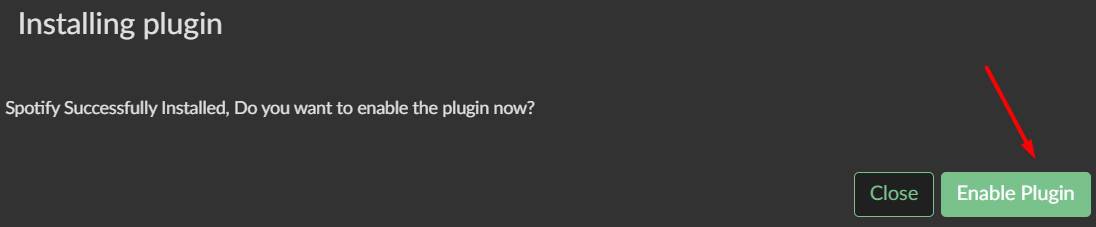
- Click on “Enable Plugin”
- Then go to “Installed Plugins” and click on “Settings” for the Spotify plugin.
- Enter your login and password for Spotify, and save the configuration.
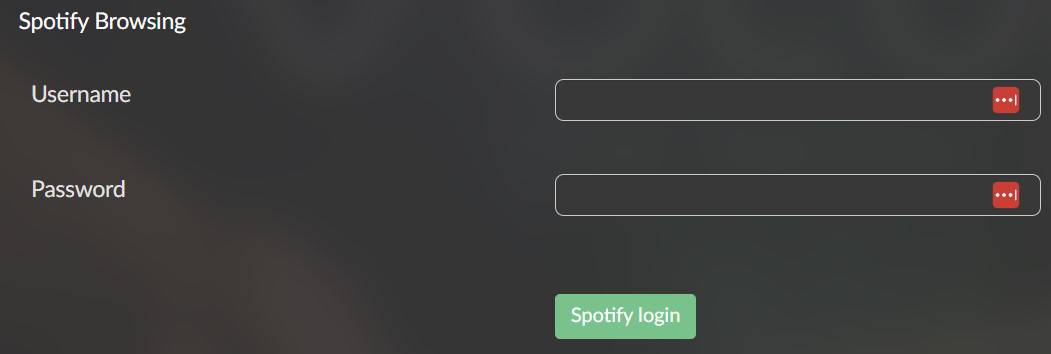
- Spotify is ready to use.
Finally, go back to the Volumio home page.
Click on the “Browse” icon and choose Spotify, or click on “Spotify” in the left menu.
From there, you can use the search engine to play any song available on Spotify:
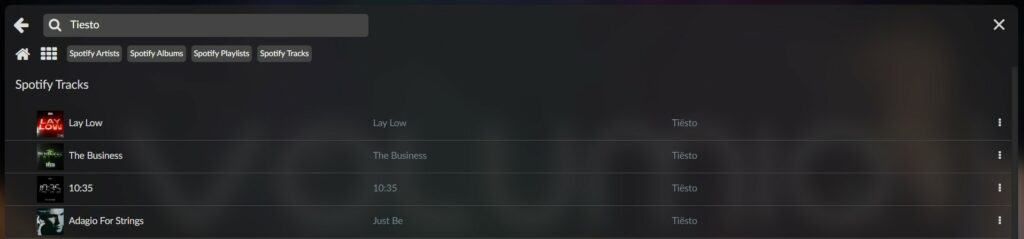
You can now use Spotify on your Raspberry Pi and control it from your computer or smartphone:

It’s working well, the installation is easy, and the interface is nice.
I think I’ll keep the SD card somewhere :).
Video
If you need a more step-by-step demonstration, I have recorded a video. You can watch it here if you want:
You can also subscribe to the RaspberryTips YouTube channel to receive new videos in your feed:
Play Spotify on Kodi
The second way to listen to Spotify on Raspberry Pi is to use Kodi.

Join Our Community!
Connect, learn, and grow with other Raspberry Pi enthusiasts. Support RaspberryTips and enjoy an ad-free reading experience. Get exclusive monthly video tutorials and many other benefits.
Learn moreWhat is Kodi?
I have already written a lot about Kodi on this website.
It’s a media center software that runs on top of other systems like OSMC or LibreElec.
In Kodi, you can play any media.
Today we’ll talk about Spotify, but you can also watch Netflix or YouTube on Kodi.
Install Kodi
I already wrote a guide on how to install Kodi on your Raspberry Pi, so I will not repeat it here.
Take a new SD card, flash OSMC for example, and get started with your new media center solution.
As soon as you finish the welcome wizard of OSMC, move to the next paragraph to install Spotify.
Install the Spotify app
Enable SSH
If not already done, you need to have SSH working to send the repository file to your Raspberry Pi.
- Go into “My OSMC” > Settings.
- Click on SSH Server (stopped) and Apply to start it.
- Then connect with an SCP client like FileZilla or WinSCP:
- Enter your IP address in the host field.
Click on this link if you don’t know how to find the Raspberry Pi IP address. - The default login is osmc.
- The default password is osmc.
- Enter your IP address in the host field.
- Once connected, create a new folder in the current directory.
For example “download”.
You’ll put all the files here later.
Download and install the Spotify repository
Spotify is not available by default on Kodi.
You need to add a new repository to do this:
- Download the repository zip file on this link: GitHub page.
In the Readme, there is an “Install with repository section”. Click on the link to get the zip file. - Upload this file to the download folder you just created (with Filezilla, WinSCP or another).
- Back to OSMC, go to the Add-on browser (in Settings depending on your interface).
- Choose “Install from zip file”.
- Then “Home Folder” and finally “download” (or the folder name you put the file into).
- Select the corresponding zip file and click on it.
The repository is now available to install new software packages on Kodi.
Install and configure Spotify
The last step is to install Spotify from this repository:
- In the Add-on browser, this time select “Install from repository”.
- Click on “Marcelveldt’s BETA repository”:
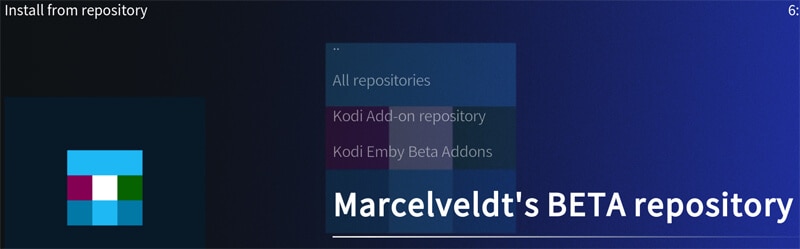
- Spotify is in the “Music Add-ons” category.
- Click on it, and then “Install”.
After a few seconds, Spotify is installed, but you still need to configure it.
In the same window, click on “Configure” and enter your Username and Password.
That’s it, Spotify is ready.
Listen to Spotify
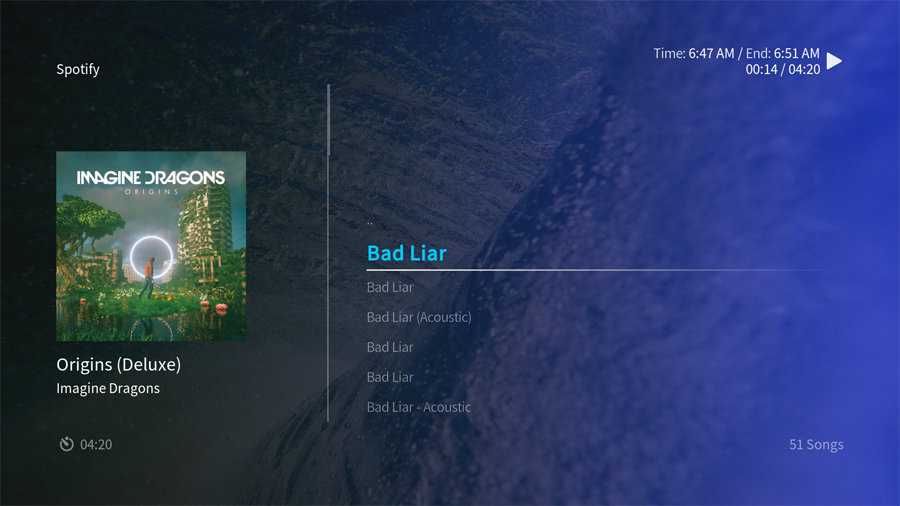
Finally, to play Spotify, choose “Music” from the Main Menu.
Then in Music Add-ons you’ll find Spotify and can do what you want in it.
If you like this solution and want to learn more about Kodi on OSMC, I have two blog posts about it, feel free to read them:
It's a free PDF guide containing every Raspberry Pi Linux command you should know!
Download now
If not, I have one final solution for you :).
Play Spotify with MusicBox
The last way I want to show you is to use a dedicated software: MusicBox.
What is MusicBox?
MusicBox is a suite of tools, build on Raspberry Pi OS, to create a music player for the main streaming services:
- Spotify
- SoundCloud
- Google Music
- Itunes Podcasts
- etc.
It’s available as an image you can flash on an SD card and use directly.
What I like about this solution is that you can control it via a web browser, so you can use your phone as a remote control.
Plug a speaker into your Raspberry Pi and you have an always-ready music player.
Warning
This project is no longer maintained, and the latest Raspberry Pi models are not supported (Raspberry Pi 4 and Pi Zero 2 for example). You can try it with older models if you really like this solution, but I recommend using Volumio or Kodi instead.
Here is a note from the developer itself:
There will be no more releases and probably no more support from myself. The Pi 4 and Zero W 2 do not work with the last release and I don’t know of any workarounds. Potential alternative software suggestions are available here. The software will continue to be available for now but note it is very outdated, doesn’t support the latest Pi hardware and is totally unsupported. I encourage people to find alternatives.
Pi Musicbox website
Thanks to everyone that has helped with Pi Musicbox.
In addition, this method is probably the most complicated, as you need to configure a few things manually (like using the Spotify API with keys), where Volumio do everything for you, with a simple login and password.
Install MusicBox
To install MusicBox on your Raspberry Pi, take a free SD card and follow this procedure:
- If needed, download and install Balena Etcher on your computer.
This is a free tool to flash operating systems on an SD card. - Download the latest MusicBox release from GitHub.
Take the first zip file in the links list. - Open Etcher, and flash the image on your SD card:
Select the MusicBox image by clicking on the left button.
And click on Flash! to start the SD card creation. - After a few minutes, the process will complete and you can eject the SD card.
Configure MusicBox
You can configure most of the settings from your web browser.
But if needed (for example if you want to use your Raspberry Pi with WiFi), you can do it in a configuration before starting MusicBox.
Configuration file
Before starting the Raspberry Pi with the fresh new SD card:
- Re-insert the fresh SD card into your computer.
- Find the SD card drive.
- Open the configuration file from the config folder: settings.ini
- At the beginning of the file, you’ll find the network settings.
If you need to connect to WiFi, fill in the file like this: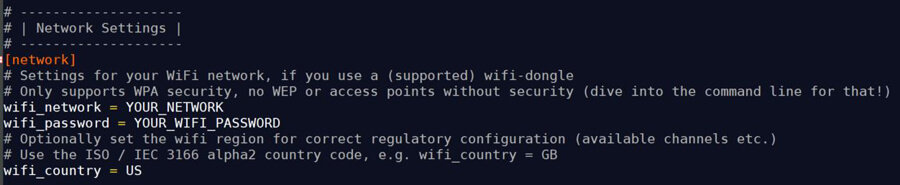
- Browse the file for other settings you want to change, for example:
- enable_ssh to enable SSH access on boot.
- Spotify parameters: if you want to insert your credentials and keys here (I’ll show you later how to get this).
- And all the other streaming providers that you can enable or disable from here.
Settings tab
If you don’t need Wi-Fi and prefer using the web interface to configure everything, it’s possible, just move on to the next paragraph.
Listen to Spotify
To turn MusicBox into a Spotify player, there are a few other things to do now.
First boot
Insert the SD card into your Raspberry Pi and start it.
It can take a few minutes on the first boot, be patient.
You can follow the next paragraph procedure while waiting for the Raspberry Pi to boot.
If needed the default login and password are:
- Login: root
- Password: musicbox
No need for a screen.
If you have a screen and want to use the jack as the audio output, unplug the HDMI cable to make sure MusicBox will use the jack as the main output.
In my case, I had no sound on the first boot with my screen plugged in.
After a reboot without HDMI, it was ok.
And you don’t need a screen.
Get your Spotify keys
To use Spotify with MusicBox, you need a premium account.
You also need two keys from this URL: https://www.mopidy.com/authenticate/#spotify.
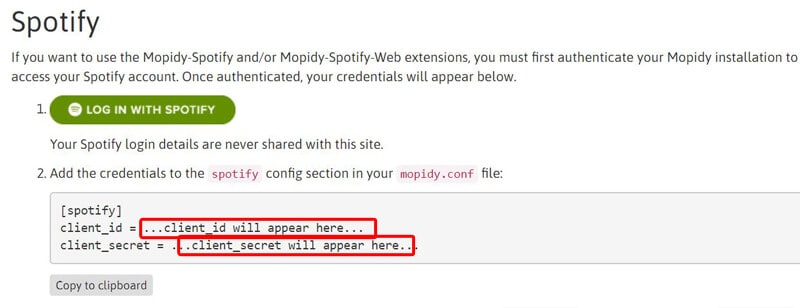
- Click on “Log in with Spotify”.
- The credentials appear in the config section below (where the red boxes are).
- Keep this page open, you’ll need this information later.
Access the web interface
To access the web interface, you need to know the IP Address of the Raspberry Pi.
If you don’t know how to do this, click on the link above to find out how step-by-step.
But you have several choices:
- Plug in a screen, log in and use the ifconfig command.
- Check your DHCP server for the new IP (in your Internet box probably).
- Make a scan of your network.
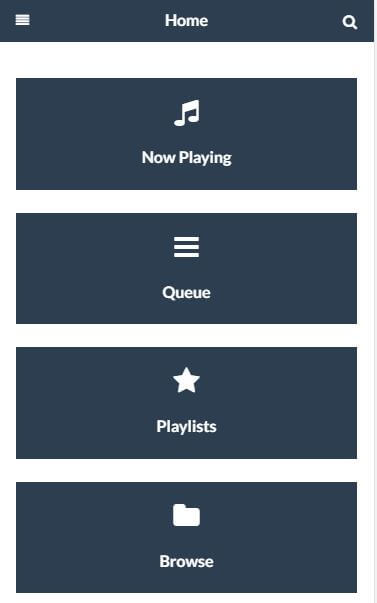
When you find it, open it in your browser: http://YOUR_IP.
You should see the web interface of MusicBox.
It works well on your phone if you prefer.
Before playing with this interface, we’ll move to the configuration part.
Configuration
If you haven’t configured MusicBox yet from the settings.ini file, you need to do this from the web interface:
- Click on Settings to access all the MusicBox options.
- Feel free to browse all the settings, but in this tutorial, I will stay focused on Spotify.
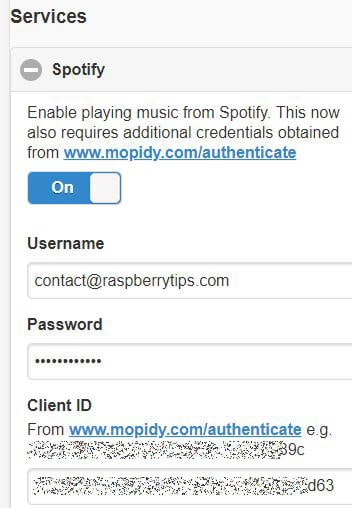
- Click on Spotify.
- Click Enable Spotify and fill in your Username and Password.
Then enter your Client ID and Client Secret you got in the previous step. - You should have something like this:
- Then save and reboot the Raspberry Pi.
It’s not mandatory to reboot, but for me, it didn’t work until the reboot.
Play Spotify
You are finally ready to play something from Spotify!
The Browse section didn’t work for me, but you can click on the Search tab from the Home page.
Then enter a song title or album and click play:
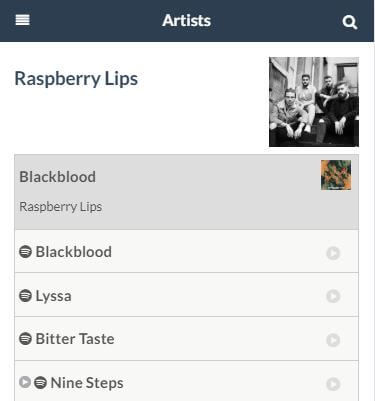
You can now listen to Spotify with your Raspberry Pi and control it from your phone.
It’s really nice to use.
Related Questions
Why Volumio says “Login failed” when connecting to Spotify?
A premium account is required to use the Spotify plugin on Volumio. If you have one, double-check your email address and password.
Is there a way to play Spotify on Raspberry Pi for free?
No, Spotify is a premium service, you need a paid account to use it. There is a free trial for 30 days if you want to try it, but that’s all.
Why didn’t you use the web player?
It was the easiest way a few years ago, but it doesn’t work anymore, even with a user-agent switcher. Spotify seems to limit the usage of some systems and highly encourages subscribers to use their app.
It's a free PDF guide containing every Raspberry Pi Linux command you should know!
Download now
Recommended hardware to get the most out of Spotify on Raspberry Pi
- A Bluetooth Speaker: I have this one for my computer and Raspberry Pi, and I’m a big fan of it. It’s waterproof and unbreakable, you can bring it everywhere (even in the shower or at the pool ^^) and the sound is excellent for the size.
- Raspberry Pi 3B+: You don’t need more, they are all light apps, so keep it simple and affordable. Pick a Raspberry Pi 3 and leave it plugged in 24/24.
- Flirc USB receiver: Allow you to use any universal remote with your Raspberry Pi. It should be more convenient than using your keyboard to zap :).
- Harmony remote: Replace all your remotes with one and it works great with the Flirc receiver. There is also a smartphone app that you will love.
It's a free PDF guide containing every Raspberry Pi Linux command you should know!
Download now
Reminder: Remember that all the members of my community get access to this website without ads, exclusive courses and much more. You can become part of this community for as little as $5 per month & get all the benefits immediately.
Conclusion
That’s it, you know 3 ways to install Spotify on your Raspberry Pi: Volumio, Kodi and MusicBox.
The final choice is up to you, but for me, I think Volumio is the best option if you only want to play music (with Spotify or another).
Let me know if you would like to get more details on Volumio or MusicBox, I can make a dedicated post with all the settings, tips, etc…
And, which solution will you use to listen to Spotify on your Raspberry Pi?
Whenever you’re ready, here are other ways I can help you:
The RaspberryTips Community: If you want to hang out with me and other Raspberry Pi fans, you can join the community. I share exclusive tutorials and behind-the-scenes content there. Premium members can also visit the website without ads.
Master your Raspberry Pi in 30 days: If you are looking for the best tips to become an expert on Raspberry Pi, this book is for you. Learn useful Linux skills and practice multiple projects with step-by-step guides.
The Raspberry Pi Bootcamp: Understand everything about the Raspberry Pi, stop searching for help all the time, and finally enjoy completing your projects.
Master Python on Raspberry Pi: Create, understand, and improve any Python script for your Raspberry Pi. Learn the essentials step-by-step without losing time understanding useless concepts.
You can also find all my recommendations for tools and hardware on this page.


In section “Play Spotify with Kodi” and in the last step of the section “Spotify is in the Music Add-ons category – Click on it and then Install” Kodi says:
Spotify – Installation failed
Versions:
Kodi 18.5 Git:leia_pi4_18.5-Leia
repository.marcelveldt-1.0.1
I had to update within the Spotify plugin to 1.0.2
Now it shows 1.1.58
Spotify now works on Kodi, but Spotify Connect is not complete.
Spotify Connect is necessary to control the device when it is setup as a blind music player (in my case). You can currently only start/stop or navigate previous/next song. It not possible to start another song or playlist. A workaround is to play on your local device (e.g. iPad), select the playlist you want, then connect to the Kodi device.
Will have a look at another way, like Volumio offers…
And a fourth !
https://dtcooper.github.io/raspotify/
Thanks!
Very useful post!!! I will have a try. Besides, you could also download Spotify music using Tunelf Spotify Music Converter then you can listen to Spotify music on Raspberry Pi.
Hi Bella,
Thanks for the tip!
Hey, I found another tool called AudKit Spotify Audio Converter. It looks similar to the one in you mentioned. Are they from the same company or something? Do you know which one is better?
Hi John,
Sorry, never tried it
Let me know if you test and recommend it
spotify on osmc freeze every time, then start play again minutes after, does not work well
any suggestions ?
thanks
Thanks for the sharing! But for me, to use Spotify on Raspberry Pi, I use the third-party tool DRmare Spotify Downloader to help me. After using it, I can get the Spotify music as local files and then I can move them to Raspberry Pi or other devices for using with ease.
Hi darry,
Thanks for your comment.
Probably not the most convenient, but could be a solution in some cases 🙂
Can we have a guide to install strawberry/clemantine on the RP4?
My attempts so far have not worked…
Hi Neil,
I never tried these but I will check that 🙂
It would have been nice to know you need a premium Spotify account up front before I wasted my time with all three of these options.
Hi Randy,
Just added the information at the beginning.
Thanks for your comment 🙂
You include touched some nice details here. In whatever way keep way up wrinting.
spotify no longer works with volumio
Thanks for your feedback, I will take a look at this.