How to View Raspberry Pi Screen on Your Laptop Easily
Just got your Raspberry Pi board but no additional accessories? Or maybe you don’t have your usual setup on hand? I feel you, I’ve been there. In this article, I’ll give you 2 easy ways to use your laptop as the Raspberry Pi display.
While it’s possible to connect the Raspberry Pi to the laptop monitor using HDMI, the easiest solution if the two devices are on the same network is to use a free remote access software like VNC, requiring no additional hardware.
I’ll expand a bit on this short answer first, and then give you the step-by-step instructions in both cases.
If you need help getting started on Raspberry Pi, I have an entire course to guide you through your first steps. I’ll help you use the perfect hardware, plug everything in and install your first system. You’ll also do your first projects with me, just to make sure you are ready for the next level. Get all the information on this page if you are interested.
Can I connect Raspberry Pi to my laptop monitor?
There are two ways to use a laptop as a Raspberry Pi monitor:
- Install software on both devices to take control of the Raspberry Pi from a computer on the same network.
- Use hardware to really connect the Raspberry Pi to the laptop.
Option 1 is the simplest and cheapest, so it’s the one I’d recommend in most cases and I’ll start with this in the tutorial. As long as a system is installed on the Raspberry Pi, you can do it quickly and easily. It’s free and doesn’t require any additional accessories.
The downsides are that it doesn’t work before the system boot or installation. But as you can do headless installation of a Raspberry Pi (without a monitor), it’s generally not a big deal. Also, it might not work on some exotic systems where you can’t install any remote access software for Raspberry Pi.
Option 2 can be useful in some situations, but for most users it won’t be worth the time and cost. For example, I use it to record videos or take screenshots during the boot or installation process.
In short, I recommend reading this tutorial in the same order I wrote it. Try the next section first (option 1), and check the following one if it doesn’t work for you (option 2).
It's a free PDF guide containing every Raspberry Pi Linux command you should know!
Download now
How to use your laptop monitor for the Raspberry Pi (without additional hardware)
The Raspberry Pi ecosystem is built with makers in mind, the system developers know we’ll use it embedded without necessarily all the traditional accessories we have on a PC. So, there are many solutions to control the Raspberry Pi remotely without a dedicated monitor (and so using the PC monitor instead).
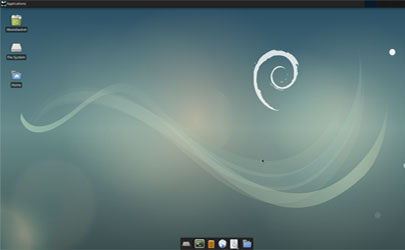
The only requirement for this solution to work right away is to use Raspberry Pi OS and have both devices on the same network.
Here are the main steps to use your laptop monitor for the Raspberry Pi :
If you are lost in all these new words and abbreviations, request my free Raspberry Pi glossary here (PDF format)!
Download now
- Do a headless installation of the Raspberry Pi.
- Plug & boot the Raspberry Pi.
- Find the Pi IP address.
- Use a remote access tool to view the Raspberry Pi screen on your PC.
Headless setup
If it’s the first time you see this term, you might wonder what I’m talking about. The idea is simple: to pre-configure the system to boot right away after the installation with the network already connected and a remote access tool enabled.
A few years ago, this was still some kind of ninja technique with configuration files to edit manually on the SD card before the first boot.
But now Raspberry Pi Imager has streamlined the process and it’s easier than ever to do it.
In short, you’ll use Raspberry Pi Imager to install the operating system, as you may already be familiar with:
- Get Raspberry Pi Imager here if you don’t have it.
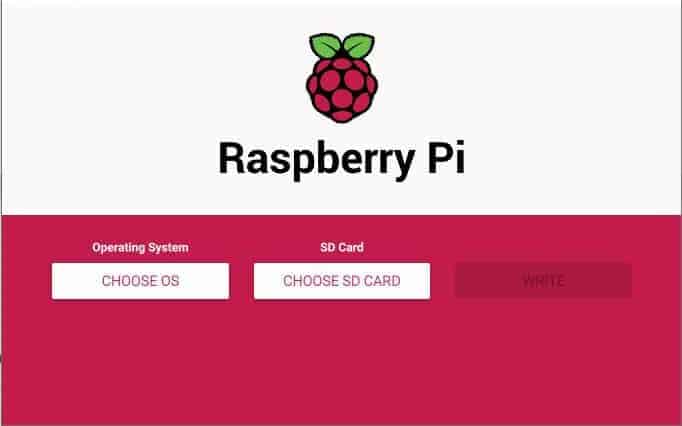
- Click on “Choose OS” and pick the version of Raspberry Pi OS you want to install.
- Click on “Choose Storage” and select your media for the system installation.
- But pause here.
Instead of clicking “Write” immediately to start the installation, you need to use the advanced options to skip the first boot wizard:

Join Our Community!
Connect, learn, and grow with other Raspberry Pi enthusiasts. Support RaspberryTips and enjoy an ad-free reading experience. Get exclusive monthly video tutorials and many other benefits.
Learn more- Open the advanced options.
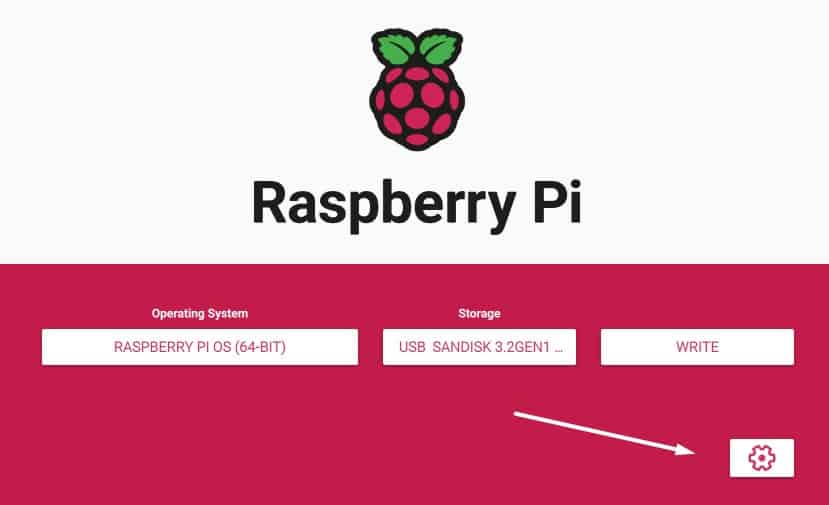
- Click on “Enable SSH” and fill in the username and password.
- If you don’t have a wired network on hand, also make sure to fill in the information about your wireless connection (Wi-Fi SSID, password and country).
If you’re not familiar with this tool, I have a full guide about Raspberry Pi Imager here. That’s not the point of this article.
But you need to have the system already installed with at least the network configured and SSH enabled if you want to use your laptop monitor for the Raspberry Pi.
What if the system is already installed on the Raspberry Pi?
If you just need to enable SSH on an existing system, but don’t have a monitor to do it, you can create a blank file named “ssh” on the SD card. Insert the SD card into your computer and do it. On the next boot, SSH will be enabled.
If the setup is incomplete or the network is not configured, it’s probably easier to restart from scratch. You may try to use a TV or visit a friend with a keyboard and monitor to complete the installation, but it’s likely faster to restart the installation.
Plug & boot the Raspberry Pi
The installation with the pre-configuration done was the tricky part, now it’s business as usual.
Insert your new SD card into the Raspberry Pi and plug in the power cord.
Wait a few minutes to make sure it has started completely. Without a monitor, you can be certain it’s done, but the first boot generally takes 2 to 5 minutes on most models. It usually reboots a few times, especially for a headless setup.
Get the IP address
Now we’ll use the network to get access to the Raspberry Pi remotely. But to do this, we need to have its IP address.
Depending on your network architecture, there might be a couple of ways to do this, but I recommend doing a network scan for this. It’s often the fastest option.
On Windows, I use a tool named Advanced IP Scanner for this. On Linux, you can use the nmap command to get a similar result.
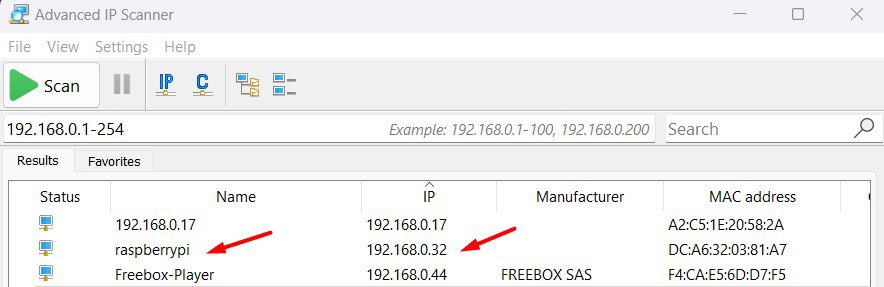
I have a dedicated article here on how to find the Raspberry Pi IP address, so I’ll let you check it out if you need more guidance. The first options with commands and GUI won’t work as you don’t have a monitor, but you can check the other ones (network scan and router interface).
If you are lost in all these new words and abbreviations, request my free Raspberry Pi glossary here (PDF format)!
Download now
Note: If you set a hostname in the advanced options, or only have one Raspberry Pi on the network, you can generally use the hostname in the next steps instead of the IP address. The default hostname is “raspberrypi”.
Enable VNC on the Raspberry Pi
VNC stands for “Virtual Network Computing” and is a free remote access tool allowing you to get access to the full interface of the Raspberry Pi remotely. It’s installed by default on Raspberry Pi OS. You just need to enable it.
Here is how to enable VNC on a headless Raspberry Pi setup:
- Use your favorite SSH client, and access the Raspberry Pi by using its IP address or hostname.
On most operating systems, you can also use the command line (yes, even on Windows):ssh <USER>@<IP>The user will be the one you set in the advanced options with Raspberry Pi Imager. - Once connected, start the Raspberry Pi configuration tool with:
sudo raspi-config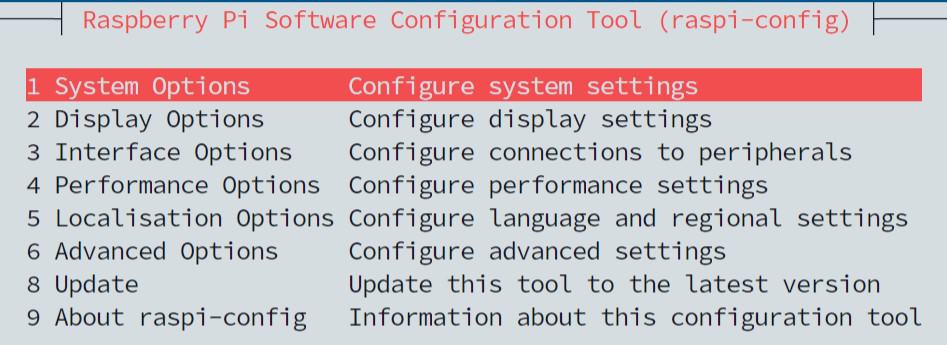
- Use the keyboard arrows to select “Interface Options”, then “VNC”.
- Choose to enable it and exit the configuration tool.
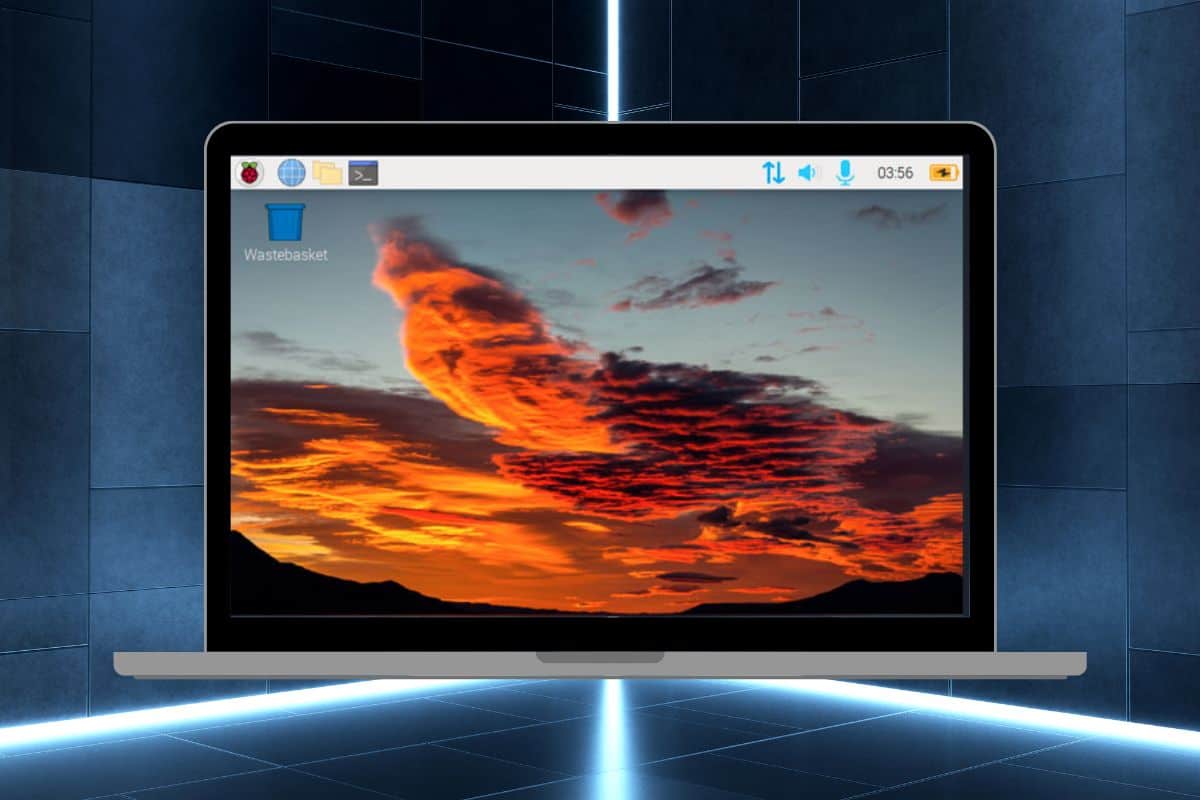
It just took a few seconds, and you now have VNC enabled, which will allow you full access to the Raspberry Pi OS interface. Let’s see how to use this service now.
Note: If you are new to this SSH thing and need a more step-by-step guide on how to use SSH on Raspberry Pi, click on this link to read my dedicated tutorial.
Are you a bit lost in the Linux command line? Check this article first for the most important commands to remember and a free downloadable cheat sheet so you can have the commands at your fingertips.
Install VNC on the computer
The last step before the connection is to install VNC on your computer.
If you’re using the latest version of Raspberry Pi OS (Bookworm), not all clients are supported currently. I recommend using TigerVNC, available here.
For older releases, VNC Viewer is a better client overall. Even if it’s a bit hidden on the official website, VNC Viewer is free and can be installed on any operating system. Here is the direct link to the download page. You can even use it to connect from another Raspberry Pi.
I have a full tutorial on how to install and use VNC too, so I’ll remain brief here. Just install it and check the next step for the connection.
Connect via VNC
We now have everything we need:
- IP Address of the Raspberry Pi.
- VNC enabled on the Raspberry Pi.
- VNC installed on the computer.
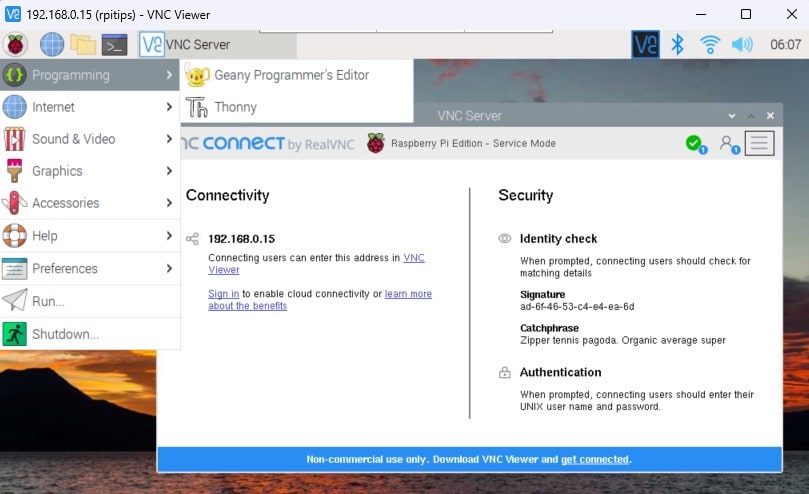
Still from the computer, open your VNC client from your main menu.
Once the license is accepted and the introductory messages are skipped, you’ll get an interface where you can connect to a VNC server.
Type the Raspberry Pi IP address and press Enter to start the connection.
It will prompt you to enter the user and password (the ones set in Raspberry Pi Imager) and you’ll get access to the full interface:
That’s it, you can now use your laptop monitor as the main screen for the Raspberry Pi even if there is no cable connected between them :-).
Note: Other tools are available (link) but VNC is the easiest way to get started on Raspberry Pi OS. You may want to try other options if you’re not using Raspberry Pi OS or want to access the Pi from a different network.
It's a free PDF guide containing every Raspberry Pi Linux command you should know!
Download now
Reminder: Remember that all the members of my community get access to this website without ads, exclusive courses and much more. You can become part of this community for as little as $5 per month & get all the benefits immediately.
How to connect the Raspberry Pi to the laptop monitor (via HDMI)
Another option to use a PC monitor for the Raspberry Pi is to plug a video capture device into the Raspberry Pi and the computer. It won’t use the network and will exactly capture the Raspberry Pi screen at anytime (even before the system boots).
That’s generally what I do when I record videos or take pictures when VNC is not available (for example, for my network boot tutorial).
Prerequisites
The issue with this solution is that you need to invest a bit of money on new hardware dedicated to this, which can be more expensive than a traditional monitor. But here is what I use:
- A video capture device: I use the Elgato HD60S (link to Amazon) and overall I’m happy with it. It’s simple to plug in (USB + 2x HDMI ports) and works well with Windows and most software products I tested.
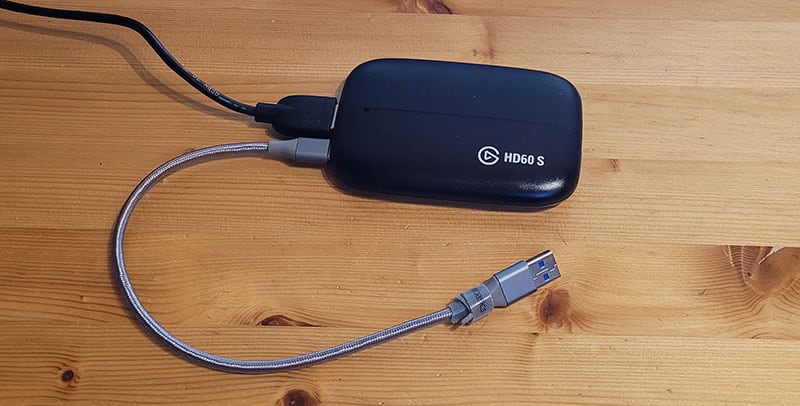
It might be a bit overkill if it’s just for personal use, so an alternative that has good reviews is the Elgato Cam Link. - A micro HDMI to HDMI cable: to plug the Raspberry Pi into the capture device. It’s for a Pi 4 or 400, so make sure to get the right cable if you have another model. Don’t use adapters.
- OBS Studio or alternative: OBS Studio is a free recording and streaming application and works better than the software included with the Elgato devices in my experience. You’ll need one for sure, so pick the one you like, it doesn’t really matter.
- A keyboard/mouse: With this solution, you can’t use the laptop keyboard or mouse to interact with the Pi, so you’ll need one plugged into the Raspberry Pi directly. You can check my reviews here (I tested a bunch of them.)
Once you’ve everything listed here, we can move on with the setup.
Note: At first, I tested a few unbranded capture devices that were cheap but didn’t work nearly as well as the Elgato product. Unless you only need it for a very short time, the extra cost is clearly worth it.
Setting everything up
Here are the steps to use the laptop monitor for the Raspberry Pi when you have a video capture device and the software that goes with it:
- Plug the capture device into the computer.
Mine is plugged in via a tiny USB cable, nothing complicated.
Your system should install the drivers automatically, check the manufacturer’s instructions if needed. - Use the cable to plug the Raspberry Pi display port (micro HDMI or HDMI) into the capture device.
The device I recommend has two HDMI ports, make sure to plug it into the “Input port” if you have the same one. - Start OBS Studio or the application of your choice.
- Configure it to view the capture device on your screen.
In OBS, you need to create a new source (Video capture device) and select your USB device: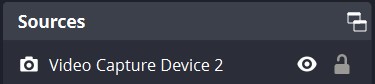
It will be slightly different with each application but the manufacturer app will probably detect it automatically.
Once done, you’ll see the Raspberry Pi interface in the preview window of OBS Studio and can use the mouse and keyboard connected to the Raspberry Pi to interact with it.
I’d recommend switching to the previous solution (with VNC) as soon as possible. But it’s an excellent solution for troubleshooting a Raspberry Pi to which you’ve lost access, or for performing a few manipulations directly on it.
Whenever you’re ready, here are other ways I can help you:
The RaspberryTips Community: If you want to hang out with me and other Raspberry Pi fans, you can join the community. I share exclusive tutorials and behind-the-scenes content there. Premium members can also visit the website without ads.
Master your Raspberry Pi in 30 days: If you are looking for the best tips to become an expert on Raspberry Pi, this book is for you. Learn useful Linux skills and practice multiple projects with step-by-step guides.
The Raspberry Pi Bootcamp: Understand everything about the Raspberry Pi, stop searching for help all the time, and finally enjoy completing your projects.
Master Python on Raspberry Pi: Create, understand, and improve any Python script for your Raspberry Pi. Learn the essentials step-by-step without losing time understanding useless concepts.
You can also find all my recommendations for tools and hardware on this page.