Turn Your Raspberry Pi into an Access Point (Bookworm ready)
Most Raspberry Pi models have one Ethernet port and one Wi-Fi adapter, making them the perfect device to become a Wi-Fi access point. Whether you do this because you don’t have any Wi-Fi network yet to create a separate network on your LAN or for other reasons, I’ll show you the steps to get you there.
Once the Raspberry Pi is connected to the local network with an Ethernet cable, the Wi-Fi adapter can be used to create an access point for other wireless devices. Network manager can do it natively on Bookworm and Hostapd can be used on older versions.
There are a few requirements before getting started and a few things to understand about the network setup, so I’ll start with this, and then I’ll give you all the steps to get your access point working quickly.
If you’re looking to quickly progress on Raspberry Pi, you can check out my e-book here. It’s a 30-day challenge where you learn one new thing every day until you become a Raspberry Pi expert. The first third of the book teaches you the basics, but the following chapters include projects you can try on your own.
Getting Started: Network Theory and Requirements
Before jumping to the practical steps, I need to make sure you’re up to speed with some network keywords and abbreviations. If you are used to this kind of project it’s not that complicated, but just in case, let’s define a few things first.
Network theory
A typical network at home looks like this:
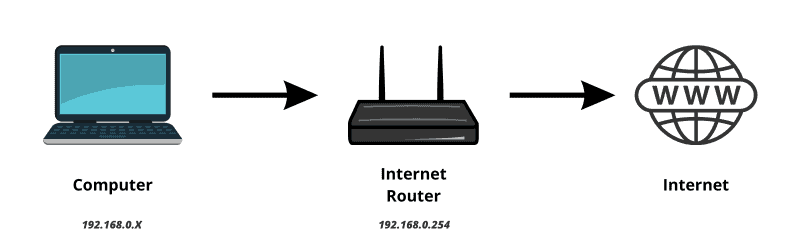
The IP addresses mentioned here are the ones on my network, so it’s just an example, but the main elements on most networks are the same.
A router is configured by your Internet service provider. It’s the connection point to the Internet that will generally deliver IP addresses to the other devices on the network (DHCP service), and play the role of DNS server (to translate a domain name like “raspberrytips.com” to an IP address).
Most Internet routers now provide these services for wireless (Wi-Fi) and wired devices (Ethernet). Maybe it’s not the case with yours, or maybe you don’t want to use these services for wireless devices and you want to create your own configuration and security.
Anyway, the goal here is to insert a Raspberry Pi in the middle, to get something like this instead:
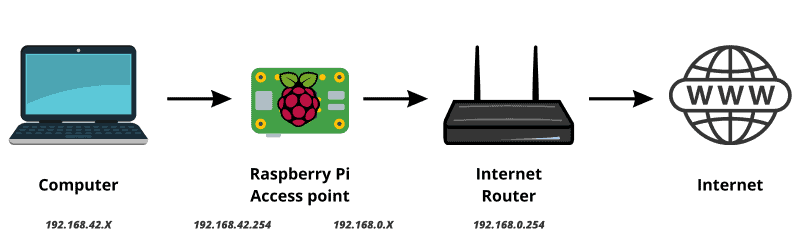
The Raspberry Pi will be connected directly to the Internet router (using an RJ45 cable on a free Ethernet port), and its Wi-Fi interface will provide a new wireless network (SSID) available for other devices to connect to (like the laptop in my schema).
Wireless devices connecting to the Raspberry Pi access point will get different IP addresses (a different subnetwork), and the security level for this network and the routing between the two subnetworks can be as low or as strict as you want.
Prerequisites
Here are the prerequisites to build this on your home network:
- Raspberry Pi model: Just make sure it has a Wi-Fi and Ethernet network adapter, so avoid Raspberry Pi Zero (1 or 2) and old models, but a Raspberry 3, 4 or 400 should be OK.
We won’t use much of the CPU or memory, so we really don’t need anything fancy. - Raspberry Pi OS: I recommend Raspberry Pi OS, so you can follow my instructions and won’t have any compatibility issues while following them, but any version is fine (Lite is enough, we don’t need a GUI).
Most Linux distributions should work, so if you already have something else installed, feel free to give it a try. - Network configuration: Once the system is installed, make sure to only configure the Ethernet interface, don’t use the Wi-Fi for Internet access, you must be connected to the Internet with an RJ45 cable.
- Then, as always, do the system updates with:
sudo apt update
sudo apt upgrade -y
By following these simple prerequisites, you should be ready to go.
If you need more guidance for the system installation and configuration (especially on a Lite edition of Raspberry Pi OS), you can read this article with all the details: Install Raspberry Pi OS on Raspberry Pi (Illustrated guide).
It's a free PDF guide containing every Raspberry Pi Linux command you should know!
Download now
I also recommend setting up SSH on your Pi so you can follow the instructions from your computer, then copy/paste the commands and configuration lines via your SSH client instead of typing them on the Pi directly.
Related tutorial: Get Started with Raspberry Pi 400: A Beginner’s Guide
Enable the Wi-Fi interface
If you are using a fresh new Raspberry Pi OS, you might need to set a Wi-Fi country first.
The Wi-Fi is disabled until that’s done.
When you access Raspberry Pi OS via SSH after the first boot, you’ll likely get a warning message like this:

Let’s fix it before going any further:
- Open raspi-config with this command:
sudo raspi-config - Go to “Localisation Options” > “WLAN country”:
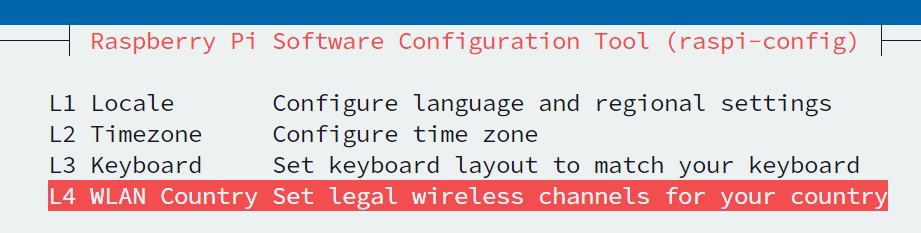
- Select your country from the list.
- Confirm and exit.
From there on, the Wi-Fi interface will be enabled, and we can now use it for our access point.
Are you a bit lost in the Linux command line? Check this article first for the most important commands to remember and a free downloadable cheat sheet so you can have the commands at your fingertips.

Join Our Community!
Connect, learn, and grow with other Raspberry Pi enthusiasts. Support RaspberryTips and enjoy an ad-free reading experience. Get exclusive monthly video tutorials and many other benefits.
Learn moreNetwork Manager or old school?
If you are using Raspberry Pi Bookworm (2023) or any other recent distribution using NetworkManager, the steps to enable an access point are quite different.
So I wrote two entirely different sections, for each case. Make sure to only read the one that applies to you and your system. Here is the table of contents to quickly access it:
If you are not sure which version is installed, you can follow this tutorial that explains how to identify your current OS.
It's a free PDF guide containing every Raspberry Pi Linux command you should know!
Download now
Setting up an access point on Raspberry Pi OS Bookworm
The latest version of Raspberry Pi OS is now using Network Manager, so you no longer need dnsmasq, hostapd and other services that were used before to create an access point.
The process to enable an access point with Network Manager is more straightforward, but requires a few command lines you can’t really guess without this tutorial.
Here are the main steps you need to follow:
- Start by enabling the Wi-Fi interface in Network Manager with:
sudo nmcli con add con-name hotspot ifname wlan0 type wifi ssid "RaspberryTips-Wifi"
You can replace the last parameter with your own SSID of choice, that will be the access point Wi-Fi name.
You can also replace “hotspot” with anything else, it’s the configuration name. Just make sure to also change it in the next commands. - We’ll then set the access point security and password, for example:
sudo nmcli con modify hotspot wifi-sec.key-mgmt wpa-psk
sudo nmcli con modify hotspot wifi-sec.psk "raspberry"
The last parameter is your Wi-Fi password, make sure to use something more complicated :-). - And finally, configure Network Manager to run in access point mode, with shared IP addresses on this interface:
sudo nmcli con modify hotspot 802-11-wireless.mode ap 802-11-wireless.band bg ipv4.method shared
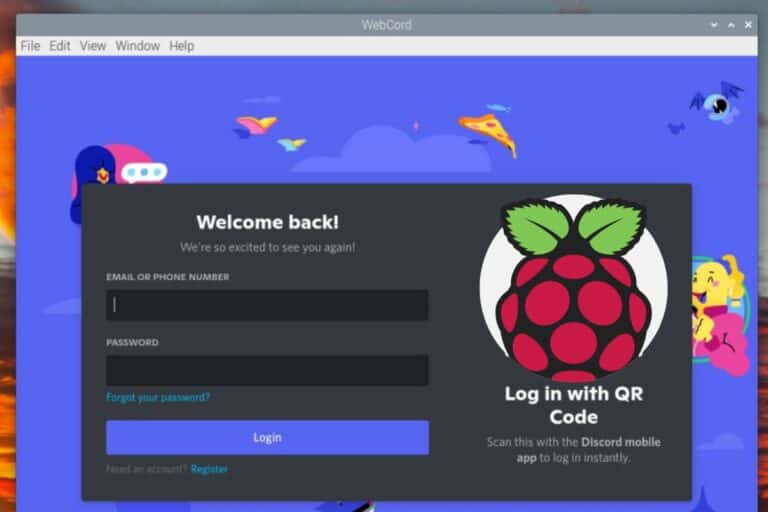
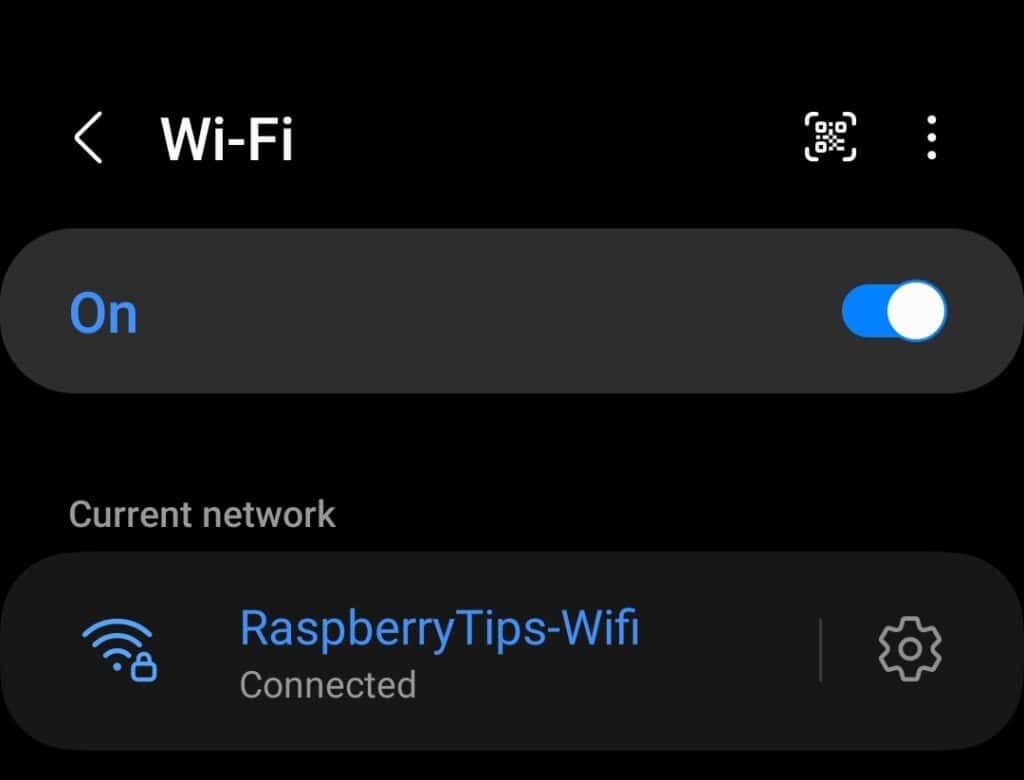
If everything goes as expected, your access point should be up and visible a few seconds later. You can try to connect to it from another computer or your phone:
It took me some time to find the right command sequence to configure it, but once you have them, it’s really simple. For a typical home usage, there is nothing else to do.
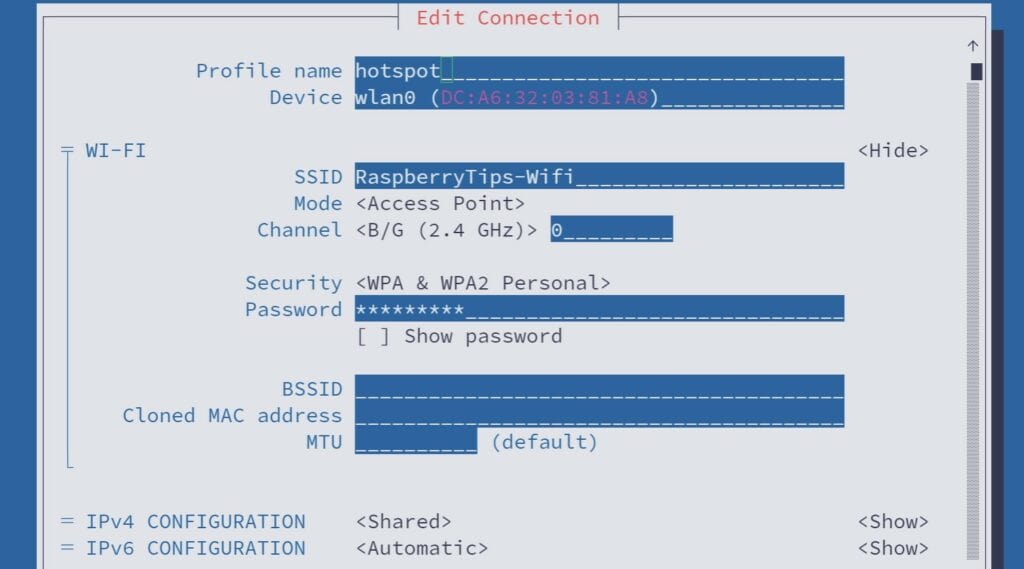
Once the access point setup, you can also use “nmtui” to edit your settings, like upgrading the security, for example. Here is the command to open this tool:sudo nmtui
In there, you can see and edit your configuration easily, without having to find all the commands parameters:
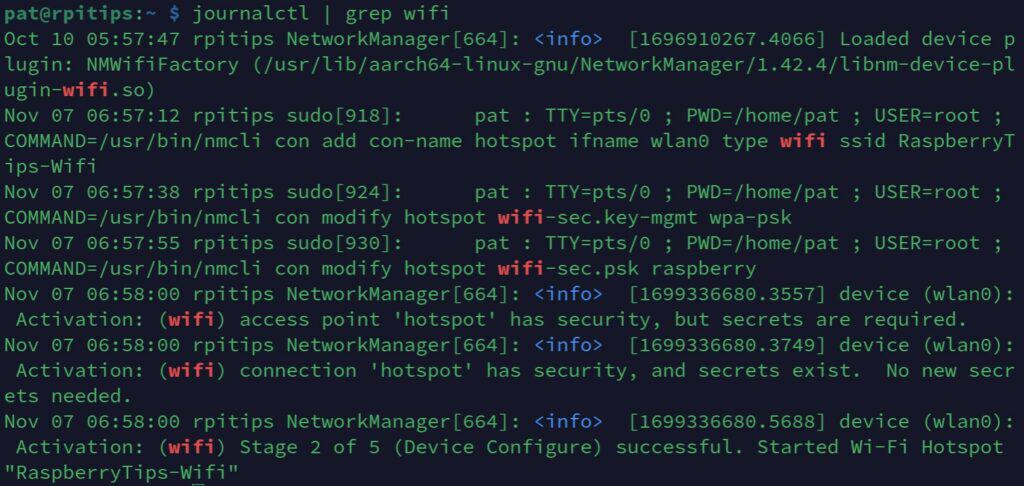
If you experience any issue, check the logs with:journalctlYou can use grep to filter the output:journalctl | grep hotspot
journalctl | grep wifi
etc.
It's a free PDF guide containing every Raspberry Pi Linux command you should know!
Download now
If you are looking for exclusive tutorials, I post a new course each month, available for premium members only. Join the community to get access to all of them right now!
Setting up an access point on Raspberry Pi OS Bullseye and older
Now, if you’re still using Raspberry Pi OS Bullseye or a system that doesn’t come with Network Manager, the process of setting up an access point is a bit more tedious. But we’ll get there, don’t worry, just follow these steps at your own pace.
Install the services to create a hotspot
We’ll mainly use two new services on our router:
- Hostapd: to create the wireless access point (SSID, Wi-Fi password, …).
- DNSmasq: to forward the DNS requests to another DNS server.
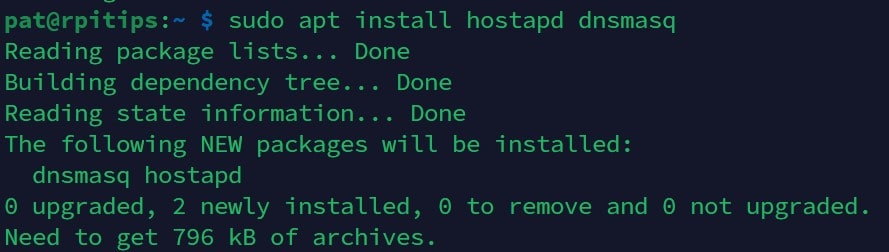
Start by installing the required packages:sudo apt install hostapd dnsmasq
It's a free PDF guide containing every Raspberry Pi Linux command you should know!
Download now
That’s it, we can now move to the configuration part.
Configure Hostapd
You’ll now create a configuration file for hostapd with the settings for your new wireless network:
- Create the configuration file with Nano:
sudo nano /etc/hostapd/hostapd.conf
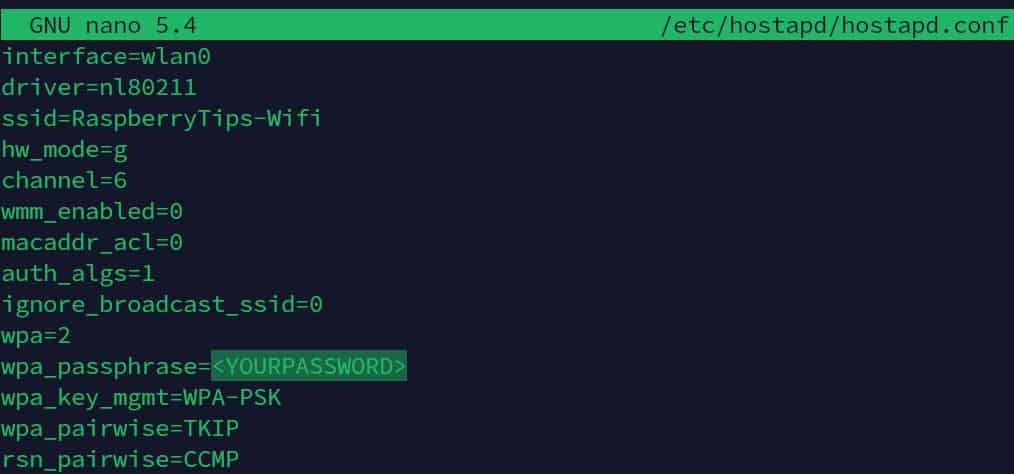
No idea what Nano is, or need a refresher on how to use it? Check this article. - The file probably doesn’t exist, so you can directly copy and paste these lines into it:
interface=wlan0
driver=nl80211
ssid=RaspberryTips-Wifi
hw_mode=g
channel=6
wmm_enabled=0
macaddr_acl=0
auth_algs=1
ignore_broadcast_ssid=0
wpa=2
wpa_passphrase=<YOURPASSWORD>
wpa_key_mgmt=WPA-PSK
wpa_pairwise=TKIP
rsn_pairwise=CCMP
Consider this as a template you can copy/paste to get started. From there, change at least the line with the passphrase and anything else to fit your needs (for example to use another channel, security level, or SSID).
The options are pretty self-explanatory, but you can check this default file for more details, especially if you need to set up something specific or more secure. - Save & exit (CTRL+O, CTRL+X)
Hostapd won’t start automatically on boot (which is required for your access point to work 24/7). Here is how to fix this:
- Edit the default service configuration file:
sudo nano /etc/default/hostapd - Add this line at the end to tell it where to find your configuration file:
DAEMON_CONF="/etc/hostapd/hostapd.conf" - Save & Exit
- Then enable the service with:
sudo systemctl unmask hostapd
sudo systemctl enable hostapd
We won’t start it yet, as we still need to configure the DHCP and DNS server.
Note: for test purposes, you can create several configuration files under /etc/hostapd if needed, and only change this line in /etc/default/hostapd to tell the service which configuration to load next time.
Configure DNSMasq
DNSMasq is a DNS forwarder that we’ll use for our new network. Instead of installing a full DNS server, we’ll just redirect everything to the current DNS server on the Ethernet network (most likely your Internet router).
If you want to set up a full DNS server on your Raspberry Pi, you can check this related article, but we’ll keep things simple for now.
Here is how to configure DNSmasq:
- Open the configuration file:
sudo nano /etc/dnsmasq.conf - Paste these lines at the end (CTRL+END will bring you there, it’s a very long file):
interface=wlan0
bind-dynamic
domain-needed
bogus-priv
dhcp-range=192.168.42.100,192.168.42.200,255.255.255.0,12h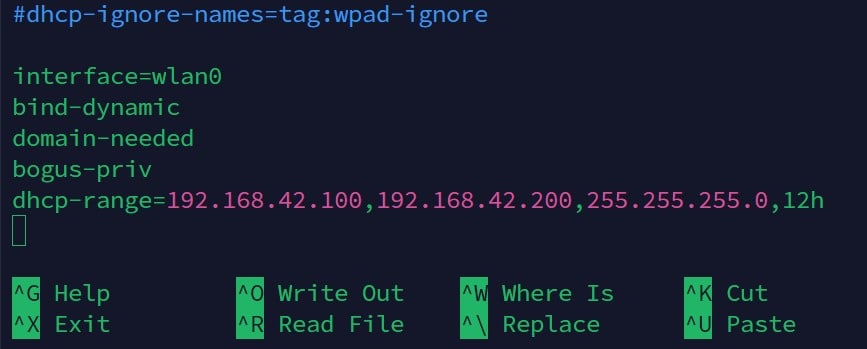
Nothing to change here except if you plan to use a different subnet.
Mine will be 192.168.42.X, with 192.168.42.254 for the Raspberry Pi, and a DHCP delivering IP between 42.100 and 42.200. Adjust this to suit your goals if needed. - Save & exit (CTRL+O, CTRL+X)
Refer to the comments in the file itself to better understand what each option means, or to add other options if needed for your network setup (use CTRL+W to find any word in the file).
Configure the DHCP server
The last configuration file to change is the DHCP server. Set it on the same subnet:
- Open the configuration file:
sudo nano /etc/dhcpcd.conf - Scroll to the end of the file and paste these lines:
nohook wpa_supplicant
interface wlan0
static ip_address=192.168.42.10/24
static routers=192.168.42.1
- Save & exit
We are almost ready for the first test.
Enable IP forwarding
If you have several network cards, the default behavior on Linux is to isolate them.
In our setup, it means that networks from the wireless and wired interfaces don’t communicate with each other. This means a device connected to the Wi-Fi hotspot can’t reach the Internet router and even less access Internet.
I guess that for most of you, communication between the LAN and the Wi-Fi needs to be enabled.
Here is how to allow this:
- Open this file:
sudo nano /etc/sysctl.conf - Find this line (first page):
#net.ipv4.ip_forward=1 - And uncomment it, by removing the “#” symbol at the beginning of the line:
net.ipv4.ip_forward=1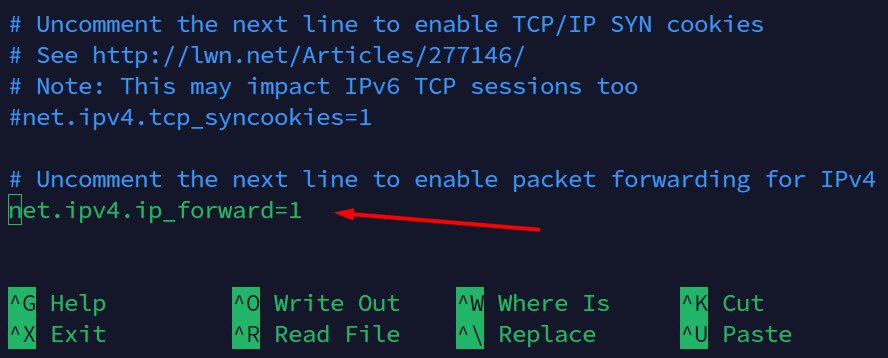
- Save & exit
You can now reboot for a first try:sudo reboot
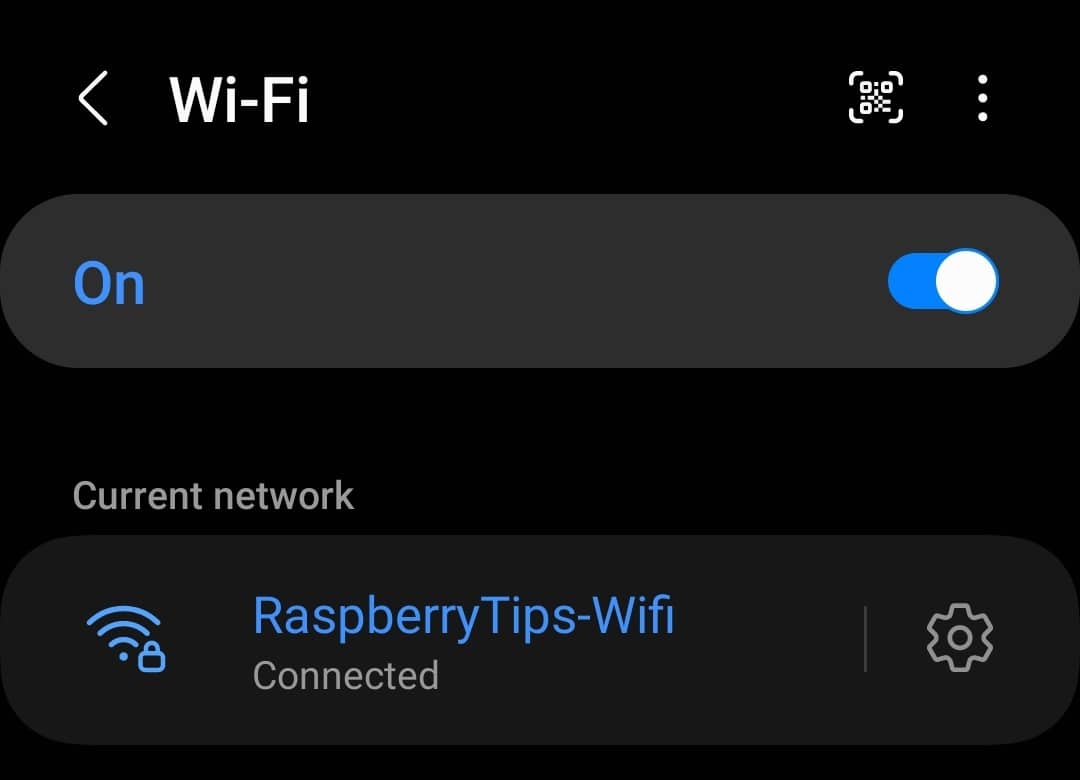
Once this is complete, you should be able to see your Raspberry Pi access point in the networks list. You can test with any smartphone or computer.
In your Wi-Fi networks list, you should see something like this (the SSID I chose in my hostapd.conf file):
You can connect to it and check that everything is working as expected.
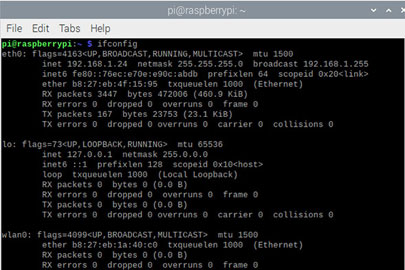
If you kept the same network configuration as me, you should get an IP on the 192.168.42.0/24 subnet.
You won’t get any Internet connection for now as we need to configure the firewall to allow Internet traffic.
Troubleshooting issues
If it doesn’t work, check the hostapd status with:sudo systemctl status hostapdOr the syslog file for more details, for example:tail -n100 /var/log/syslog
more /var/log/syslog | grep hostapd
For example, if the passphrase is too short, you’ll see an error like this:

Adjust the settings according to the error message and try again.
Share Internet access
If you want to allow Internet access for devices connected to the access point, it’s possible to forward traffic to the main router, using the Ethernet port. You can either just redirect everything, or open it only for specific devices, destinations, or protocols (advanced configuration).
Routing everything
The easiest way to allow Internet access is to type this command, telling the firewall to redirect everything to the Ethernet gateway:sudo iptables -t nat -A POSTROUTING -o eth0 -j MASQUERADE
I recommend doing this anyway for a first try just to make sure everything works. Adjust it later for more strict firewall rules only if this is working. If it doesn’t work with this, you need to fix the issue first.
The rule won’t stay active after a reboot, which is great for a first try but not optimal to keep it working forever.
If it’s working and you want to keep it like that, you need to install iptables-persistent with:sudo apt install iptables-persistent
It will automatically save your current rules when you install it, but you have to run this command each time you change something after that:sudo iptables-save | sudo tee /etc/iptables/rules.v4
I’m now connected, with full access to the Internet, even after a reboot of the Raspberry Pi:
Advanced configuration
From there, you can use iptables to set rules as strict as you want or need. Maybe one device will have access to the Internet but not others, maybe web browsing is allowed (port 80 and 443) but not emails or local device access (for a guest access point for example).
It’s up to you to set up the security level you want and need. For a home network, it’s probably easier to just route everything (having a different network for your wireless network is already one level of security), but in companies, you most likely need to set up something stronger.
I already have an article where I go a bit further about configuring the firewall with advanced rules, you can find it here: How to use Raspberry Pi as a Wireless Router with Firewall?
You already did the first part with the access point, so skip the first few parts and start reading where I explain the firewall concepts.
I also have other topics about network security on this website that might interest you in this case:
- 17 Security Tips To Protect Your Raspberry Pi Like A Pro
- Step-by-Step Guide: Configuring a Firewall on Raspberry Pi
- OpenWrt on Raspberry Pi: Use your Pi as a router (Tutorial)
Whenever you’re ready, here are other ways I can help you:
The RaspberryTips Community: If you want to hang out with me and other Raspberry Pi fans, you can join the community. I share exclusive tutorials and behind-the-scenes content there. Premium members can also visit the website without ads.
Master your Raspberry Pi in 30 days: If you are looking for the best tips to become an expert on Raspberry Pi, this book is for you. Learn useful Linux skills and practice multiple projects with step-by-step guides.
The Raspberry Pi Bootcamp: Understand everything about the Raspberry Pi, stop searching for help all the time, and finally enjoy completing your projects.
Master Python on Raspberry Pi: Create, understand, and improve any Python script for your Raspberry Pi. Learn the essentials step-by-step without losing time understanding useless concepts.
You can also find all my recommendations for tools and hardware on this page.