Get Started with Raspberry Pi 400: A Beginner’s Guide
Setting up a Raspberry Pi for the first time is not easy, and most tutorials available don’t mention the Raspberry Pi 400, which is a bit different from the other models. It was time for me to write this fully illustrated guide to help you set up your Raspberry Pi 400 from unboxing to using it as your main computer.
Unlike other Raspberry Pi models, the Raspberry Pi 400 looks much more like a traditional PC with everything embedded in the keyboard. However, installation may differ from what you’re used to (cable connections, system installation and configuration).
No worries, I’ll guide you step-by-step, explaining everything you need to do to get started the right way and you’ll be ready to start using it as your main computer (or for other projects) in a few minutes. You are welcome to scroll directly to the step where you’re stuck if you already started before finding this guide.
If you’re looking to quickly progress on Raspberry Pi, you can check out my e-book here. It’s a 30-day challenge where you learn one new thing every day until you become a Raspberry Pi expert. The first third of the book teaches you the basics, but the following chapters include projects you can try on your own.
Raspberry Pi 400 overview: 2 versions
The first thing to know is that the Raspberry Pi 400 exists in two versions:
- The Raspberry Pi 400 unit is the main product. It’s basically a Raspberry Pi 4 hidden in the official Raspberry Pi keyboard.
- The Raspberry Pi 400 personal computer kit, which not only includes the Raspberry Pi 400 unit but also all the accessories: power supply, display cable, micro SD card, mouse and beginner’s manual.
If it’s your first Raspberry Pi, I recommend getting the full kit (check the price here), so you don’t have to wonder forever which brand or model to get for each accessory. It’s not necessarily the best mouse or the best SD card, but it’s good enough to get started quickly.
If you are on a budget, the Pi 400 unit is fine, especially if you already have some of the accessories (here is the direct link to get one). A computer mouse and a phone charger can be used if needed. You may have an SD card in your old camera or phone, but you’ll probably need to buy the display cable. I’ll give more details about this now.
Unboxing the Raspberry Pi 400 and requirements
Now that you know there are two versions, we can start talking about everything you need before getting started.
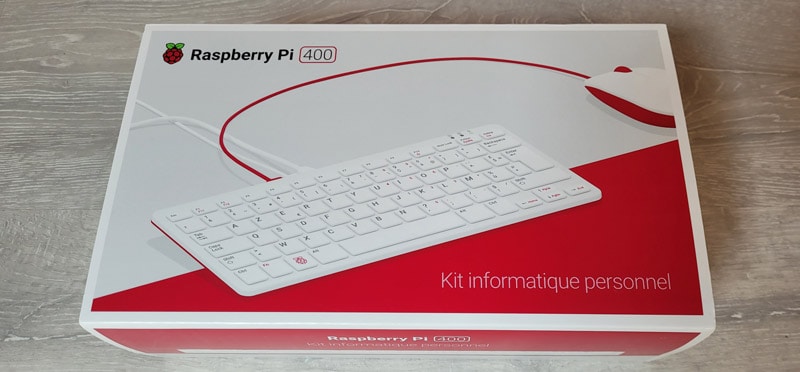
Raspberry Pi 400 complete kit
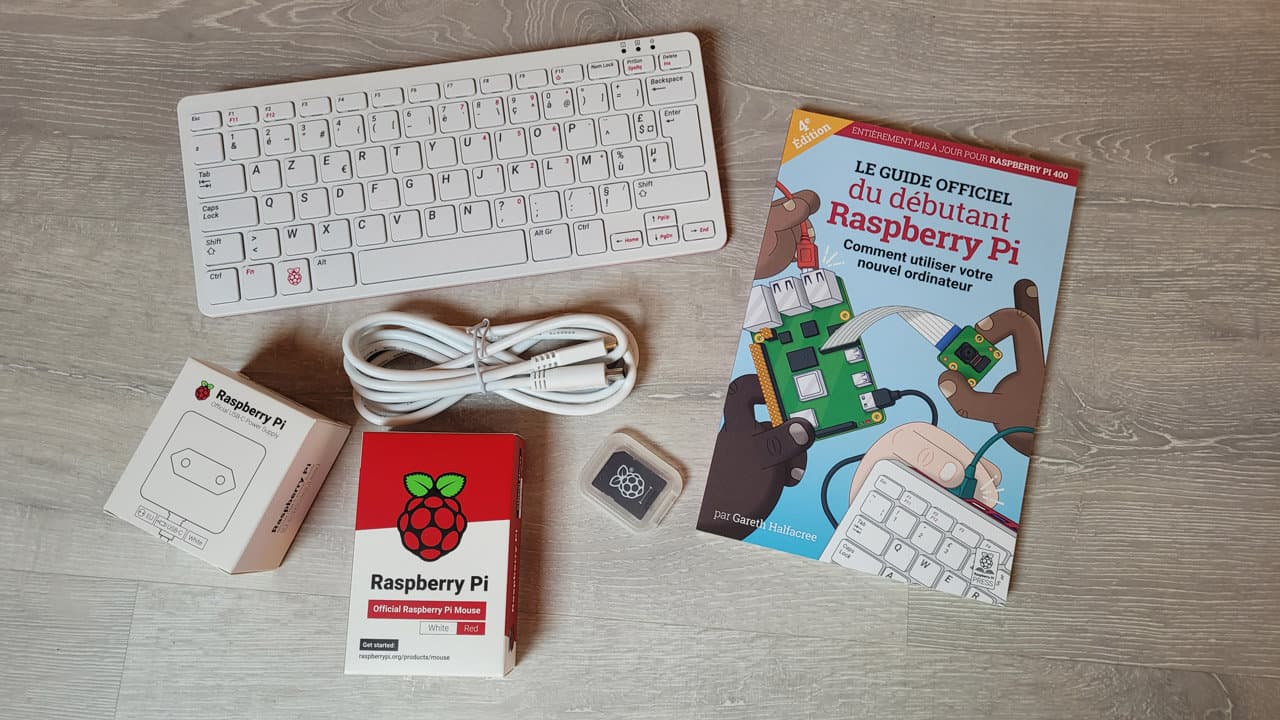
With the complete kit, you’re pretty much set up. This kit was created so you can start right away, here is what’s in the box:

So you get:
- The main unit: the keyboard, where the Raspberry Pi is embedded. It’s like a mini-PC.
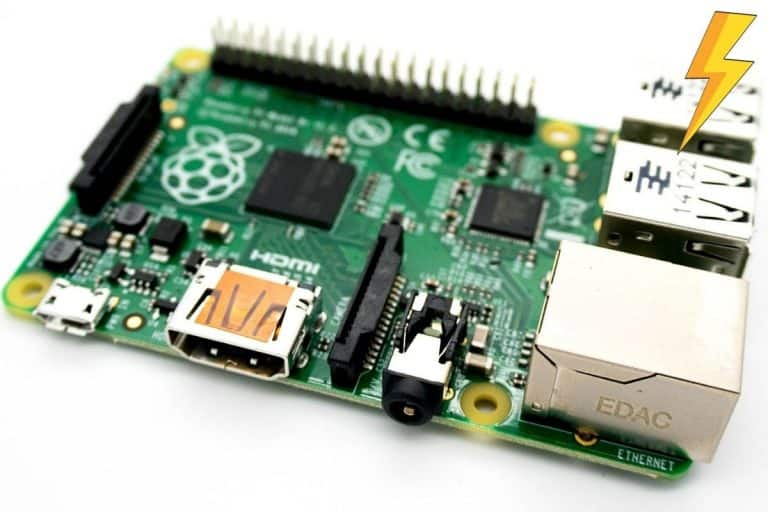
- The official power supply: this is essential because phone chargers and other USB cables generally don’t deliver enough juice for the Pi (as explained here).
- The micro-SD card: Raspberry Pis don’t use traditional hard drives by default, all the storage is on the SD card. Other good news, the operating system is preinstalled on it when you get the full kit, so you’ll save time here.
- The display cable: the Raspberry Pi 400 has two micro-HDMI outputs. It’s not common, so you probably need this cable (your TV or console cables are generally standard HDMI to HDMI).
Even with the full kit, you might need some additional equipment for more comfort:
- A display monitor: you can always use a TV or PC screen if you only use it for short periods, but if it’s meant to become your main computer, or you’ll use it often, I recommend finding a dedicated monitor for your Raspberry Pi.
I generally use a small monitor (like the one I review here), but you can use any PC monitor with it, you just need an HDMI input (which is the case with most recent devices). - A better mouse: To be honest, the mouse included in the kit is really minimum quality. It’s fine if you don’t use it much, but for desktop usage, I would recommend a better model (here’s one with good value for money).
This is optional, but you’ll thank me later.
Raspberry Pi 400 only
If you only got the Raspberry Pi 400 unit, you saved a bit of money on the initial purchase but you’ll need to find many additional accessories to get started.
If you are lost in all these new words and abbreviations, request my free Raspberry Pi glossary here (PDF format)!
Download now
So I hope you already have some, but here is some guidance if you need to buy a few things:
- SD card: All Raspberry Pi devices use micro-SD cards as their main storage. There are many models available and many sizes for each model. The price difference between a cheap one and an excellent one is not so big, so I recommend getting something good right away (here is my favorite).
You can also read some related articles that might help:
– What’s the Best Micro SD Card for Raspberry Pi? (benchmark)
– How Much Storage Do I Need For Raspberry Pi? - Power supply: Even if you can start a Raspberry Pi 400 by plugging it into your phone charger (USB-C) or by just using a USB cable plugged into your main computer, it’s not a good idea.
You won’t get the best performance by doing this, and you might get “low-voltage warnings” all the time.
The Raspberry Pi 400 requires a specific (and uncommon) voltage in input, so I strongly encourage using the official power supply. - Display cable: Likewise, the Raspberry Pi 400 doesn’t use a traditional HDMI/HDMI cable for the monitor. You only have micro-HDMI ports, so you’ll likely need a micro-HDMI to HDMI cable for it. Maybe even two if you want to try the dual-screen feature.
Any model will do but try to avoid adapters, it’s the same price but I never got good results with them. - Mouse: There is no touchpad on the Raspberry Pi 400, so you’ll probably need a mouse. A USB one is a good idea to get started even if Bluetooth mouses are supported, which you can configure later. For the installation, get a standard computer mouse that you can plug in via USB (a wireless one with a USB adapter is fine). Here is a decent one on Amazon if you don’t have one yet.
- Display monitor: You can use any computer screen or TV for the installation, but I recommend getting a dedicated setup quickly. If you need to spend 15 minutes installing everything each time you want to use your Pi 400, you’ll never do it.
Yep, that’s a long list, but I guess you already have most of this if you chose the Pi 400 unit. Gather everything now and we’ll see next how to plug everything in so we can get started.
Assembling the Raspberry Pi 400
Assembling is a bit of a strong word to describe the setup of a Raspberry Pi 400. No need to screw or solder anything, the main unit is ready to use. We just need to plug all the cables into the back of the keyboard.
Here is a view of the back of the unit, with all the ports available:
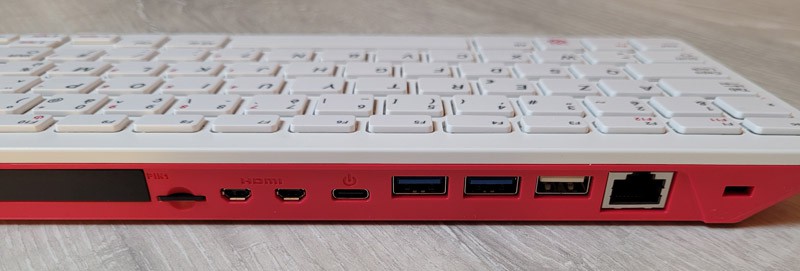
The next step is to plug each cable and accessory to the right port here.
It shouldn’t be too complicated, here is what you should do:

Join Our Community!
Connect, learn, and grow with other Raspberry Pi enthusiasts. Support RaspberryTips and enjoy an ad-free reading experience. Get exclusive monthly video tutorials and many other benefits.
Learn more- Plug the power supply into the USB-C port (the small one, with a power icon).
Don’t plug it into the wall socket yet. - Plug a mouse into one of the three USB ports (the white one is recommended).
The blue ones are faster, so it’s better to keep them free for USB drives or anything that could benefit from this speed boost. - Plug the display cable into one of the HDMI ports (between the SD card and the power input).
It doesn’t matter which one you use, the system should detect it.
If you have two monitors, plug in both cables now. - If you can, plug a network cable into the Ethernet port (the square one on the far right of my picture). The Raspberry Pi 400 can also connect via Wi-Fi, so it’s optional.
It’s generally easier to configure and will work right away in most cases. So, if you can, do it now.
Once you have done this, it should look like this from the top:
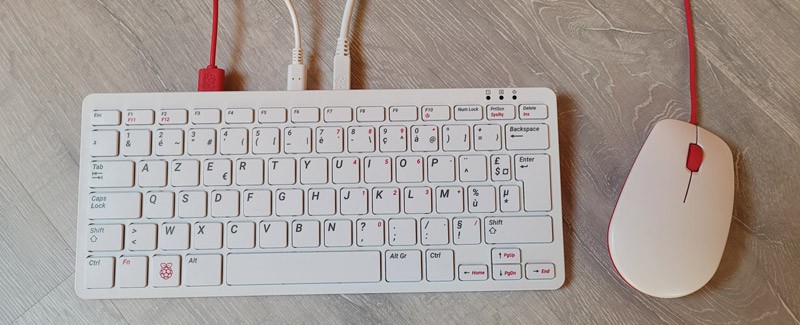
I don’t have a network cable in this picture, but I have the mouse, micro-HDMI cable and power supply connected (in this order).
Now we need to talk a bit about the software, and especially the operating system, before powering on the Raspberry Pi 400.
Installing a system on the Raspberry Pi 400
Installing a new system on the Raspberry Pi 400 is no different from doing it on any other Raspberry Pi model.
I’ll briefly explain the steps and refer you to other tutorials on this website for more details.
Flashing a system on the SD card
Remember: If you got the Raspberry Pi 400 complete kit, the system is already installed on the included SD card, so you can just skip this step. That’s what you’ll do if you need to reinstall it at some point, but for now, you don’t need to do it.
There are different ways to install an operating system on a Raspberry Pi, but the most common one is to insert the SD card into your computer and use it to copy the files to the SD card.
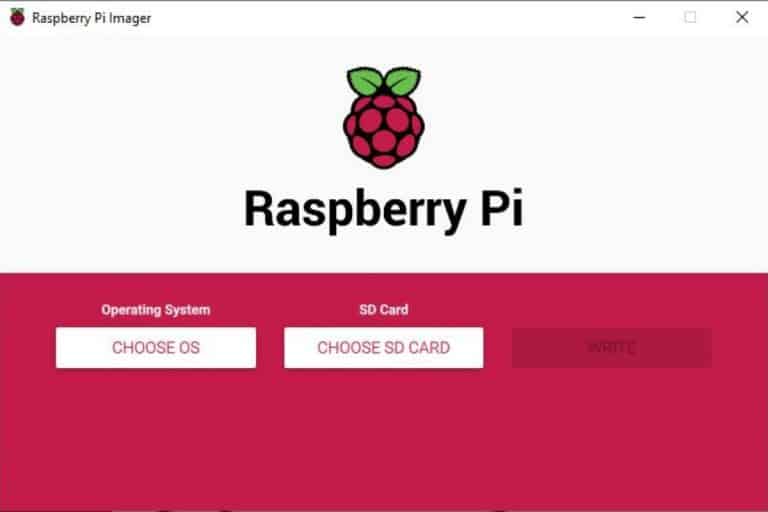
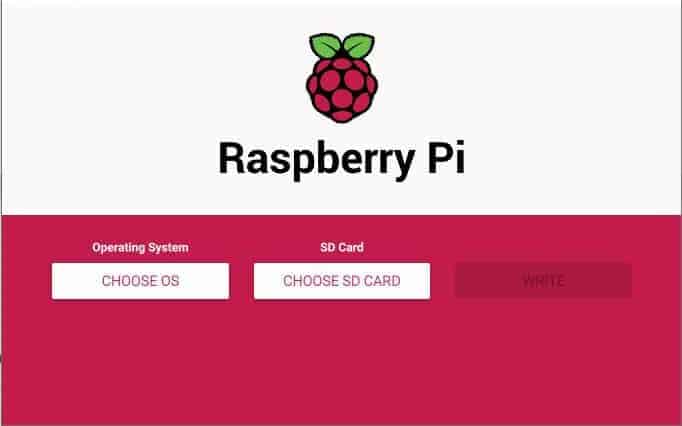
Hopefully, you don’t have to do this manually, the Raspberry Pi Foundation has created a great tool for this named Raspberry Pi Imager. It’s free and works on any operating system (Windows, Linux, and Mac).
I didn’t mention it earlier, but you may need an SD card adapter to do this. Most computers have a large SD card slot or no slot at all. If you have a standard SD card adapter, you’ll need something like this (it’s often included with the micro SD card). And if you don’t have any, you can use a USB to SD card reader.
So, if you have a brand new SD card and don’t know where to start, please check my other tutorials about this:
- Getting Started with Raspberry Pi Imager: The Ultimate Guide
- Install Raspberry Pi OS on Raspberry Pi (Illustrated guide)
- Beginner’s Guide: How To Install a New OS on Raspberry Pi
- What Is Raspberry Pi OS? (Goal, Installation & Benefits)
These guides are not written specifically for the Raspberry Pi 400 but the steps are the same.
If you are lost in all these new words and abbreviations, request my free Raspberry Pi glossary here (PDF format)!
Download now
For your first use of the Raspberry Pi 400, using Raspberry Pi OS with Desktop is highly recommended. You can try other versions and systems later, but start with the official system for now.
If you don’t have a computer and didn’t get a preinstalled SD card, an alternative is to use the network boot feature to start an equivalent of Raspberry Pi Imager directly on the Pi 400. You can find my detailed tutorial about network boot here.
Still have questions about the Raspberry Pi 400? You can find a list of questions and answers dedicated to this model here.
First start of your Pi 400
Once the system is installed on the SD card, you’re almost ready to start the Raspberry Pi 400 for the first time.
Here are the next steps:
- Insert the micro SD card into the slot on the back of the Raspberry Pi 400.
- Power on your monitor or TV if it’s not already done.
- Plug the power supply into the wall socket and turn the switch on (if you have one).
You should see weird screens and lines on your monitor almost right away. Don’t touch anything while the Raspberry Pi is working. There are a few automated steps in the first boot to make everything ready. The Pi may restart a few times, it’s normal, don’t worry.
After a few minutes, you should get a welcome wizard, looking like this:
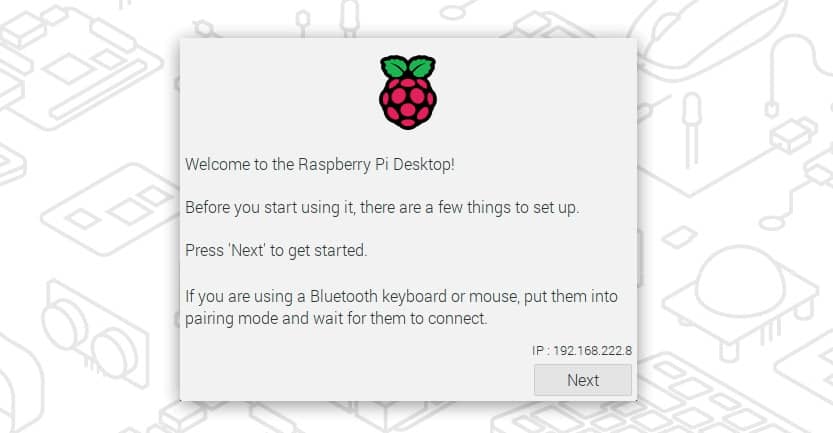
It will help you to configure the main settings, like:
- Language, timezone, and keyboard layout.
- Creating the first user and password.
- Connecting to a Wi-Fi network if needed (do it there if you didn’t plug in a network cable).
- Updating the system with the latest version of all applications.
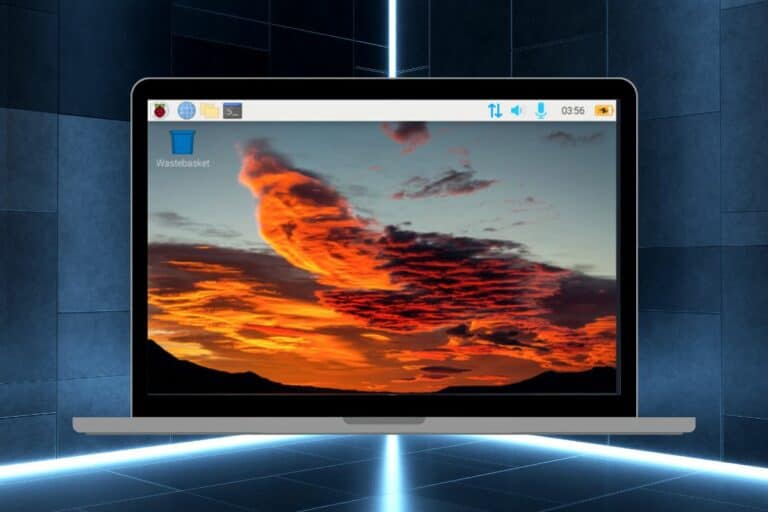
It’s not complicated, just follow the instructions, click next a few times and you should quickly access the main interface that looks like this:
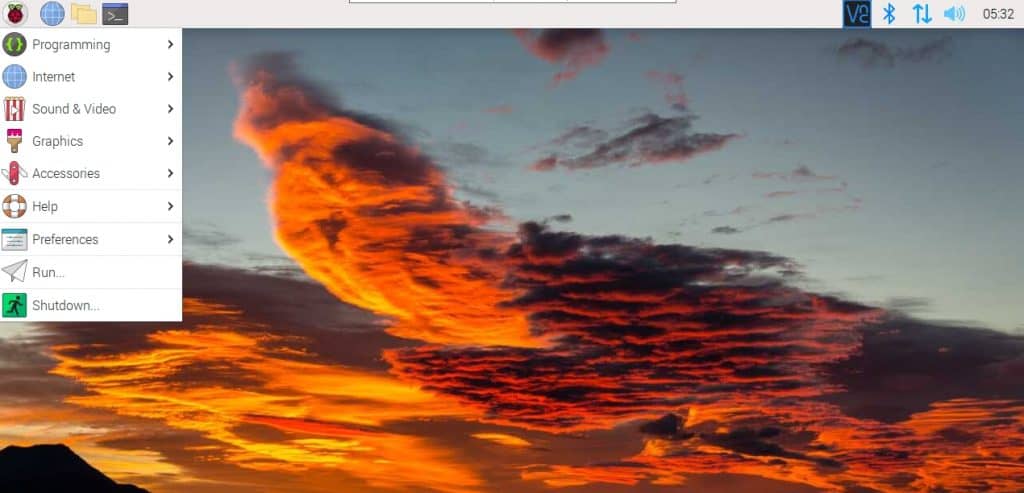
From there, you have your Raspberry Pi 400 setup, and all the following steps will be the same as with any Raspberry Pi model.
Once Raspberry Pi OS is installed, system configuration, app installation, programming, etc. are no different from doing it with a Raspberry Pi 4 or older. But as always, let me give you a few bonus tips to get started the right way.
It's a free PDF guide containing every Raspberry Pi Linux command you should know!
Download now
Going further
This website is all about helping Raspberry Pi users to get the most out of their devices. You’ll find tutorials for absolute beginners, as well as project ideas and advanced project instructions.
Here are a few links you should check out to learn more about your new system.
Let me guide you in your first steps
If you need help getting started on Raspberry Pi, I have an entire course to guide you through your first steps. I’ll help you use the perfect hardware, plug everything in and install your first system. You’ll also do your first projects with me, just to make sure you are ready for the next level. Get all the information on this page if you are interested.
The first steps should be easy if you read this article carefully, but that’s only the beginning. The system is probably new to you and you can quickly become overwhelmed with all the new things you need to learn.
No configuration panel, no Microsoft store, but tons of projects available that are beyond your reach unless you know how to use this new system properly. That’s why I created this beginner’s course. Check this page to see if it’s a good fit.
You can obviously use the search engine on this website to find the answers to all your questions, it will just take forever to get the same result, but it’s your call.
Install new applications
Installing new applications on Raspberry Pi OS is not obvious. There are a few ways to do it:
- Open a terminal and use command lines, but I guess it’s a bit too much for now if it’s your first use of the system.
- Go to “Preferences” > “Recommended Software” and install the main applications. The list is pretty limited, but it might be enough for the most popular ones.
- Use the “Add / Remove Software” tool, which is the equivalent of the command line with a graphical interface. It’s a bit messy in there with thousands of packages available, but that’s the only way on Raspberry Pi OS.
I have a guide on this website where I explain how to install new apps on a Raspberry Pi. I recommend reading it if you have never done this before.
You can also check this list of the best apps for Raspberry Pi OS to get the package names for the main ones.
Desktop usage tips
I have a full series of video lessons available for community members explaining how to get the most out of your Raspberry Pi for desktop usage. I guess that would be the best way to learn everything quickly.
But if you can’t afford to join the community, here are a few articles that might be helpful to get started:
- Can a Raspberry Pi really Replace your Desktop PC? (I Tried)
- How to Change The Desktop Appearance on Raspberry Pi?
- How to Configure Wi-Fi on Raspberry Pi? (6 Easy Ways)
- How to Use Bluetooth on Raspberry Pi: GUI & Command Guide
- The 7 Best Text Editors for Programming on Raspberry Pi
- 5 Best Web Browsers to Use on Raspberry Pi (I Tested Them)
Projects ideas
Once you get used to your Raspberry Pi 400 and its new desktop environment, you’ll probably want to try a few projects to test its limits (and expand your skills).
I have a few lists on this website to give you inspiration. Check out some of them, depending on your current level and interests:
- 15 Easy Projects for Raspberry Pi Beginners (With Links)
- 25 Awesome at-Home Raspberry Pi Project Ideas
- 15 Raspberry Pi Network Projects for Home and Office Use
- 15 Fun Raspberry Pi Projects to Experiment with Python
It's a free PDF guide containing every Raspberry Pi Linux command you should know!
Download now
Reminder: Remember that all the members of my community get access to this website without ads, exclusive courses and much more. You can become part of this community for as little as $5 per month & get all the benefits immediately.
Q&A
Are there GPIO pins on the Raspberry Pi 400?
The Raspberry Pi 400 has GPIO pins available on the back. They are hidden behind a removable plastic cover near the SD card slot.
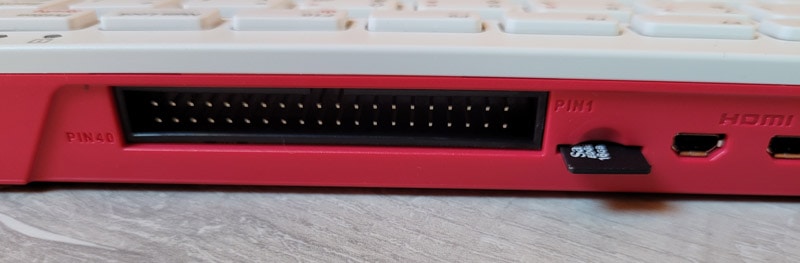
Like any other Raspberry Pi model, you can use them for electronic projects and programming experimentation. It’s a bit less convenient than on a Raspberry Pi 4, and I’m not sure all Raspberry Pi HATs work on it, but it’s usable anyway.
However, if you plan to use them, I recommend getting a GPIO header adapter like this one on Amazon. It’s cheap, and you’ll save a ton of time on your projects.
How do I shut down the Raspberry Pi 400 properly to avoid data corruption?
Save your files and close everything, then use the shutdown feature from the desktop interface to properly stop all tasks and services. You can then unplug the Raspberry Pi (or use the power switch if there is one on your power supply).
After the shutdown process is complete, the power LED on the Raspberry Pi 400 will turn off, indicating that it is safe to unplug the power source.
Whenever you’re ready, here are other ways I can help you:
The RaspberryTips Community: If you want to hang out with me and other Raspberry Pi fans, you can join the community. I share exclusive tutorials and behind-the-scenes content there. Premium members can also visit the website without ads.
Master your Raspberry Pi in 30 days: If you are looking for the best tips to become an expert on Raspberry Pi, this book is for you. Learn useful Linux skills and practice multiple projects with step-by-step guides.
The Raspberry Pi Bootcamp: Understand everything about the Raspberry Pi, stop searching for help all the time, and finally enjoy completing your projects.
Master Python on Raspberry Pi: Create, understand, and improve any Python script for your Raspberry Pi. Learn the essentials step-by-step without losing time understanding useless concepts.
You can also find all my recommendations for tools and hardware on this page.