Beginner’s Guide: How To Install a New OS on Raspberry Pi
Whether you’re using the Raspberry Pi for the first time, need to reinstall the system, or want to try a new one, you’ve come to the right place. The goal of this tutorial is to explain how to install a new operating system on the Raspberry Pi. I’ve done it with almost all systems for this platform, but the goal today is to give you an overview of the steps whatever system you choose.
The Raspberry Pi uses an SD card (or USB drive) as its main storage. This means that it’s possible to easily switch from one system to another by using a different media. It’s also possible to reinstall a system on the same storage drive if needed.
This tutorial is divided into three parts: preparing the installation (theory, hardware & software requirements), the installation steps, and then the system setup. Feel free to jump to the part you are interested in if you already know a few things.
If you need help getting started on Raspberry Pi, I have an entire course to guide you through your first steps. I’ll help you use the perfect hardware, plug everything in and install your first system. You’ll also do your first projects with me, just to make sure you are ready for the next level. Get all the information on this page if you are interested.
Preparing for the installation
Theory
Most users get an SD card with their Raspberry Pi preinstalled with Raspberry Pi OS (ex-Raspbian) and think they can only use this SD card with this system forever. A Raspberry Pi is not like an iPhone or a PS5, you can easily reinstall it, upgrade it, or switch to another operating system.
A Raspberry Pi is more like a PC when it comes to system management. And it’s even easier because it’s not using internal storage hidden inside a case like on a PC, it’s all on a micro-SD card that can be removed and replaced easily.
The goal of this article is to show you what you can do and how to do it.
Side note: The system is generally installed on a micro-SD card inserted into the Raspberry Pi slot, but on most models, it’s also possible to use a USB stick instead. I will refer to the SD card in this article to keep things simple, but you should know that using a USB drive instead is an option.
Want to reinstall everything so you restart from scratch? It’s possible.
Want to get a fresh installation of the latest Raspberry Pi OS version? It’s possible, same steps.
Want to try another operating system, like Ubuntu, without losing the possibility to get back to your current system? It’s possible too.
Related: What’s the Difference Between a Raspberry Pi and a Computer?
Hardware requirements
If you already have a Raspberry Pi running Raspberry Pi OS currently, you probably don’t need more hardware than what you already have. I would, however, recommend using a second SD card (or USB drive) for your first try, so you don’t lose your current system and data.
If you are lost in all these new words and abbreviations, request my free Raspberry Pi glossary here (PDF format)!
Download now
Here are the recommended components:
- A Raspberry Pi: it works the same for any model (except the Pico which is not a microcomputer). If you’re here, you probably already have one, so just keep the same one to follow this tutorial.
- An SD card or USB drive: try to get your hands on a second one if you try reinstalling your system for the first time. Everything is stored on it (system, applications, personal data), so if you follow this tutorial with the same one, you’ll lose everything.
Don’t know which one to buy? Here is my benchmark of the fastest SD cards. For a USB stick, any option is fine, but here is my favorite one on Amazon. - A keyboard and mouse: recommended, at least for the first boot. Most systems will have a welcome wizard with a few questions on the first boot, to configure the network, keyboard layout, and language. If you can get one dedicated to your Pi, it’s great (here are my recommendations), but you can also use any standard PC keyboard and mouse for the installation.
- A monitor: same thing, try to plug your Raspberry Pi into a screen for the installation, you can use a TV or PC monitor temporarily. Personally, I use this screen I tested on the website, always plugged into my Raspberry Pi.
In this tutorial, I’ll use another computer for the system installation. So, you’ll need one to follow the instructions. The idea is to prepare the SD card or USB stick on the computer before inserting it into the Raspberry Pi for the first boot.
If you don’t have another computer, I would recommend reading this tutorial instead, which explains how to install a system directly from the Raspberry Pi.
Recommended application
Many applications are available to write a new system for the Raspberry Pi on an SD card, but the one recommended currently is Raspberry Pi Imager. Developed by the manufacturer, and supporting the most popular systems for the Raspberry Pi, it’s the best choice.
You can download it from the official website here. It’s free and available on any operating system (it’s even possible to use it from a Raspberry Pi directly, it’s included with the latest versions).

Join Our Community!
Connect, learn, and grow with other Raspberry Pi enthusiasts. Support RaspberryTips and enjoy an ad-free reading experience. Get exclusive monthly video tutorials and many other benefits.
Learn moreSo please start by downloading and installing it on your computer if you don’t have it yet.
Related tutorial: Get Started with Raspberry Pi 400: A Beginner’s Guide
Optional: System download
As mentioned before, Raspberry Pi Imager already includes a list of system options that are well-supported for the Raspberry Pi, but not all of them are available.
So, sometimes, you need to download the image manually first, and then use Imager to put the files on your storage device.
This is mostly the case for less-popular options or recent Linux distributions. It can also be the only solution if your project requires an outdated version of a popular distribution.
As an example, Rocky Linux, which I tested recently, is not listed in Raspberry Pi Imager, so you need to download the system file from their website first. However, in most cases, you don’t have to worry about that.
It's a free PDF guide containing every Raspberry Pi Linux command you should know!
Download now
Installing a new OS
Once you have all your hardware ready and Raspberry Pi Imager installed, here are the three steps to install a new operating system on the Raspberry Pi:
- Choose the system to install in Raspberry Pi Imager.
- Select the destination media (SD card or USB drive).
- Click on “Write” to start the installation.
Let’s see how to do all of this in detail.
Step 1: Choose your new system
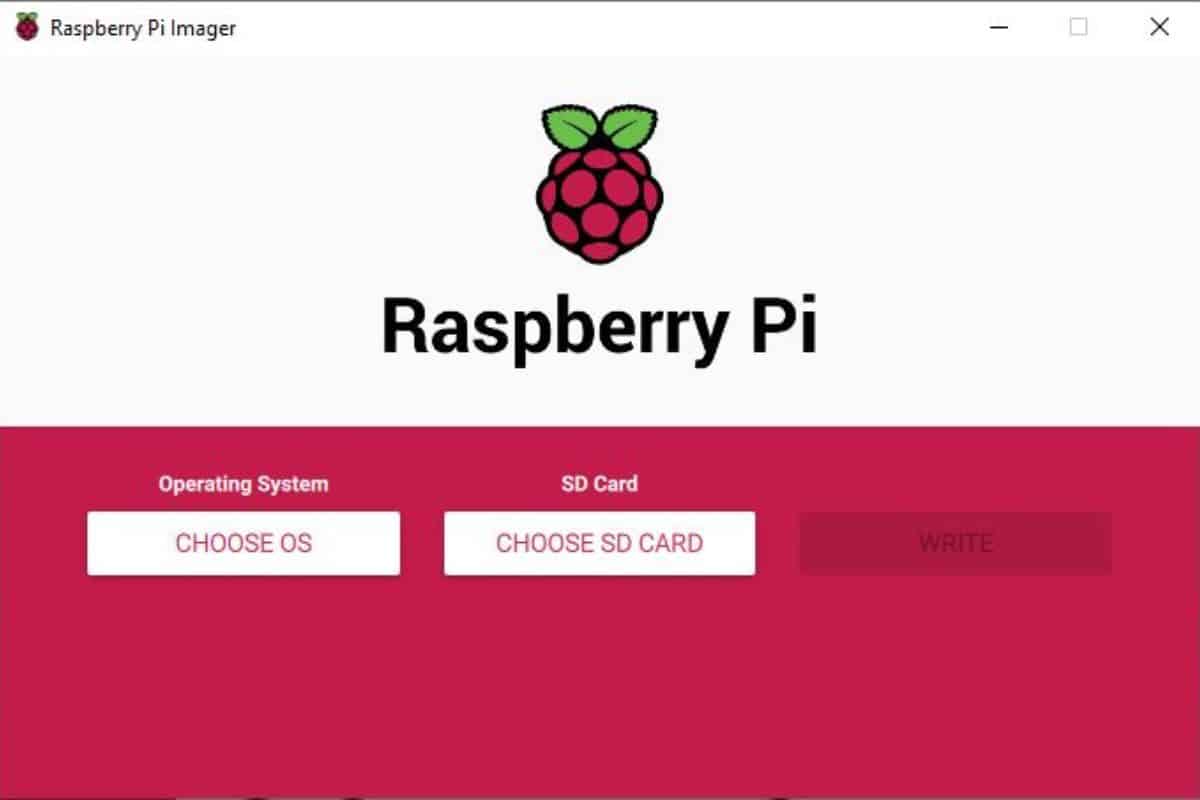
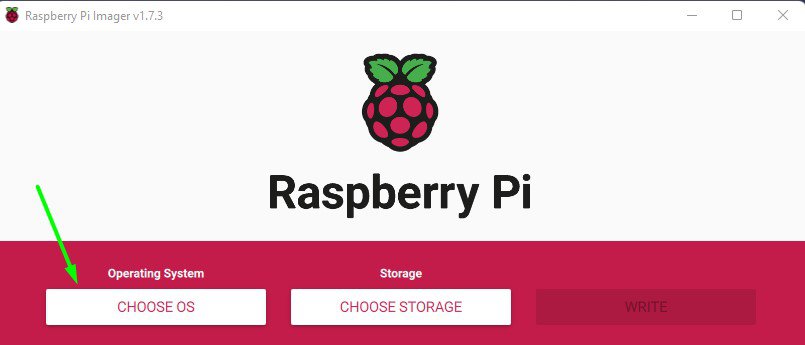
Start Raspberry Pi Imager, and click on “Choose OS”.
A pop-up appears with a list of options, sorted by category and system name (category > system names > system versions).
If you are lost in all these new words and abbreviations, request my free Raspberry Pi glossary here (PDF format)!
Download now
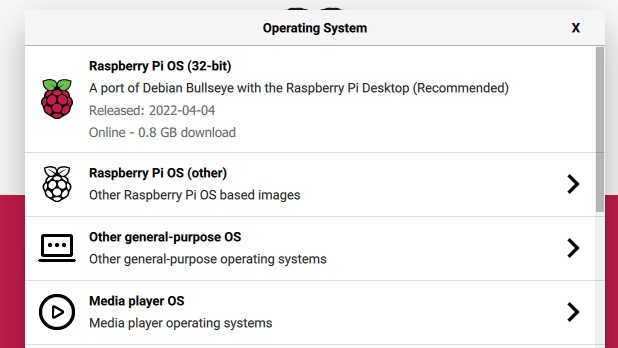
For the first try, I recommend keeping the first option (Raspberry Pi OS 32-bit), or anything inside “Raspberry Pi OS (other)”, but feel free to explore the other options in the other categories if you like.
If you have downloaded a system manually, you need to scroll down to “Use custom”, where the tool will ask you the image file location (most likely your “Downloads” folder).
If you don’t know which operating system to try, you can check my top recommendations for Raspberry Pi systems here. Pick one in this list that interests you, and give it a try ;-).
Step 2: Select the destination media
Once the system version or image is chosen, you can move to the second step and pick the destination media.
Make sure the SD card or USB drive you want to format and use is inserted into the computer, and click on “Choose Storage”. Another pop-up will appear with a list of options:
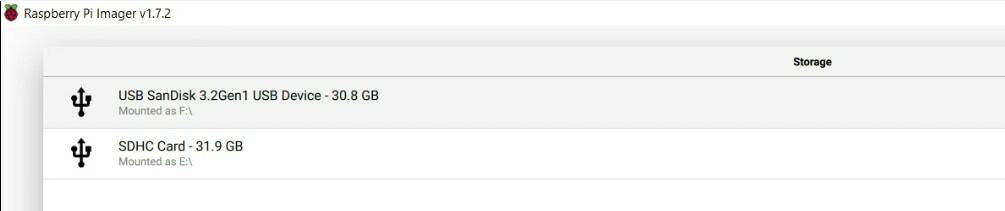
In most cases, you’ll only have one option as the tool automatically excludes the computer storage. But if you have other USB drives plugged in, (for backup purposes for example), be careful when you pick the storage device as it will be formatted.
Step 3: Write the image
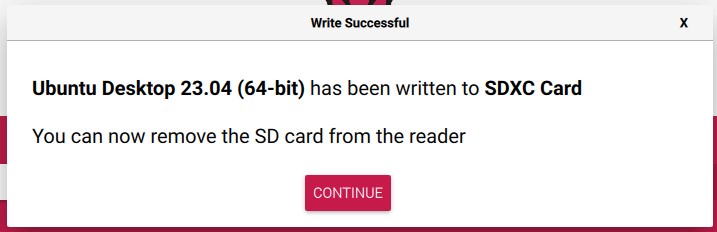
The last step is to click on “Write” to start the installation process.
Raspberry Pi Imager will download the system image (if needed), and copy the files to your media storage. It may take between 2 and 15 minutes depending on the system, storage, computer, and Internet connection speed.
Just be patient and wait for the success message, which looks like this:
Note: Advanced options are available in Raspberry Pi Imager to preconfigure the system before the first boot. I don’t mention it here to keep things simple, but as soon as you’re comfortable with this process, you can read my complete guide about Imager here.
It's a free PDF guide containing every Raspberry Pi Linux command you should know!
Download now
Reminder: Remember that all the members of my community get access to this website without ads, exclusive courses and much more. You can become part of this community for as little as $5 per month & get all the benefits immediately.
Setting up your new OS
Each operating system will be different, with generally an onboarding sequence for the basic configuration during the first boot, and then different tools for more customization and installing new applications.
Let’s see how it usually works, and I’ll then give you additional links for more specific guidance.
Hardware setup
Before anything else, you need to make sure your hardware is properly set up, with all the accessories plugged in, before powering up the Raspberry Pi.
I guess you already know how to do this if you were using the system preinstalled on the SD card within your Raspberry Pi kit, but let’s recap:
- Put the Raspberry Pi board into your case if you have one (I’m talking about something like the Argon Neo I tested on this website and use every day).
- Plug the keyboard and mouse into the USB ports if you have one. If you have blue and black ports, use the black ones for this, the blue ports are faster, and better suited for storage devices.
- Plug the monitor into the display port. Each model uses different ports, which can be HDMI (Pi 3), micro-HDMI (Pi 4), etc. You may need an adapter or a specific cable for this. You can find my recommendations for each model on my resources pages.
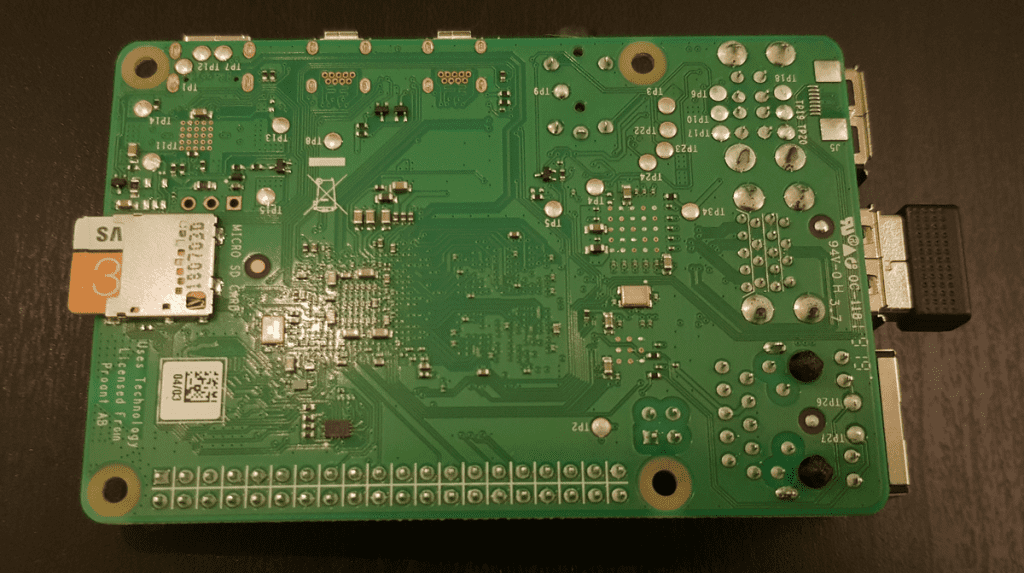
- Insert the SD card you just flashed, or plug the USB stick into a blue port.
- Finally, plug in the power supply and turn it on if there is a switch button on the power cord.
If everything goes as expected, you’ll first see the Raspberry Pi logo, the boot menu, and then the system you just installed will start to boot.
First boot
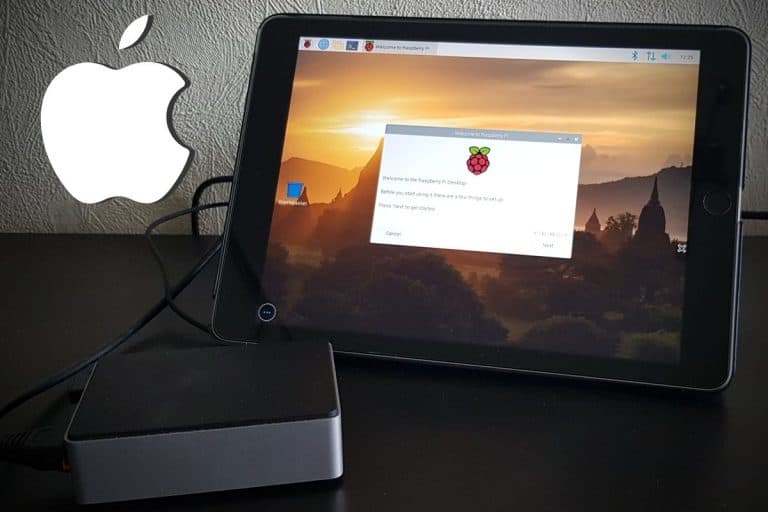
Each operating system will handle the first boot differently. But when you use a popular distribution with a GUI, you’ll generally get a welcome wizard on the first boot.
Here are a few examples from the most popular options:
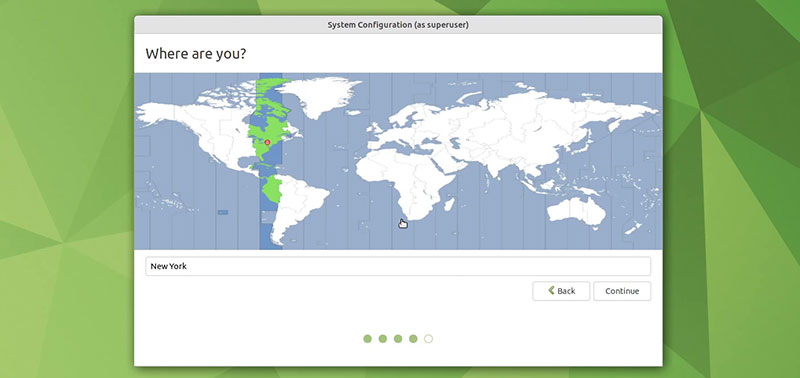
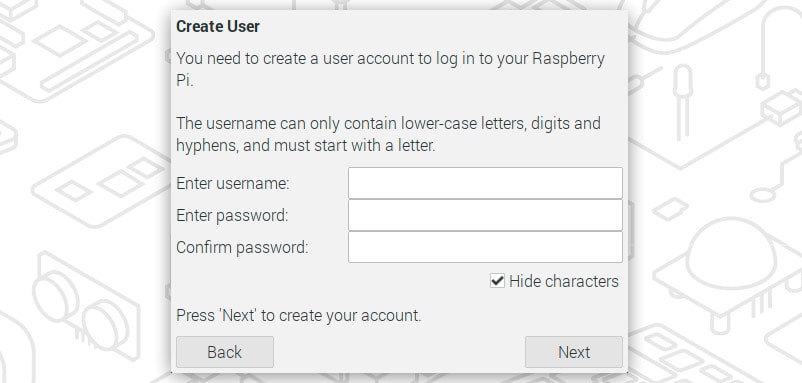
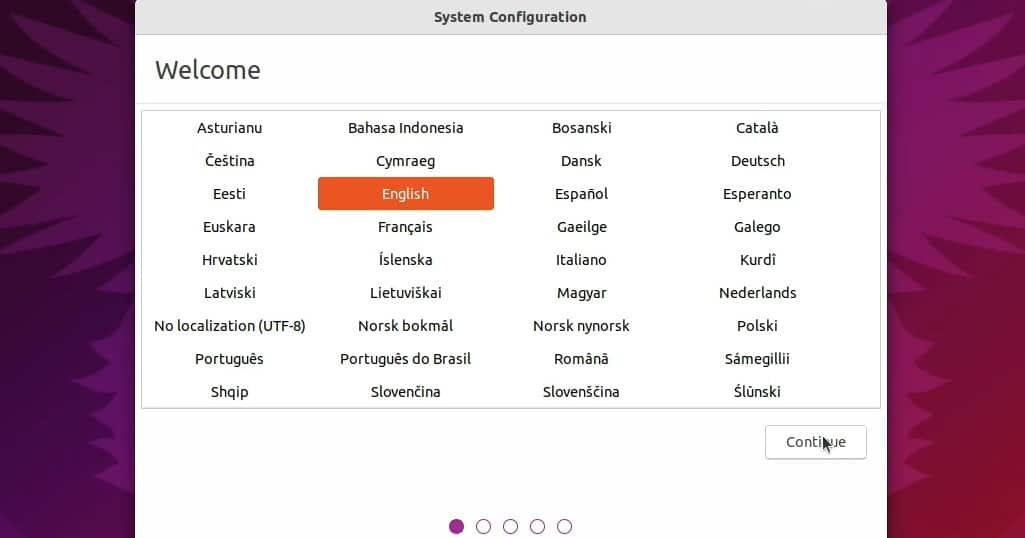
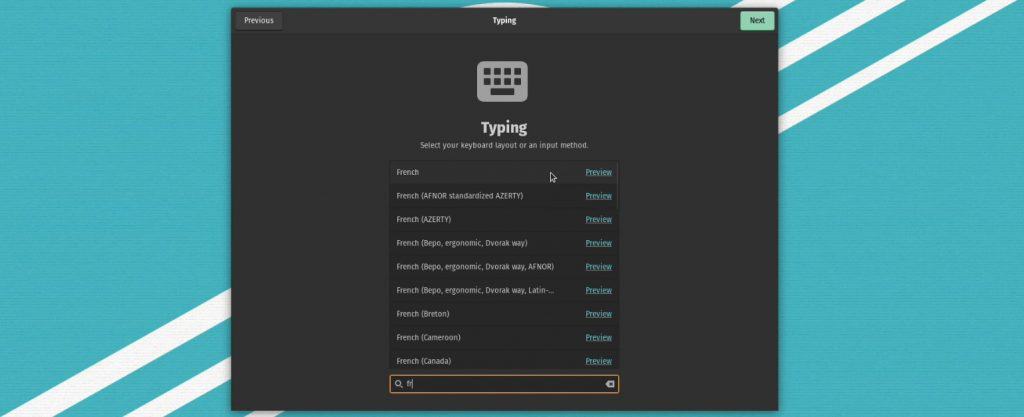
In most cases, you’ll only have to configure your language, keyboard layout, and generally create a username and password for your new system. It shouldn’t be complicated.
In other cases, there is nothing like that, and the system starts directly. In this case, there is often a default user and password that you’ll find in their official documentation (or in my tutorials). It’s generally the case for distributions that don’t have a GUI (server distributions) or specific systems (Android, retro-gaming, etc.).
First steps on your new system
Once again, once the system is installed and fully started, things are generally quite different. (If they were all the same, there would be no reason to have so many options available).
But my recommendations for the first steps are the same whatever the system you use, even if the tools to do them will be different:
- Complete the system configuration: set a strong password if not done during the first boot, configure your network, display, etc.
- Do the system updates: make sure everything is updated, it’s good practice for security reasons, but also before installing anything else.
- Customize the system as you like: maybe change the theme, wallpaper, icons, and text sizes, etc.
- Install the apps you need: perhaps it’s LibreOffice, developer tools, Python libraries, etc.
After doing these steps, you should be pretty good to start working on your project or exploring this new system more. Maybe recovering the data you had on the previous installation is the next step if you used it for a while.
Going further and examples
The issue you may experience is that even if you already have some experience with one or two systems, many things are different on other ones. Typically, installing new applications on Raspberry Pi OS, Ubuntu, or Fedora is not the same at all.
That’s why I write specific tutorials for each distribution on this website, here are a few recommendations if you want to become more confident with one of them:
- How To Easily Install Ubuntu Desktop 23.04 on Raspberry Pi
- How To Install And Use Fedora On Your Raspberry Pi?
- Best Retro-Gaming OS: Retropie, Recalbox, Batocera or Lakka?
- Installing Android on Raspberry Pi 4 with Play Store
- Installing Windows 11 on Raspberry Pi (An Illustrated Guide)
But feel free to use the search feature to find the one you are testing right now.
Whenever you’re ready, here are other ways I can help you:
The RaspberryTips Community: If you want to hang out with me and other Raspberry Pi fans, you can join the community. I share exclusive tutorials and behind-the-scenes content there. Premium members can also visit the website without ads.
Master your Raspberry Pi in 30 days: If you are looking for the best tips to become an expert on Raspberry Pi, this book is for you. Learn useful Linux skills and practice multiple projects with step-by-step guides.
The Raspberry Pi Bootcamp: Understand everything about the Raspberry Pi, stop searching for help all the time, and finally enjoy completing your projects.
Master Python on Raspberry Pi: Create, understand, and improve any Python script for your Raspberry Pi. Learn the essentials step-by-step without losing time understanding useless concepts.
You can also find all my recommendations for tools and hardware on this page.