How To Install Visual Studio Code On Raspberry Pi
Visual Studio Code is one of the best programming editors available currently. It’s developed by Microsoft, but it’s available on Linux, and can easily be installed on a Raspberry Pi. I use this editor almost every day as a developer and in my Raspberry Pi projects. Let me tell you how to get started with it.
Visual Studio Code is now included in the recommended software list on Raspberry Pi OS, so it can be installed in one click via this tool. After a few configuration steps, the editor can be used in the same way as on a standard computer.
Let’s start with the installation steps, and then I’ll share a few tips to get the most out of this tool on your Raspberry Pi.
If you’re looking to quickly progress on Raspberry Pi, you can check out my e-book here. It’s a 30-day challenge where you learn one new thing every day until you become a Raspberry Pi expert. The first third of the book teaches you the basics, but the following chapters include projects you can try on your own.
Prerequisites for Visual Studio Code on Raspberry Pi
Before starting the installation process, just make sure to have these prerequisites in mind.
Hardware
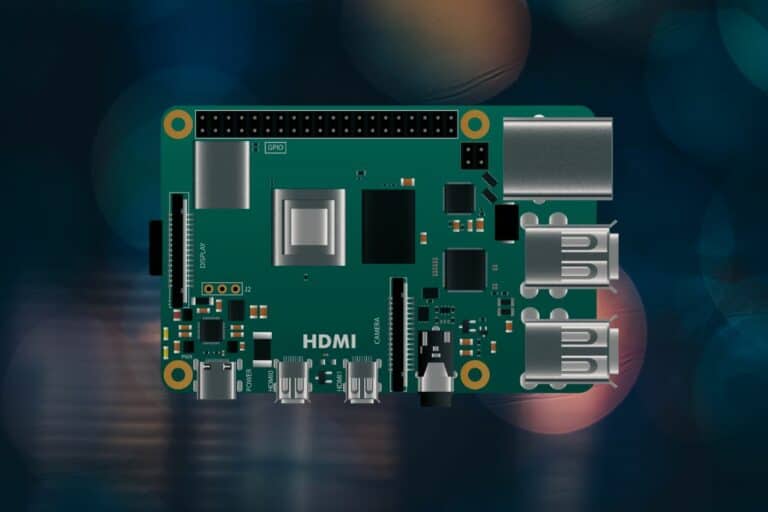
For optimal performance, a Raspberry Pi 4 is recommended. Visual Studio Code is probably one of the best editors, but not necessarily the lightest. So, you’ll have a better experience if you can get a model with more processing power and memory.
Except for that, there are no major requirements to use VS Code on Raspberry Pi. A stable network connection is recommended, and a comfortable keyboard and mouse if your goal is to code on it. But I guess you already have this (if not, check my favorite keyboards for Raspberry Pi here).
Software
Visual Studio Code is available for Windows, Linux, and Mac. On Linux, you have many options (.deb, .rpm, snap, script our sources), for different architectures (x64, arm32 and arm64) so it should work on any computer (download page).
On Raspberry Pi OS, the installation is straightforward as it’s available with the default tools, so I recommend using it. Any Raspberry Pi OS version with a Desktop environment is fine.
Make sure to do the system updates before going further. You can use the graphical tool, or simply copy and paste these commands into a terminal:sudo apt update; sudo apt upgrade -y
With your hardware requirements met and your Raspberry Pi OS updated, you are now ready for the installation of Visual Studio Code.
It's a free PDF guide containing every Raspberry Pi Linux command you should know!
Download now
Note: While writing this tutorial, I’m testing the installation process on a Raspberry Pi 4 using the latest version of Raspberry Pi OS (64-bit).
It's a free PDF guide containing every Raspberry Pi Linux command you should know!
Download now
Installing VS Code on Raspberry Pi
Here are the steps to install Visual Studio Code on Raspberry Pi:
- Open the recommended software application.
- Go to Programming and find Visual Studio Code.
- Check the “Install” box and click on “Apply” to start the installation.
I’m detailing these steps in the next sections if you’ve never used this tool before.
Open the Raspberry Pi Recommended Software tool
The “Recommend Software” application on Raspberry Pi OS allows you to quickly install the applications that are fully supported by the Pi foundation, and included in the “Full” version.

Join Our Community!
Connect, learn, and grow with other Raspberry Pi enthusiasts. Support RaspberryTips and enjoy an ad-free reading experience. Get exclusive monthly video tutorials and many other benefits.
Learn moreIt’s limited, but it’s way more convenient than the traditional package manager. Anyway, start by opening the tool so we can install Visual Studio Code:
- Go to the main menu (Raspberry Pi icon in the top-left corner).
- Open “Preferences”, and find “Recommended Software” in it.
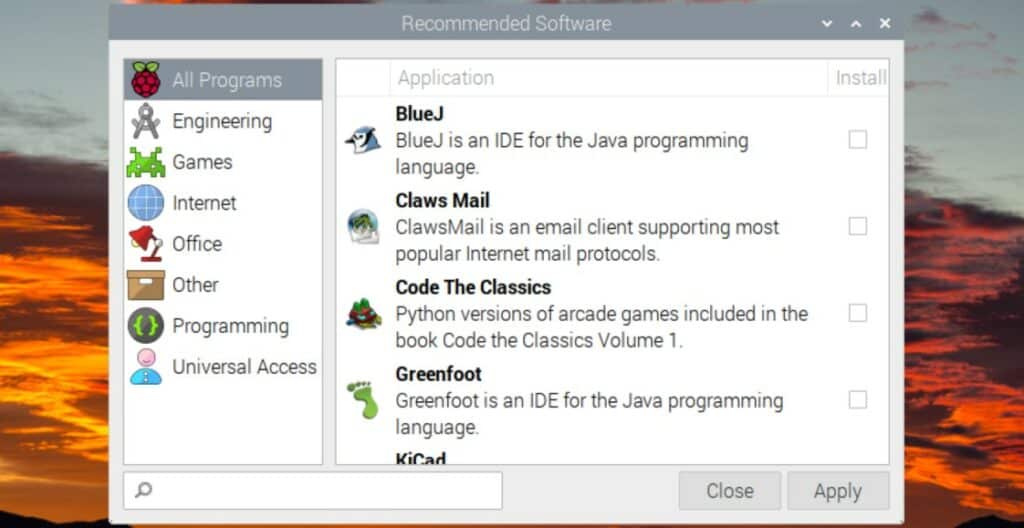
- Click on it, you should get a window looking like this:
Install Visual Studio Code
In the “Recommended Software” tool, you can see all the applications and filter them by category.
Click on “Programming” and scroll to the bottom of the list, you should find “Visual Studio Code” here. Then, click on the checkbox to mark it to be installed:
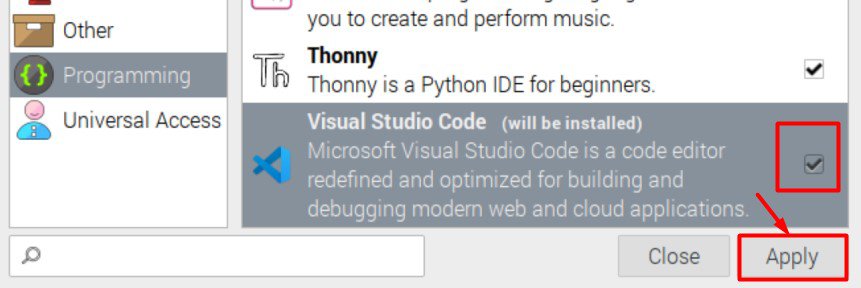
Then click on “Apply” to start the installation. The system will do everything for you in the background, no command, no password, just wait a few seconds.
Run VS Code for the first time
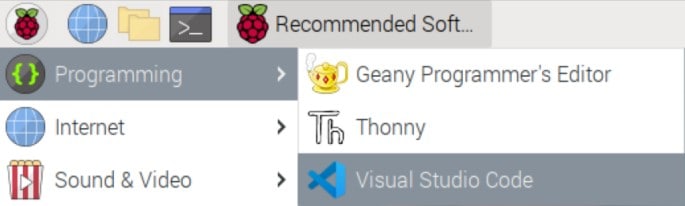
Once installed, VS Code is available in the main menu under “Programming” with the other text editors that are pre-installed by default (Geany and Thonny).
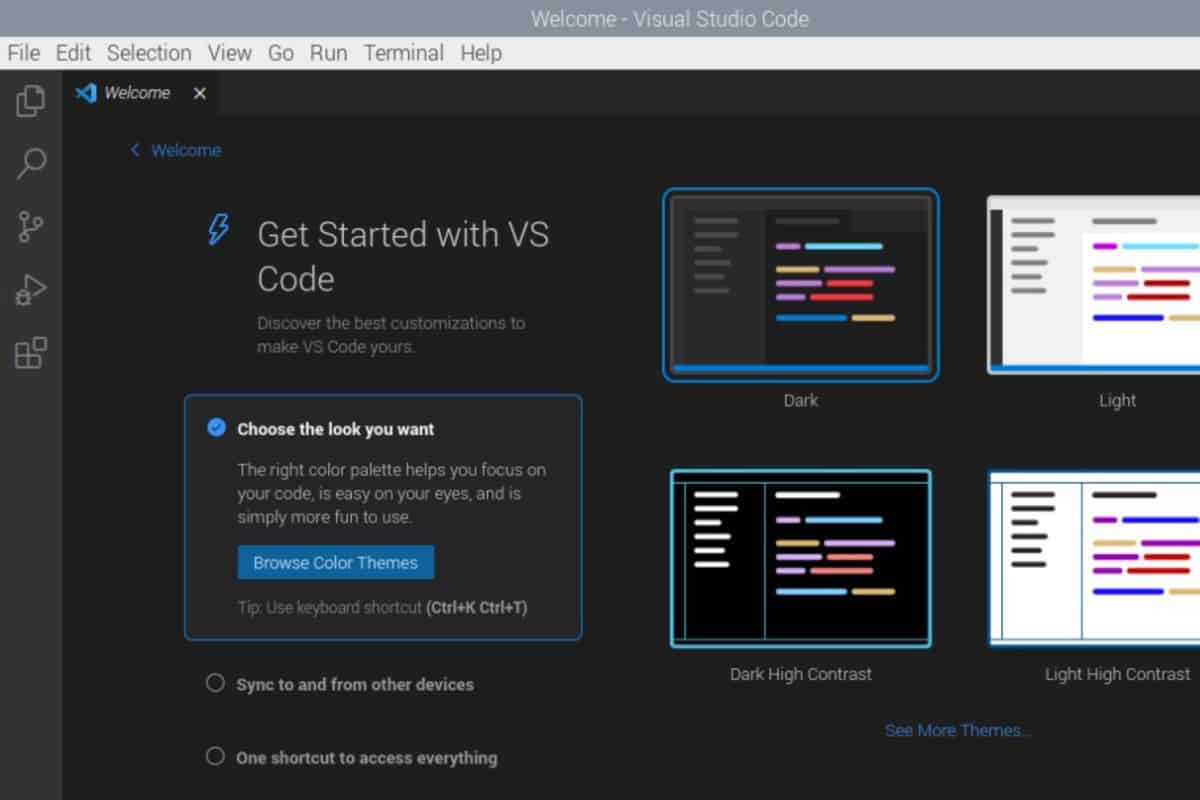
There is a welcome wizard on the first run, I recommend following it if you’ve never used this editor previously, it will help you to customize the interface and introduce important features:
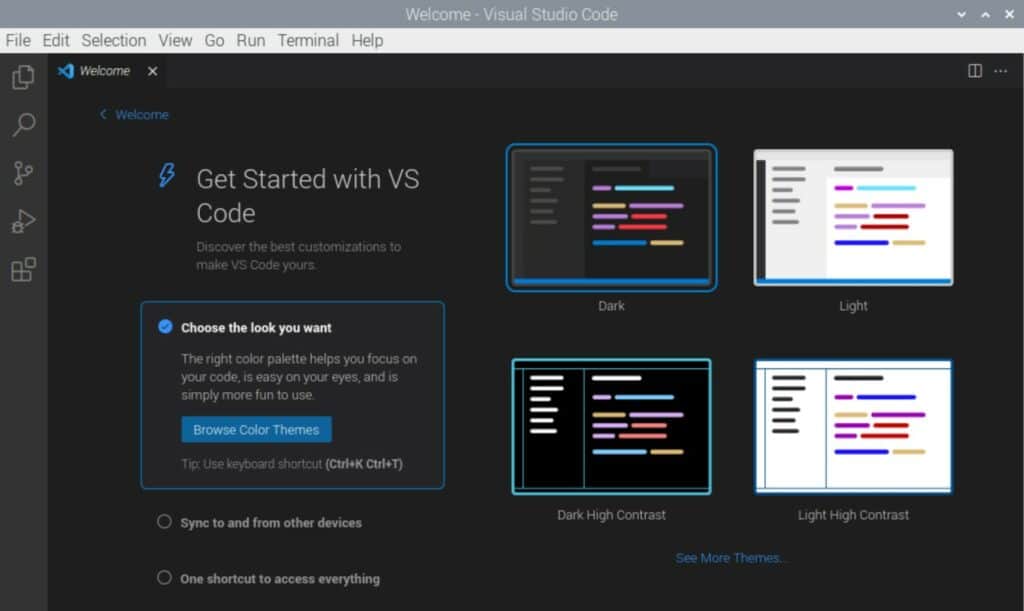
That’s it, Visual Studio Code is now installed and running on your Raspberry Pi. See? It wasn’t that hard. Let me introduce this tool a bit more so you can quickly get started with your projects.
It's a free PDF guide containing every Raspberry Pi Linux command you should know!
Download now
If you are looking for exclusive tutorials, I post a new course each month, available for premium members only. Join the community to get access to all of them right now!
Getting started with VS Code on Raspberry Pi
Overall, VS Code is an intuitive text editor, and getting started with it shouldn’t be too complicated (not like some IDE where you need a degree to create a text file). But it still includes many features, so let me walk you through the most important ones.
Interface overview
I think that the developers have done a great job to keep the default interface pretty simple by default. Many features are available, but they are mostly hidden when you open the tool for the first time.
It's a free PDF guide containing every Raspberry Pi Linux command you should know!
Download now
So if your goal is just to write a few Python scripts on your Raspberry Pi, you can get started right away. Here are the main parts you’ll see when you open a file:
- The top menu: it’s similar to those you have with Notepad++ or other basic editors. It gives you access to the main features (open, save, search, etc.).
- Then, I think you have three columns by default:
- The left menu: That’s where the icons are in the left bar on my screenshot. They give you access to the most important features I’ll explain later (search, source control, extensions, …).
- A column depending on which left menu element is active: For example, if you click on the search icon, a search engine will show up in a column inserted between the left icons and the text file.
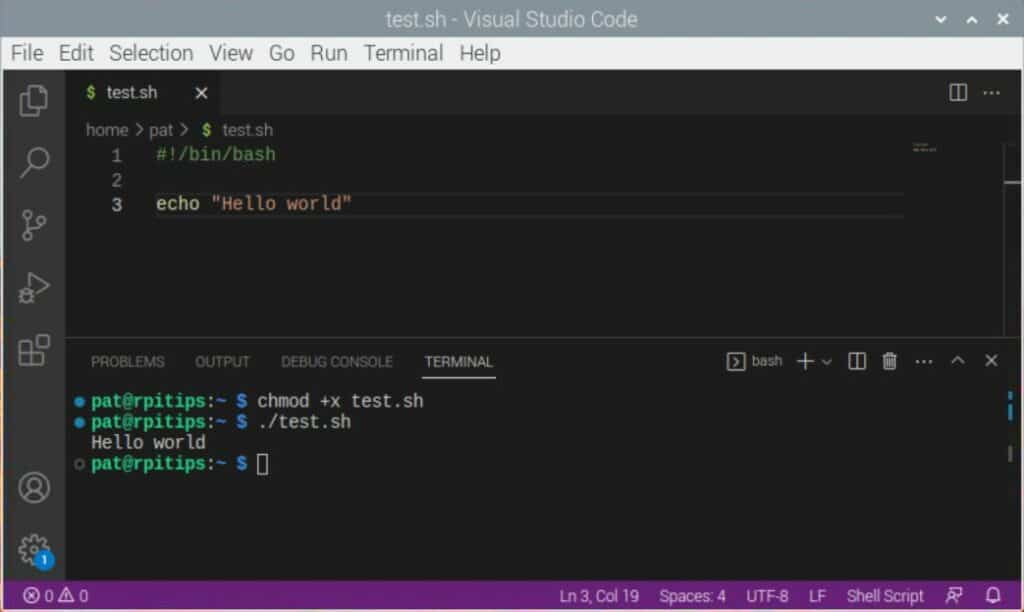
- Your code files: Then, the majority of the screen is available for your scripts. You can have as many as you want open at the same time (one tab for each file). You can split the view to see several files at once.
- The bottom line: The purple one on my screenshot. It gives you some basic information (like line number, script format, etc.), but some other features will also be added there if you enable extensions.
You can then play with the “View” menu to add optional windows. For example, in my screenshot, I enabled the “Terminal” window, allowing me to type Linux commands (and run my bash script) directly from the editor.
To be exhaustive, the features available in the left menu are:
- Explorer: Where you can see a list of the files. In general, you’ll work on one project, with all files in one folder, and you can have an overview of the project’s files here to be able to open them quickly.
- Search: A search engine. It works very well, especially if you are looking for something in your whole project.
- Source control: if you use Git or SVN, you can control everything from the editor directly.
- Run & debug: Probably not very useful for Raspberry Pi projects, it depends on which language you use and the complexity of your code.
- Extensions: This is really powerful. Not only does VS Code come with many features by default, but there is also a kind of app store here where you can find and install additional extensions from the marketplace (more details later).
- Account: It’s now possible to have an account and sync your files and settings across several computers.
- Settings: Maybe do a quick tour there on the first run to see if there is anything you need to change in the default settings (font, tab size, shortcuts, etc.).
So, it can be as simple or advanced as you want or need. Not all features or options are enabled by default, which is good. Let’s talk a bit more about the extensions part, which is very interesting and not available with most other editors.
Extensions
We are used to having app stores now, on smartphones, operating systems, or web browsers. But for a text editor, it’s not that common.
In Visual Studio Code, you can click on the Extensions icons in the left menu to access a list of additional features that can be added to it: languages support, version control, customization, etc.
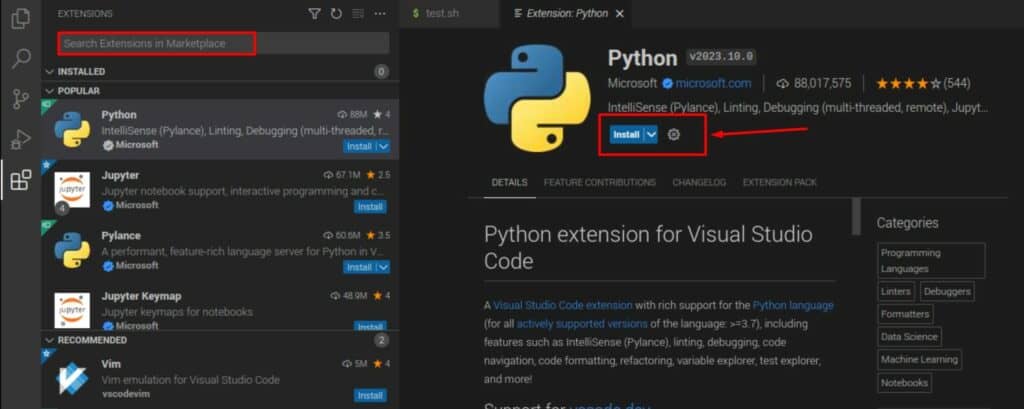
There is a search engine available to quickly find something you need, but the editor will also suggest some. In my example, I got Python and Jupyter selected, which seems pretty smart.
The Python extension will allow you to use the “Run & debug” feature for your Python scripts, have better code formatting and analysis, and many other options for your Python code.
I generally install the main extension for each language I use, some customization extensions (more on that in the next part), and various tools I find useful (for example, I have one that parses my code for //TODO comments and shows them all in one place).
It’s really nice to have this available. If there is one feature you miss from another editor, you’ll likely find it there. Use the search engine to find anything you dream of, it probably already exists.
Customization
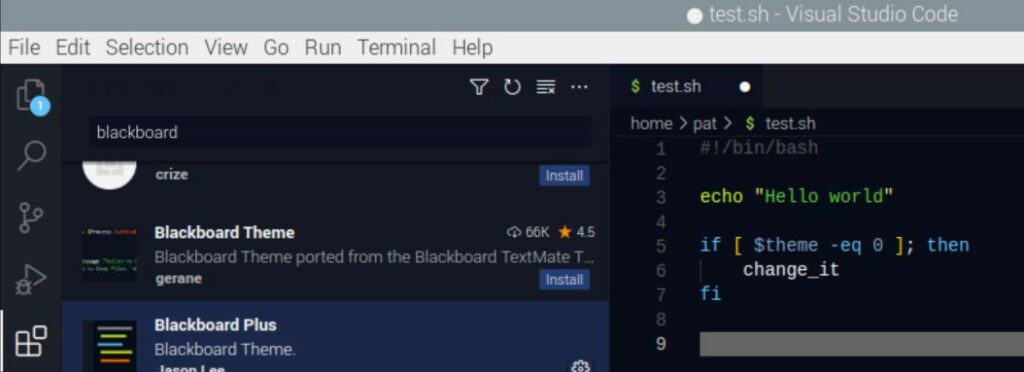
By default, Visual Studio Code has already many options you can play with in the settings, but you’ll also find several extensions to customize the style of your editor. You can find entire themes in the extensions, to completely change the way the editor looks on your system.
I generally install the “Blackboard Plus” extension that turns the interface to a dark blue and changes the syntax highlighting a bit, but feel free to search “theme” in the extensions, and test the ones that look interesting to you:
Remote development
A quick word about remote development with Visual Studio Code. It’s kind of a “buzzword”, but it can be useful with a Raspberry Pi. The idea is to work from your computer but run scripts on the Raspberry Pi remotely.
As far as I can see, there are basically two ways to do this:
- Full remote development: you do everything from the computer. You write and run scripts on the Raspberry Pi from your main computer.
- Remote writing, local execution: you write code on your main computer, and then transfer it to the Raspberry Pi to run it (or schedule it).
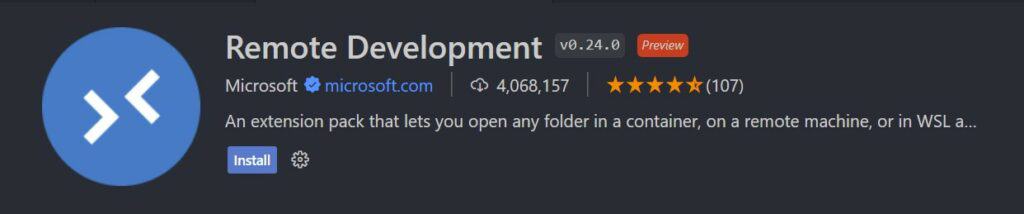
For the first case, there is a pack with 4 extensions available and promoted in the extensions list (Remote Development), you may not need all of them, but that’s the easiest way to get started. It will connect via SSH to transfer and execute the scripts.
I don’t use it, so I don’t have any good feedback about it. I just find it too complicated because generally, the only thing I want is to write the code from my computer and have it synchronized to the Pi, that’s why I use this other one instead:
It’s really simple to use (a bit less to set up, but not that hard).
You configure it for each project (folder), if you want to have the files synced to another Linux server (your Raspberry Pi). Each folder can have a different configuration file with the destination server, login, and password.
Once done (only one time for each folder), each time you save a file (CTRL+S) on your computer, it’s immediately synced to the Raspberry Pi. You can’t run the script from the computer directly, but it’s available on the Pi, so if you use SSH, or if it’s a web server, it’s very convenient.
I do this for all my small projects (when I don’t use some kind of version control system). It’s maybe not the best practice, but it works well for me. Pick the option you prefer (or just do everything from the Pi!).
And if you want to learn more about text editors and programming on Raspberry Pi, here is a list of articles you might be interested in:
- The 7 Best Text Editors for Programming on Raspberry Pi
- Python on Raspberry Pi: The Top 5 Libraries for Every Developer
- How to Learn to Program in Python with a Raspberry Pi?
- Getting Started with C++ on Raspberry Pi (Guide & examples)
Also, my goal wasn’t to write extensive documentation on how to use Visual Studio Code here, just to give you a quick overview and some tips for usage on a Raspberry Pi. Apart from that, you can check their official documentation here, where they explain all the features in detail.
Once installed, using it on a Raspberry Pi is no different from using it on a PC or Mac.
Whenever you’re ready, here are other ways I can help you:
The RaspberryTips Community: If you want to hang out with me and other Raspberry Pi fans, you can join the community. I share exclusive tutorials and behind-the-scenes content there. Premium members can also visit the website without ads.
Master your Raspberry Pi in 30 days: If you are looking for the best tips to become an expert on Raspberry Pi, this book is for you. Learn useful Linux skills and practice multiple projects with step-by-step guides.
The Raspberry Pi Bootcamp: Understand everything about the Raspberry Pi, stop searching for help all the time, and finally enjoy completing your projects.
Master Python on Raspberry Pi: Create, understand, and improve any Python script for your Raspberry Pi. Learn the essentials step-by-step without losing time understanding useless concepts.
You can also find all my recommendations for tools and hardware on this page.