Getting Started With Volumio On Raspberry Pi (Media Player)
Volumio is a great application that can turn your Raspberry Pi into a media player. The company sells hardware, but they also offer their OS for free and the Raspberry Pi is fully supported. Want to give it a try? Just follow this tutorial for the step-by-step instructions.
Volumio OS is now listed in Raspberry Pi Imager, which would be the easiest way to install it on a Raspberry Pi. It’s a lightweight operating system and can run on any Raspberry Pi model.
Let’s get started, and in a few minutes you’ll have your own music player set up, enjoying all the nice features included in this tool.
If you’re looking to quickly progress on Raspberry Pi, you can check out my e-book here. It’s a 30-day challenge where you learn one new thing every day until you become a Raspberry Pi expert. The first third of the book teaches you the basics, but the following chapters include projects you can try on your own.
Prerequisites to run Volumio on Raspberry Pi
- Any Raspberry Pi model: any model can run Volumio, it’s a light operating system, so there are no mandatory requirements. I would just recommend a standard-sized model (like a Raspberry Pi 4 or a Raspberry Pi 3B+), so you can plug your speakers into the jack port (no jack on the Zero).
- Storage: just use a large SD card if you plan to keep local media files (this one is great), if not, any SD card is fine (I test most of them here if you need some recommendations)
- Option: if you already have your media files on external storage, or plan to keep a very large volume of files in the future, you can plug a USB drive into your Raspberry Pi and store everything on it. Volumio can’t boot on USB for now, so no need to have a fast drive, anything with enough space will do the job.
- Option: if you already have your media files on external storage, or plan to keep a very large volume of files in the future, you can plug a USB drive into your Raspberry Pi and store everything on it. Volumio can’t boot on USB for now, so no need to have a fast drive, anything with enough space will do the job.
- Optional: when it comes to audio projects, there is always a giant gap between the cheapest setup and the best audio quality. If you want better audio, you’ll probably need some kind of DAC. Several expansion boards (or HATs) are available for Raspberry Pi, here is an example on Amazon.
- A good power supply: Finally, try to use the official power supply for this project, especially if you use a Raspberry Pi 4, have a USB drive or any HAT plugged in (I explain why in this article).
Warning: USB boot is still not supported with Volumio!
If you want to use and USB drive to store your files, you have to install the system on an SD card and plug an additional USB drive for extra storage later, but you can’t boot from it (you’ll likely get a black screen if you try: “Busybox issue, can’t access tty: job control turned off“).
For your information, I did the tests for this article with this configuration:
- Raspberry Pi 4 (4 GB).
- Raspberry Pi OS with Desktop (Bullseye, 64-bit) installed on this SD card.
- My usual monitor and my favorite Raspberry Pi keyboard (links to my reviews if you need one).
Install Volumio on the Raspberry Pi
As mentioned in the introduction, Volumio is now available within Raspberry Pi Imager, so the installation steps are straightforward:
- Install Raspberry Pi Imager and start it.
- Find Volumio in the OS list.
- Select your SD card in the storage list.
- Click on “Write” to start the Volumio installation.
Need more guidance? No worries, I’ll explain each step in the following sections.
Get Raspberry Pi Imager
Raspberry Pi Imager is the application created by the Raspberry Pi manufacturer to easily install or reinstall an operating system on the Raspberry Pi. It includes all the systems that are supported and have been tested by them.
Volumio is one of them, but first, you need to install Raspberry Pi Imager on your computer if you don’t have it already.
It's a free PDF guide containing every Raspberry Pi Linux command you should know!
Download now
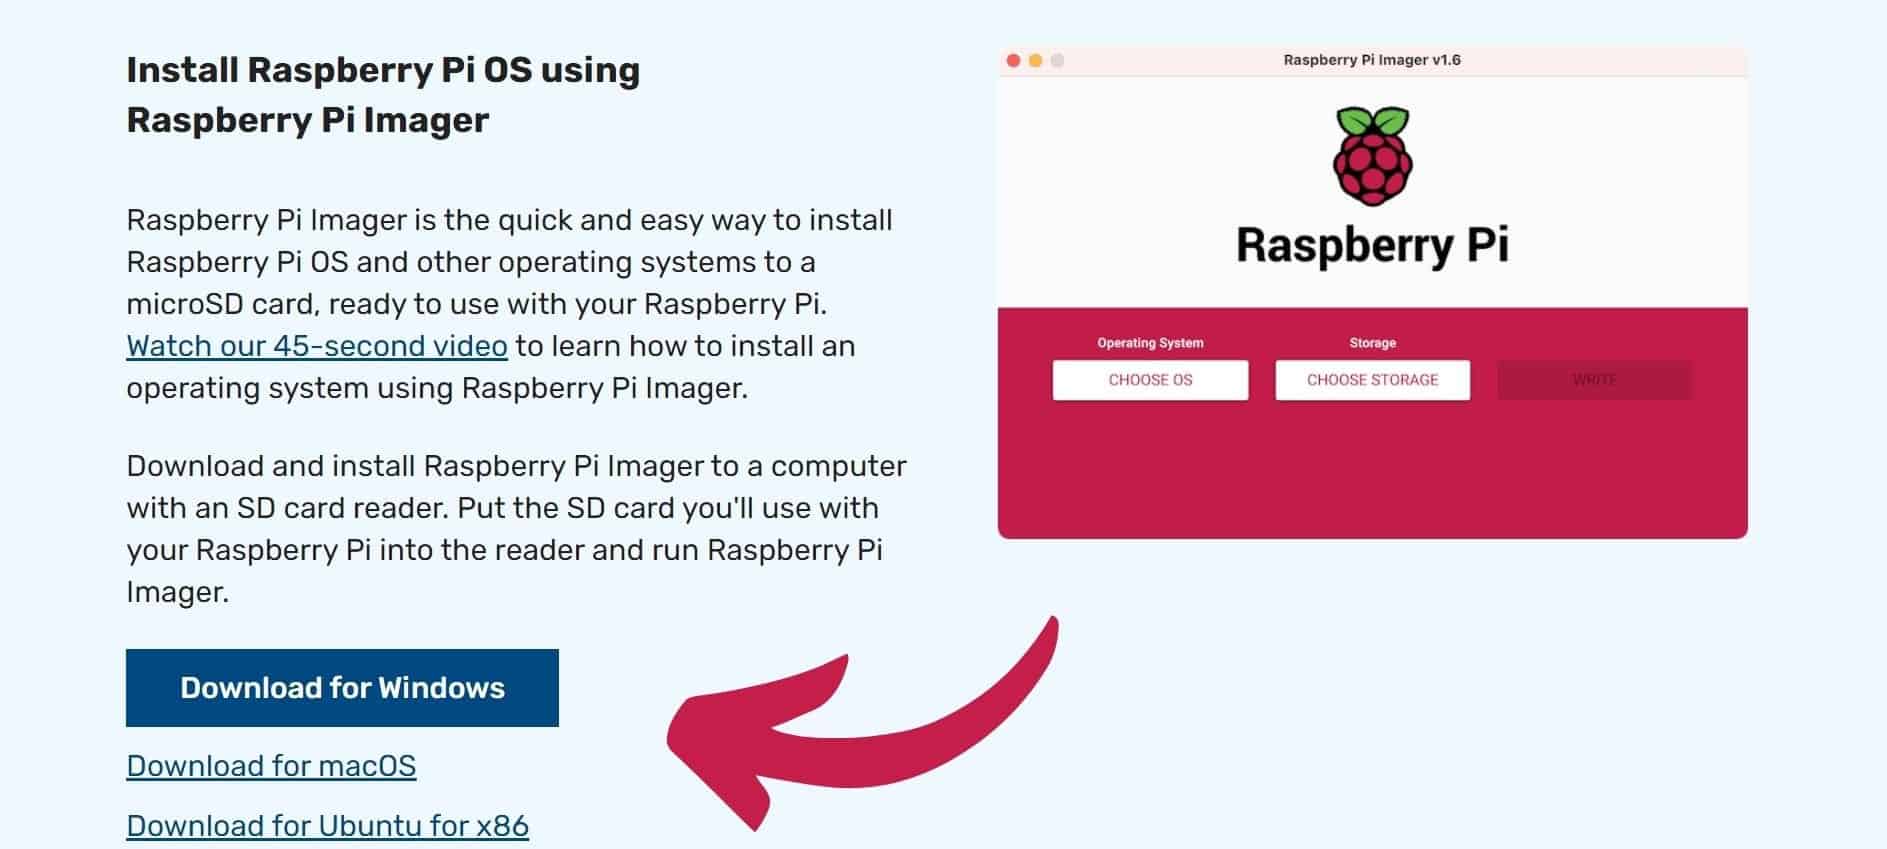
- Go to the Raspberry Pi official website.
- Open the software page, and find “Raspberry Pi Imager” there.
- Download the version corresponding to your computer operating system.
It’s available for all operating systems, you can even use it on a Raspberry Pi if you don’t have a traditional computer. - Once downloaded, install it on your system (a double click on the file should start the installation in most cases).
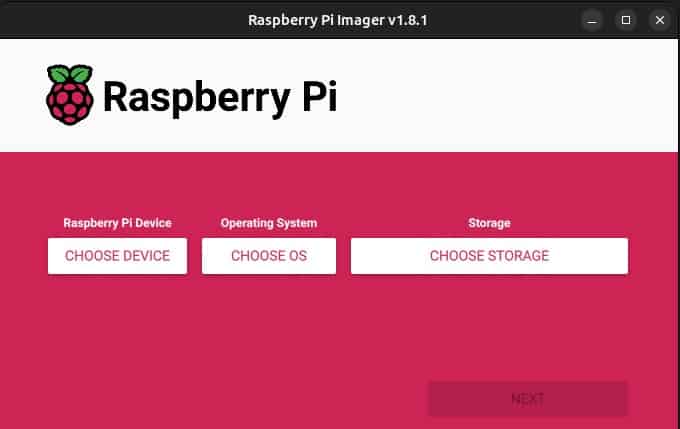
After a few seconds, the app is added to your main menu and ready to use, you can start it and should get a window looking like this:
I’ll now explain how to use it to install Volumio on your Raspberry Pi.
If you need more details or guidance about Raspberry Pi Imager, I have a complete tutorial here. Note that you can also use the network boot from the Raspberry Pi to install an operating system from the Raspberry Pi directly if you don’t have a computer or any system installed on the Raspberry Pi.
Flash Volumio to the Raspberry Pi storage
Once Raspberry Pi Imager is installed, the rest of the installation process is straightforward and similar to any other operating system:
- Start Raspberry Pi Imager.
A window shows up with 3 big buttons: “Choose OS”, “Choose Storage” and “Write”. - Click on “Choose OS”.
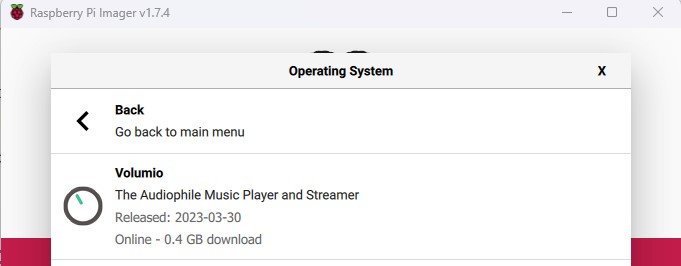
In the menu, go to “Media Player OS” > “Volumio”.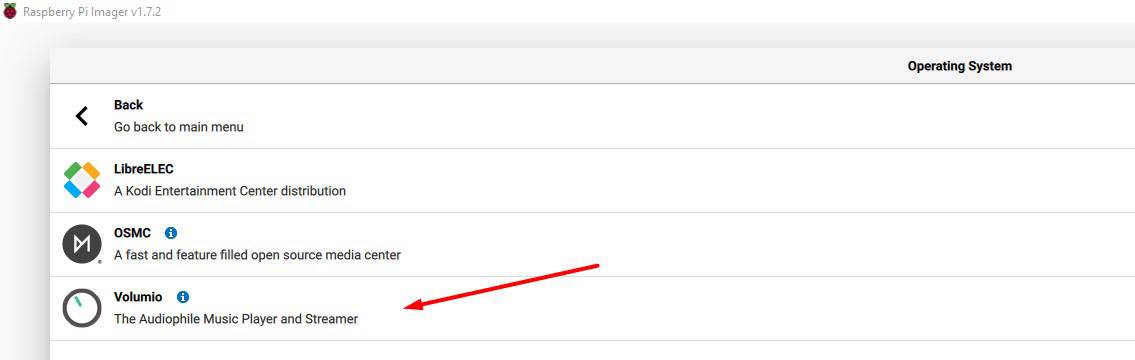
- Pick the latest version available (there was only one listed at the time of writing).
- Then insert your SD card into your computer and click on “Choose Storage” and select your SD card in the list.
If you can’t read a micro-SD card on your computer, you may need some kind of adapter (like this one on Amazon). - Finally, click on “Write” to start the installation.
The Volumio image is small (about 0.4 GB), so downloading it and copying the files to the SD card should be pretty fast. Wait a few minutes, and you should be ready to move to the next part.

Join Our Community!
Connect, learn, and grow with other Raspberry Pi enthusiasts. Support RaspberryTips and enjoy an ad-free reading experience. Get exclusive monthly video tutorials and many other benefits.
Learn moreFirst start
You can now insert the SD card into your Raspberry Pi. Power it on and wait a few seconds for the first boot to complete.
On the first boot, the system will resize the system partition to fit your SD card size, and you’ll only get a prompt on a black screen. There is no (desktop) interface with Volumio, so follow the steps below to get started.
Optional: Wi-Fi configuration
If you don’t have an Ethernet connection for your Raspberry Pi, you need to configure the Wi-Fi before anything else. As everything with Volumio will be done from the web interface, you should do it on the first boot.
Let the Raspberry Pi boot, and follow these instructions:
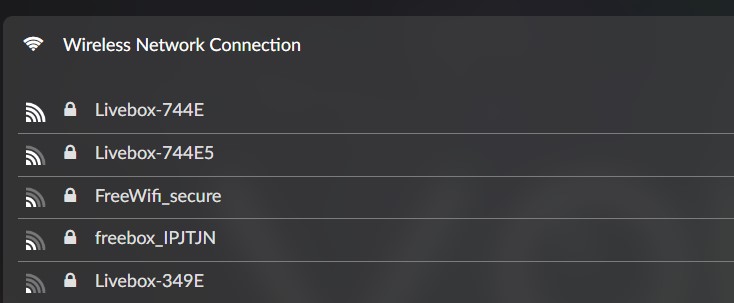
- From your computer, connect to the Volumio Wi-Fi network.
There is no password (on old versions it’s volumio2 for your information).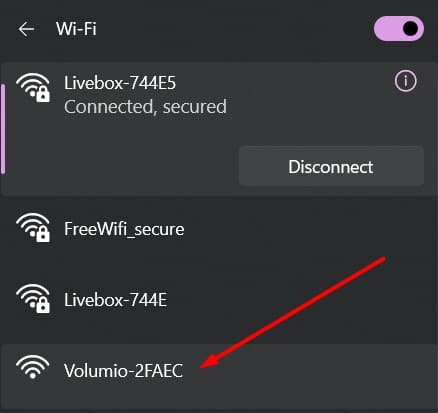
- A web page will open with a configuration wizard.
If it doesn’t open automatically, you may need to click on the link in your network list: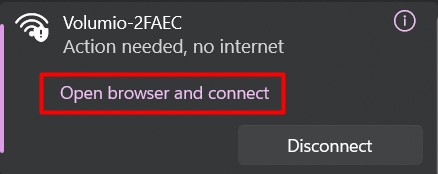
- Follow all the steps and enter your Wi-Fi settings.
You can keep most of the default values. The most important one is to pick your SSID and type the password, all the other options can be changed later. - Once finished, Volumio will apply the configuration and restart in normal mode.
You’ll switch back automatically to your usual Internet connection.
Access the Volumio interface
Whatever network connection you use (Wi-Fi or Ethernet), you can now access the web interface to start the configuration:
- Get the Raspberry Pi IP address: If you have a monitor on the Raspberry Pi, the IP address is mentioned at the end of the boot, just before the login prompt.
If you can’t see it, you can use one of the methods explained in this other tutorial to find it: How to Find the Current IP Address of a Raspberry Pi? - Open a web browser, and type the Raspberry Pi IP address: You can use HTTP, so it would be something like http://192.168.1.10.
Your browser may switch to HTTPS, make sure it’s HTTP if it doesn’t work.
You should get something like this: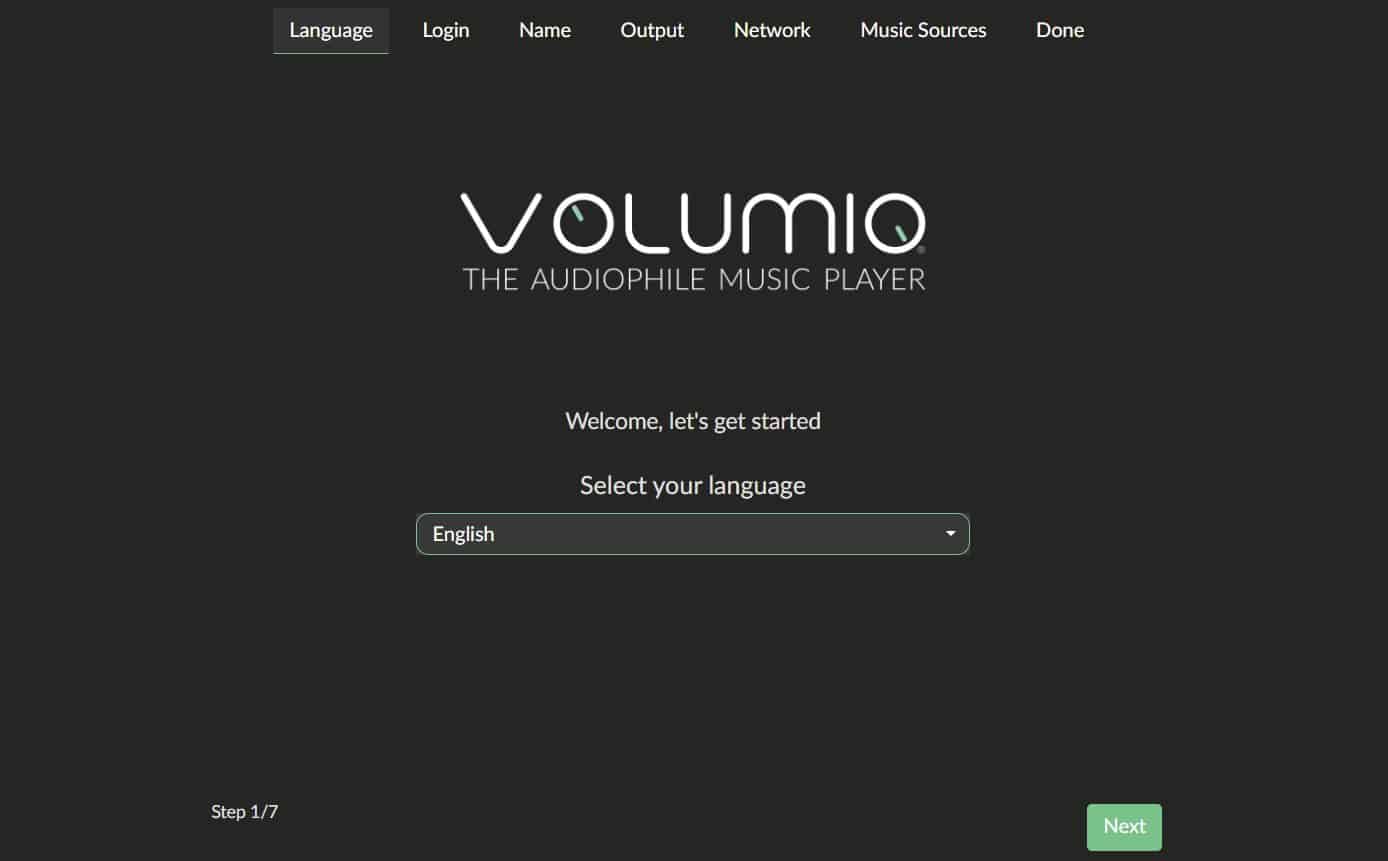
- Answer the questions to complete the installation.
You don’t need to enable anything here. No account is required to get started, I basically clicked “Next” on each page, keeping all the defaults.
Accept the terms of service and you’re ready to go.
You should get access to the full interface now, with the media player taking most of the space, and a menu available on the left (icon in the top-left corner).
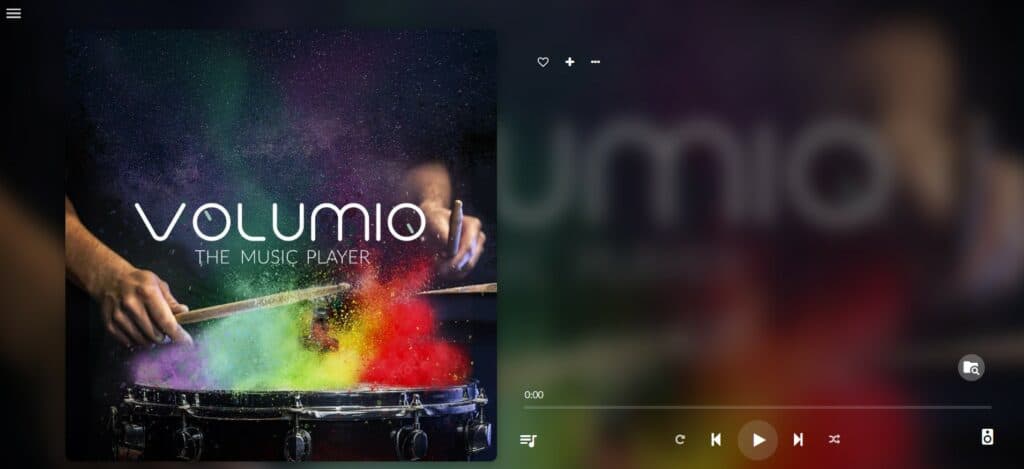
From there you can control your media player. It’s pretty intuitive, so I don’t think I need to explain much at this point. Click on the “Browse” icon in the bottom-right corner of your screen to access your local files, web radio, or media servers.
By the way, here is another article you might be interested in if you’re looking for an audio player on Raspberry Pi: How to Install MoOde on Raspberry Pi (Beginner’s Guide).
It's a free PDF guide containing every Raspberry Pi Linux command you should know!
Download now
It's a free PDF guide containing every Raspberry Pi Linux command you should know!
Download now
Volumio configuration
Let’s focus on the left menu now. That’s where you’ll find everything else, the advanced configuration and system options. I’m listing the items in the order I think you should explore them, not necessarily in the same order as they are listed in the menu.
System settings
The name is self-explanatory, it’s basically the main configuration.
On this page, you can configure:
- The interface language and your timezone.
- General settings, like the host name.
- Check the system version and configure system updates.
- Tweak a few other things (privacy and legacy settings for example).
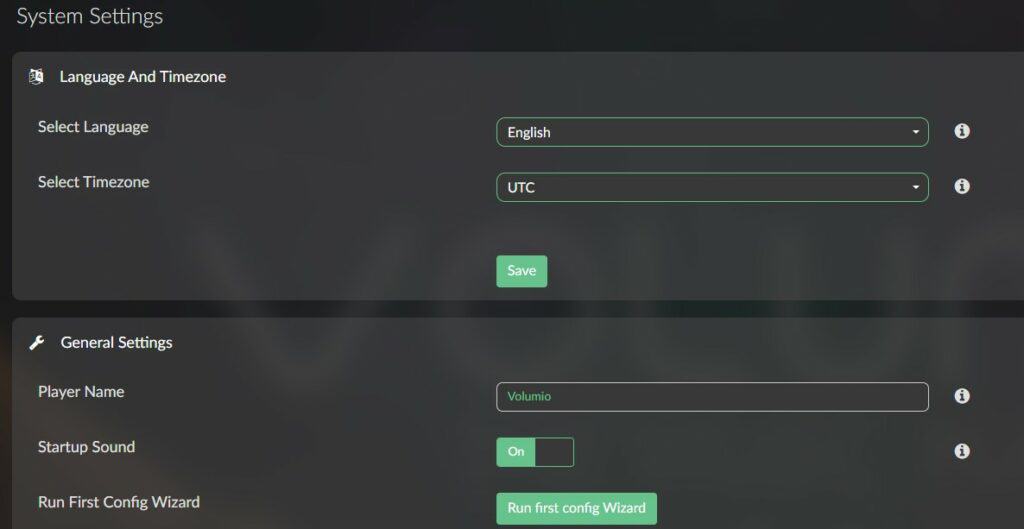
Scroll quickly through these options and see if there is anything you should change. In most cases, the default should be fine to get started, but just in case.
Network settings
Your network settings should already be pretty good. You either use an Ethernet cable with your DHCP taking care of everything, or you configured the Wi-Fi on the first boot, following the instructions I gave you above.
But you can use this page to switch from Ethernet to Wi-Fi now that the system is installed, or set a static IP address (which is probably a good idea if your DHCP tends to assign a random address every day).
Volumio has also a hotspot enabled by default when you use Ethernet, you can change the options on this page.
Plugins
One nice feature about Volumio is that extensions are supported. Like with Kodi or some TVs, it’s possible to add new features by installing plugins from their marketplace. There are not a ton of apps available, but it’s pretty useful anyway.
Warning: A free account is required to view and install extensions. If you are not yet connected (or don’t have an account), click on “My Volumio” in the left menu, and signup or log in from there.
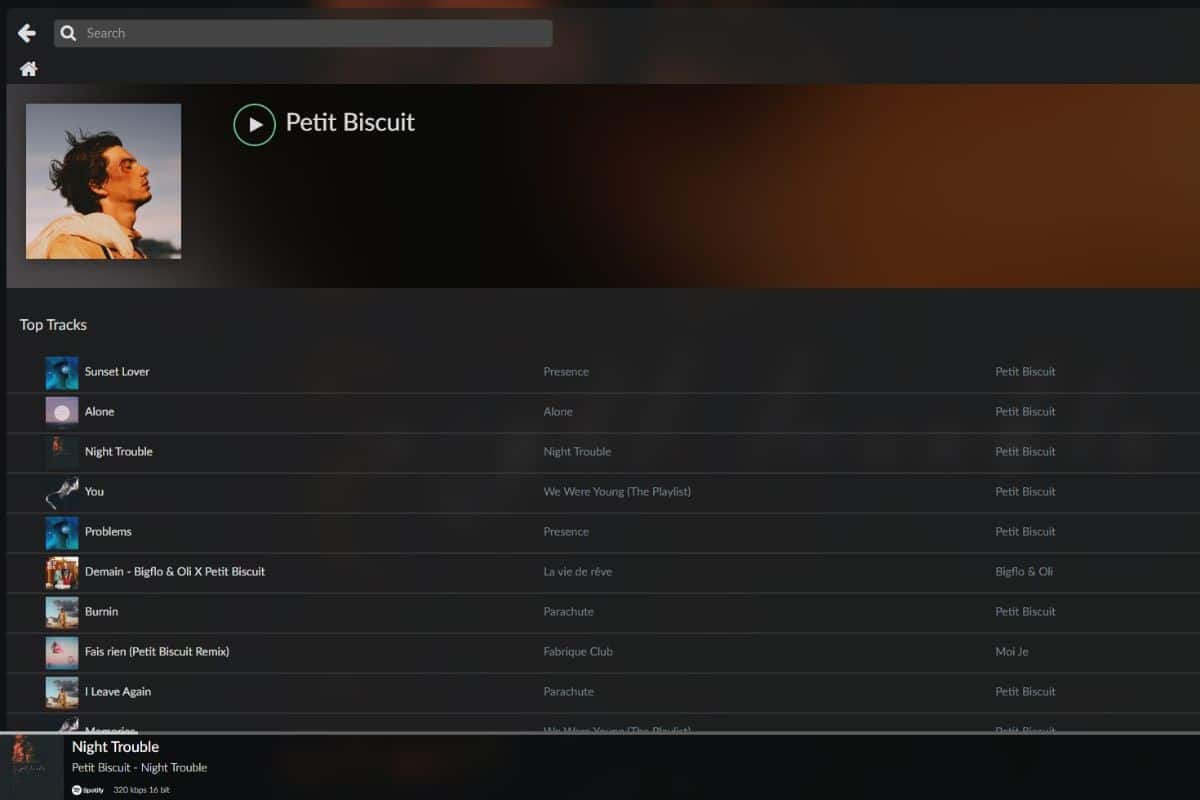
You’ll then have access to some plugins, like media services (Spotify or SoundCloud for example), that will then be accessible via the Volumio interface:
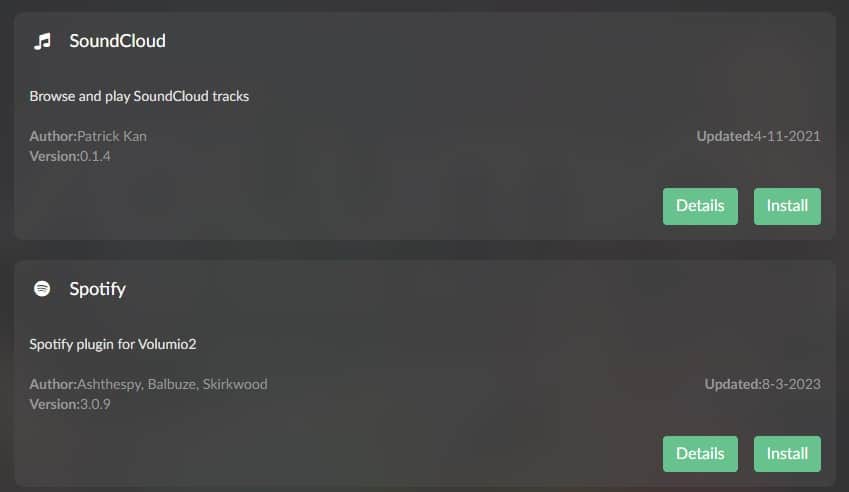
I tried Spotify, it installed in one click. Then you need to fill in your Spotify username and password to access the library (Spotify Premium account required).
Once done, you’ll get a new icon added in the “Browse” menu:
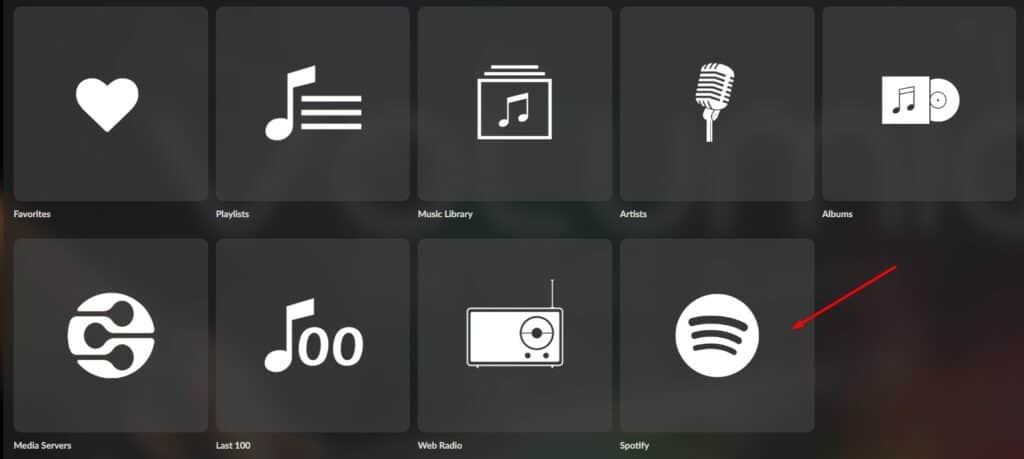
From there, any song or playlist you liked on your Spotify account is accessible:
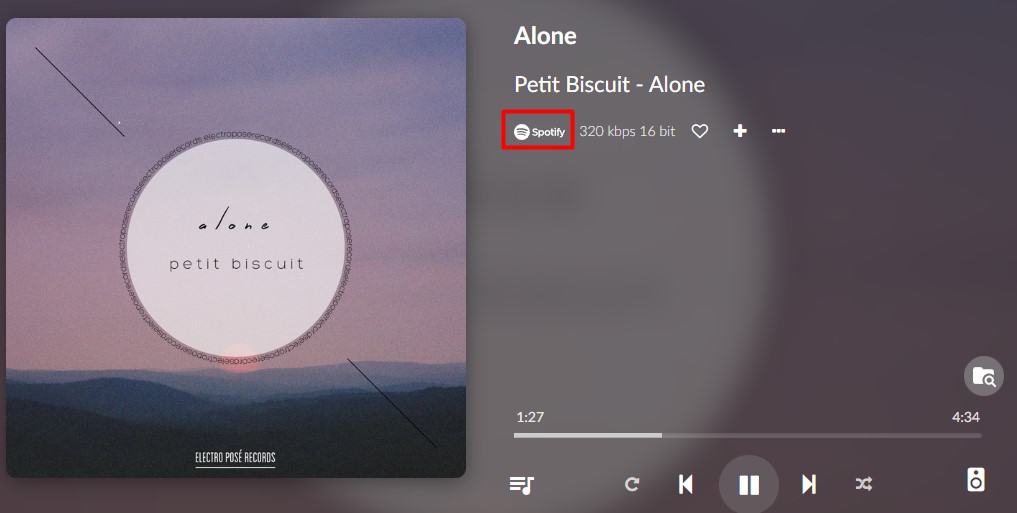
It’s well-integrated, it looks like a native feature once the plugin is installed. I didn’t experience any issues playing songs and playlists from Spotify. Good job!
Sources
Then, you have a few other features I will list quickly. You can always check their user manual for more detail. I didn’t use Volumio a lot, so it’s probably a better source of information if you need to set up something specific.
Anyway, under “Sources”, you can connect a network drive and configure advanced options (like DLNA, Bluetooth input, etc.). You can also disable most options from the browse menu if you don’t use local sources.
That’s also where you’ll find your USB drive with your media files if you have one. You need to add it as a source before you can play songs from it.
Playback options
Finally, in “Playback Options”, you can change your sound and hardware settings (output, volume, etc.). You’ll likely need to play a bit with this if the Raspberry Pi is plugged into any kind of external hardware (DAC, TV, Bluetooth speakers, etc.).
If you just use HDMI or Jack, it should be pretty straightforward (you probably already configured it in the welcome wizard).
Usage from mobile
Once Volumio is set up completely, you’ll only use the web interface, probably from a remote computer, and the good news is it works the same way from a smartphone:

So, you can have your Raspberry Pi set up with Volumio, all your files or media services, and any kind of speakers in your house. Then, just use your phone as a remote, fantastic!
It's a free PDF guide containing every Raspberry Pi Linux command you should know!
Download now
Want to chat with other Raspberry Pi enthusiasts? Join the community, share your current projects and ask for help directly in the forums.
Volumio Overview (video)
It’s getting a bit dated, but if you want to see it in action, I made a video about Volumio on my YouTube channel, here it is:
If you have projects with Raspberry Pi as a media player, here are a few other articles that you might be interested in:
- The Ultimate Guide to Install Kodi on Raspberry Pi (OSMC)
- OSMC vs LibreElec: What’s the Best Media Center System?
- The 3 Best Ways to Use Spotify on Your Raspberry Pi
- How to Install Jellyfin on the Raspberry Pi
Whenever you’re ready, here are other ways I can help you:
The RaspberryTips Community: If you want to hang out with me and other Raspberry Pi fans, you can join the community. I share exclusive tutorials and behind-the-scenes content there. Premium members can also visit the website without ads.
Master your Raspberry Pi in 30 days: If you are looking for the best tips to become an expert on Raspberry Pi, this book is for you. Learn useful Linux skills and practice multiple projects with step-by-step guides.
The Raspberry Pi Bootcamp: Understand everything about the Raspberry Pi, stop searching for help all the time, and finally enjoy completing your projects.
Master Python on Raspberry Pi: Create, understand, and improve any Python script for your Raspberry Pi. Learn the essentials step-by-step without losing time understanding useless concepts.
You can also find all my recommendations for tools and hardware on this page.