A Beginner’s Guide to Virtual Environments in Python
If you’ve upgraded to Bookworm and have used Python in your projects, you can’t have missed this change: they do everything to make you switch to virtual environments. What is this all about, and do you need to worry about it? Let me explain.
Virtual environments in Python are isolated spaces for projects. Each virtual environment has its own dependencies and Python versions. They provide a clean, conflict-free coding environment that is critical for complex projects.
If you’ve just upgraded Raspberry Pi OS or Debian and are wondering why PIP doesn’t work anymore or want to learn more about this concept, you’ve come to the right place, I’ll explain everything in this article.
By the way, if you get overwhelmed as soon as Python is required for a project, I recommend checking out my e-book “Master Python on Raspberry Pi“. It will guide you step-by-step to learn the essential concepts (and only the essential concepts) required to achieve any project in the future. Raspberry Pi without Python is like a car without an engine, you miss all the fun parts. Get 10% off by downloading it today!
Understanding the Shift to Virtual Environments
Before trying to brute force your way and find the right command to bypass virtual environments, I think it’s a good idea to take a step back to understand what has changed and how it impacts your Python projects.
What are virtual environments in Python?
After creating virtual machines to keep the main system safe, and then Docker containers to ensure compatibility, now we have to wonder about Python virtual environments. Yes, it’s the same idea. A special room for each Python project, keeping them separate, living on their own to avoid global problems.
In more technical terms, a virtual environment in Python is a self-contained directory that contains a Python installation for a specific version of Python, plus several additional packages. This setup allows you to:
- Use different Python versions: If you have different projects that require different Python versions, it’s no longer a problem.
- Have more freedom with dependencies: Each environment can have a different set of libraries installed with different versions. This prevents conflicts between project requirements.
- Avoid system issues: You can have each project running a different version and isolated libraries, so you will no longer break an old project while working on a new one.
It’s also better for developers and teamwork because it allows you to copy, share, or recreate environments under similar conditions for testing or deployment purposes. Yes, same kind of benefits as Docker.
Comparison with traditional Python setup
In traditional Python setups, libraries and dependencies are installed globally, and shared across all projects. Virtual environments, by contrast, are created specifically for each project, containing isolated and independent sets of libraries and dependencies.
It’s a bit like comparing a Jenga tower with Lego constructions.
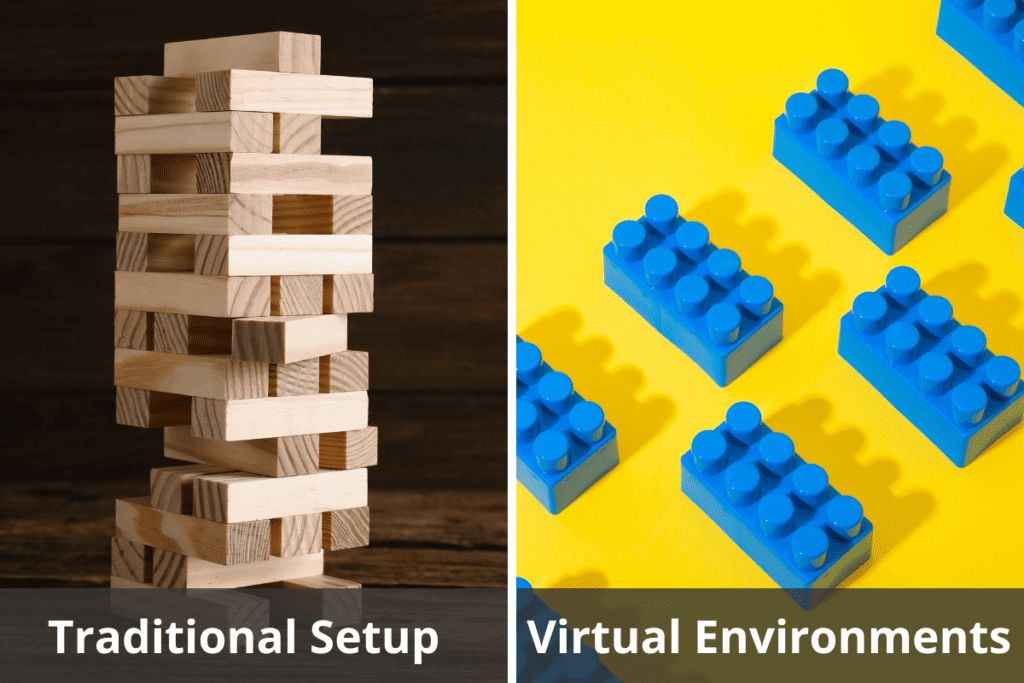
In a traditional setup, as you continue to write new projects, the structures become increasingly unstable. A Python upgrade or a library that conflicts with everything else can easily crash all your projects.
If like me, you always mix the languages syntax, download my cheat sheet for Python here!
Download now
In contrast, when you use virtual environments, your different projects are built from different sets of bricks, independent of each other. This creates a stable and controlled development environment, reducing the risk of a total meltdown.
Do I really need to use them?
Switching to virtual environments can seem overwhelming if you’re used to the old way of installing Python libraries. But in the end, it’s better for you. This method minimizes the risk of conflicts and dependency issues and provides a cleaner way to manage Python projects.
Now, I understand that if you’re getting started in Python, and just want to write 5 lines of code to make a LED blink, this might feel a bit overkill. In this case, you have a few options:
- Using system packages: it’s still possible to install Python libraries via the system package manager, so they become available on the entire system (virtual environments or not). For example, if you install the “requests” module with:
sudo apt install python3-requestsIt’ll be available in all your projects. By the way, the Raspberry Pi OS is still loaded with tons of packages like that by default, nothing has changed (so you probably already have most of them installed). - Forcing system-wide installation: If you try to install a PIP package outside a virtual environment, you’ll get an error message: “externally-managed-environment”. The system is asking you to try the previous option or create a virtual environment.
But it’s still possible to bypass that, by adding an extra parameter:sudo pip install <library> --break-system-packagesThis option is explicit, so I hope you know what you’re doing if you try it. - Creating a virtual environment: for a small-scale Python project, you can still try using a virtual environment. It’s a few more commands to remember, but it’s not that complicated. Read the next part to understand how it works.
It's a free PDF guide containing every Raspberry Pi Linux command you should know!
Download now
How to use virtual environments in Python projects
How does this work in practice? Well, it’s not that complicated. You simply create a separate folder with everything in it, and tell the system that you’re using it when you work on your Python project. Let’s get to it.
Prerequisites
If you use a recent version of Raspberry Pi OS, you should be ready to get started, everything is installed by default. But on a minimal system, especially on other distributions, I recommend checking that Python is installed, and the package ‘python3-venv’ in particular.

Join Our Community!
Connect, learn, and grow with other Raspberry Pi enthusiasts. Support RaspberryTips and enjoy an ad-free reading experience. Get exclusive monthly video tutorials and many other benefits.
Learn moreYou can check with:sudo dpkg -l | grep venv

If it’s not the case, you can install everything with:sudo apt update
sudo apt install python3-venv
Then, it’s a good practice to create a folder on your drive for each main project. But if you are only doing basic scripts, and want to group them, it’s fine to create only one, for example:mkdir /home/$USER/python

I’ll use this example, but if you have several folders for different projects, you’ll need to repeat the following steps for each of them.
If you’re new to the Linux command line, this article will give you the most important Linux commands to know, plus a free downloadable cheat sheet to keep handy.
Creating a virtual environment
The syntax to create a virtual environment is simple:python3 -m venv <name>This will create a new subfolder at your current location.
For example:cd ~/pythonpython3 -m venv rpitips

Activating and using the environment
Now, the virtual environment won’t be used unless you explicitly specify it. That’s what it’s called activation, and it can be done by running the activate script, like this:source rpitips/bin/activate
Once done, your terminal prompt will have a prefix with the virtual environment name:
If like me, you always mix the languages syntax, download my cheat sheet for Python here!
Download now

Now, all the Python commands I run from there will be executed from this environment.
Note: if you are in a different folder, you need to set the full path to the activate script, for example:source /home/pat/python/rpitips/bin/activateOrsource ~/python/rpitips/bin/activate
Working in virtual environments
If you are used to Python using a traditional setup, you’ve already completed the most complicated part. From there, it’s basically as if you were using a traditional setup, without a virtual environment.
- You can create your Python files in this project folder, as usual.
nano myscript.py - You can run PIP commands, which will only apply to this virtual environment.
pip install <lib-name> - And, if you run a Python command from there, it will use this environment.
python myscript.py
As an example, let’s say I want to use the library “emoji”, that allows you to print emojis in your scripts.
- A basic script may look like this:
import emoji
print(emoji.emojize('Python is :thumbs_up:')) - The library is not installed system-wide, but I can add it to my environment with:
pip install emoji - Then my script is working:
python3 emo.py
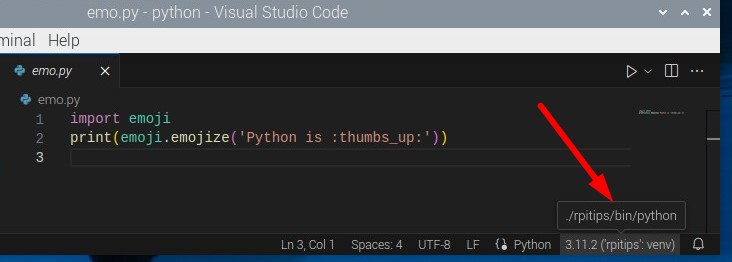
You just need to make sure you’re inside the environment to run this script. As the library is only available in it, it won’t work if you close the session and run it directly, even if you run it from the same folder:

That’s why it’s important to stay organized and have a clear structure, either with one folder per project, one folder for your small scripts, or simply by installing libraries system-wide when they are available.
Deactivating and switching between environments
To exit a virtual environment, you’ll simply use this command:deactivate

As you can see, the prefix disappears, and you’re no longer running commands in this environment. You can switch to another one by running the corresponding “activate” script if needed.
It's a free PDF guide containing every Raspberry Pi Linux command you should know!
Download now
Want to chat with other Raspberry Pi enthusiasts? Join the community, share your current projects and ask for help directly in the forums.
Virtual environments in practice
I’ve explained how you can create and use virtual environments for your Python projects via the terminal, but it’s also possible to use them from your favorite text editors.
Thonny
Thonny is a basic text editor, that is often used for Python projects, especially on Raspberry Pi, as it’s preinstalled on Raspberry Pi OS.
The features are pretty limited, but you can still change the default interpreter to use a virtual environment:
- Open Thonny as usual.
- Click on the Python interpreter in the bottom-right corner.
- You’ll get a list with the Python versions installed on your system, but you can also add a binary from a virtual environment:
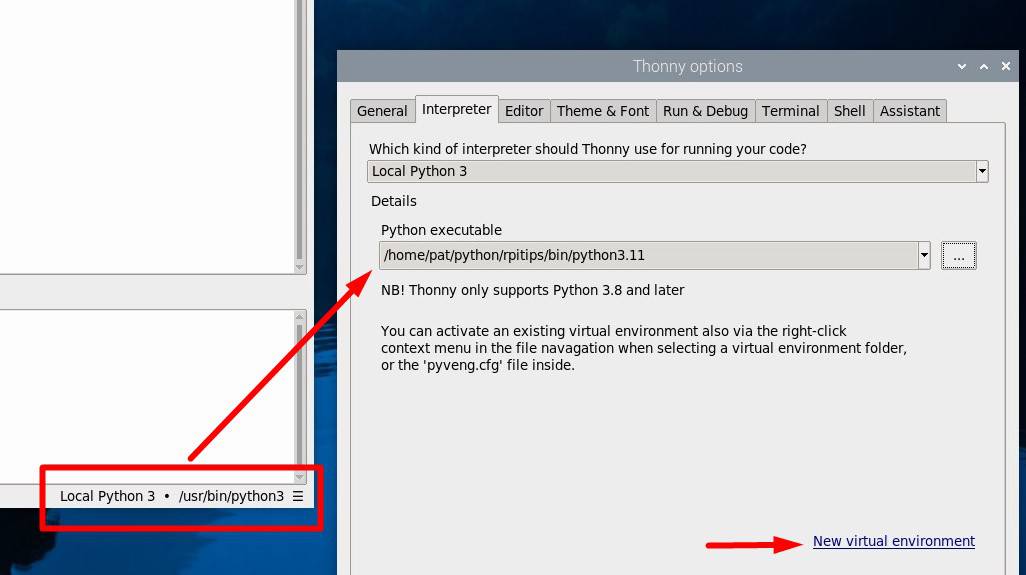
- With a recent version of Thonny, you can even create a new virtual environment from there.
If you don’t know, Thonny has built-in features to handle additional libraries. If you go to “Tools > Manage packages”, you can install PIP modules, that will be installed automatically in the current environment:
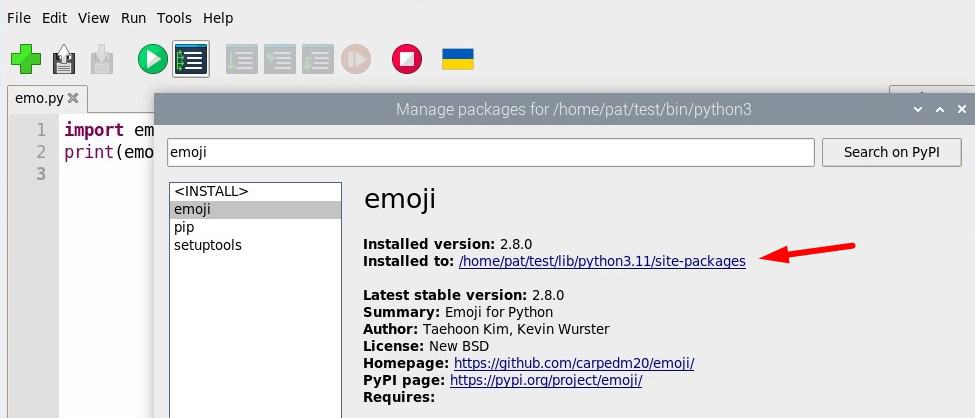
It doesn’t work via “Manage plug-ins” (it tries to install them system-wide), but it’s working from this window.
I have an entire tutorial about Thonny and its hidden features, make sure to check it if you’re a bit lost there.
Geany
Geany is a bit more evolved, with more features, but it can be a bit overwhelming.
I didn’t find the perfect way to use virtual environments with it, but I think you can go to “Build” > “Set build commands” to change the execute command, and use the one in your virtual environment instead of the default:
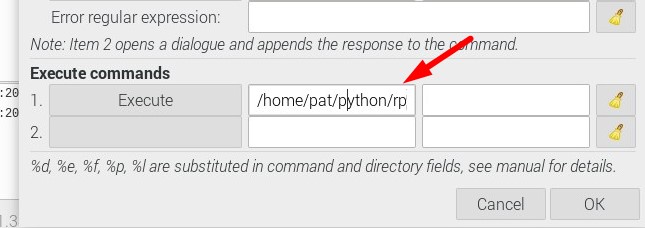
If you have several environments, you can create Geany projects and set a different command for each of them.
If you want to learn more about Geany, you can read this article: How to Use Geany on Raspberry Pi? (Full guide with pictures).
Visual Studio Code
With a more advanced editor, like Visual Studio Code, it’s even easier. If you open a folder, it will automatically detect the virtual environment inside it, and use it by default.
Note: A Python extension is required to debug and run Python scripts (the IntelliSense one for example).
You can also create a new virtual environment from an existing folder, directly from the interface. Press “CTRL+SHIFT+P” to open the palette, and search for “Create environment”:
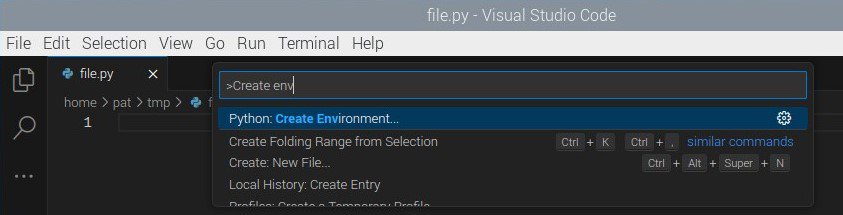
VSCode will create it in the current folder and activate it automatically.
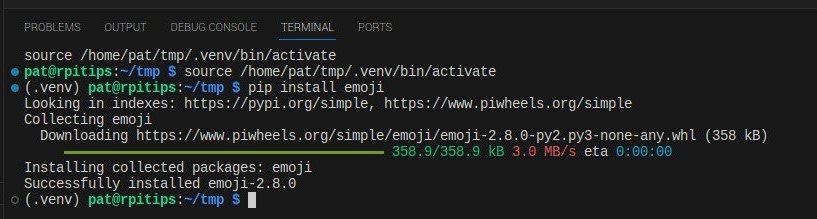
Once done, you can use the terminal window inside VSCode to install new PIP packages (the activate command is done automatically):
Now that you’re a master of virtual environments, let’s try applying this in a project while it’s still fresh in your mind:
- The Best Python GUI Libraries for Raspberry Pi to Try Out
- Getting Started With Python Games On Raspberry Pi (Pygame)
- Python on Raspberry Pi: The Top 5 Libraries for Every Developer
Whenever you’re ready, here are other ways I can help you:
The RaspberryTips Community: If you want to hang out with me and other Raspberry Pi fans, you can join the community. I share exclusive tutorials and behind-the-scenes content there. Premium members can also visit the website without ads.
Master your Raspberry Pi in 30 days: If you are looking for the best tips to become an expert on Raspberry Pi, this book is for you. Learn useful Linux skills and practice multiple projects with step-by-step guides.
The Raspberry Pi Bootcamp: Understand everything about the Raspberry Pi, stop searching for help all the time, and finally enjoy completing your projects.
Master Python on Raspberry Pi: Create, understand, and improve any Python script for your Raspberry Pi. Learn the essentials step-by-step without losing time understanding useless concepts.
You can also find all my recommendations for tools and hardware on this page.