How To Use The Raspberry Pi Camera With Python In 2024
Controlling the camera module in Python is a typical project for any Raspberry Pi owner. But with the latest Raspberry Pi OS versions and the new camera library, there have been many changes. It was time for me to write an updated tutorial, with all the steps to install and program your camera with Python, which is the goal of this article.
Since Raspberry Pi OS Bullseye, the picamera2 library is the default method to control the camera module with Python on a Raspberry Pi. It’s now a stable module, pre-installed on Raspberry Pi OS and ready to use on a fresh system installation.
We’ll start by checking your setup to ensure everything is configured properly in terms of hardware and software, and then I’ll give you a few example scripts on how to get started with Picamera2 on Raspberry Pi OS.
By the way, if you get overwhelmed as soon as Python is required for a project, I recommend checking out my e-book “Master Python on Raspberry Pi“. It will guide you step-by-step to learn the essential concepts (and only the essential concepts) required to achieve any project in the future. Raspberry Pi without Python is like a car without an engine, you miss all the fun parts. Get 10% off by downloading it today!
It's a free PDF guide containing every Raspberry Pi Linux command you should know!
Download now
Prerequisites: Raspberry Pi & Camera Installation
Here are the required prerequisites to control a camera module with Python on Raspberry Pi:
- Install Raspberry Pi OS and complete the initial configuration.
- Plug the camera module into the camera slot.
- Test the camera detection from Raspberry Pi OS.
Keep reading to learn, in detail, how to do this quickly.
Install Raspberry Pi OS
The first step is to install Raspberry Pi OS on your Raspberry Pi. If it’s your first time, or you still need some guidance, please click on the previous link to read my step-by-step tutorial.
The important thing to remember is that installing a camera and controlling it in Python has entirely changed with the latest Raspberry Pi OS version (Bullseye). If you follow this tutorial on an obsolete version (Legacy), it won’t work.
So make sure you are using the latest version of Raspberry Pi OS. I explain here how to check which Raspberry Pi OS version you use.
I’m testing this tutorial on Raspberry Pi OS Bullseye, the 64-bit version, with the desktop environment. Using the 64-bit or 32-bit edition shouldn’t be an issue, and the desktop environment is not mandatory (while recommended for debugging purposes), but make sure you are using Raspberry Pi OS Bullseye.
Complete Raspberry Pi OS initial configuration
Before going any further, make sure to complete the following configuration steps before going further in this tutorial:
- Configure the network to have Internet access: In most cases, it should work directly via DHCP. You may need to configure the Wi-Fi if you don’t have an Ethernet cable available, but that’s all.
- Do the system updates: Even when flashing the latest image with Raspberry Pi Imager, you may still be a few months behind on updates. I had like 100 updates available when testing this, and some of them were very important, as they were packages for picamera2 and libcamera, the libraries we’ll use later in Python.
sudo apt update && sudo apt upgrade -y - Enable SSH or VNC: I like to code from my computer, which isn’t mandatory, but if you have a better setup on it than on your Raspberry Pi, you might want to do the same.
Using VNC for example, allows you to copy/paste the entire code I give you in this article. This means you’ll go faster and avoid typing errors. You can also use SSH for the same reasons, especially if you installed a Lite edition of Raspberry Pi OS.
Anyway, once everything is ready on the software part, you can shut down your Raspberry Pi, and we can move to the camera module installation.
If like me, you always mix the languages syntax, download my cheat sheet for Python here!
Download now
I didn’t mention the text editors you can use for the programming section, as it doesn’t really matter (you have Nano, Thonny or Geany pre-installed in most cases). But if you want better options, you can find my 7 favorites text editors for programming on Raspberry Pi here.
Install the camera module
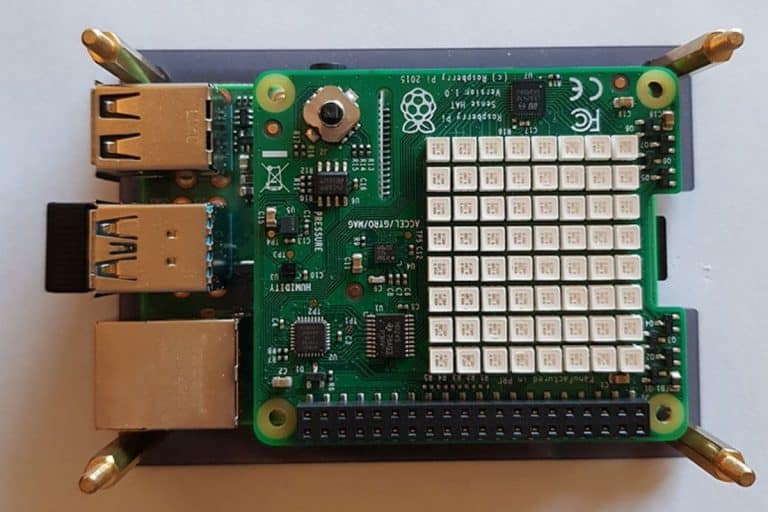
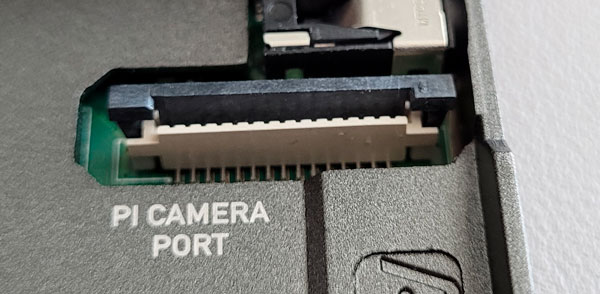
The Raspberry Pi has a specific camera port on top of it, where you can plug the camera module.
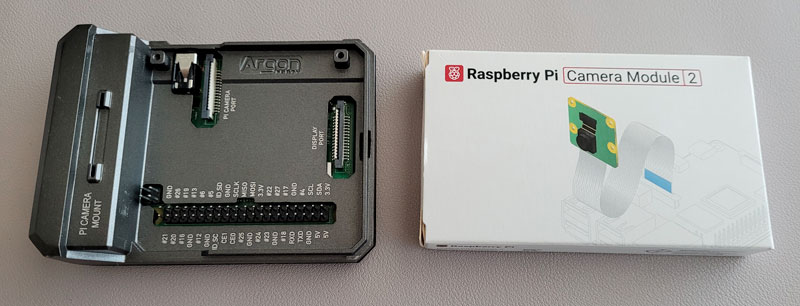
It doesn’t matter which camera module you use (I’m using the official one for this example, other options are available), but you need to plug it directly into the Raspberry Pi camera port.
On most Raspberry Pi models, the camera port is located on the side, next to the jack and HDMI output.
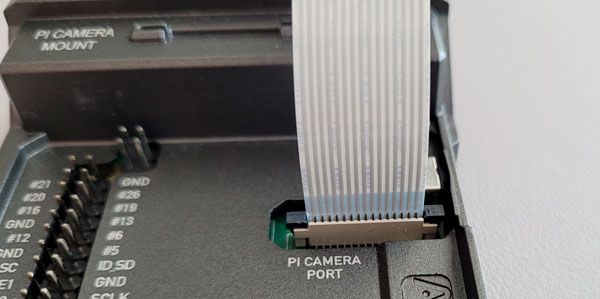
Use the ribbon provided with the camera module, and plug it into the camera port:

Join Our Community!
Connect, learn, and grow with other Raspberry Pi enthusiasts. Support RaspberryTips and enjoy an ad-free reading experience. Get exclusive monthly video tutorials and many other benefits.
Learn more- Release the camera port plastic clip (pull it up gently).
- Insert the camera ribbon cable in it.
The connectors should be facing the HDMI side, while the blue sticker is facing the USB ports (check the pictures below). - Push back the plastic clip in place to hold everything together.
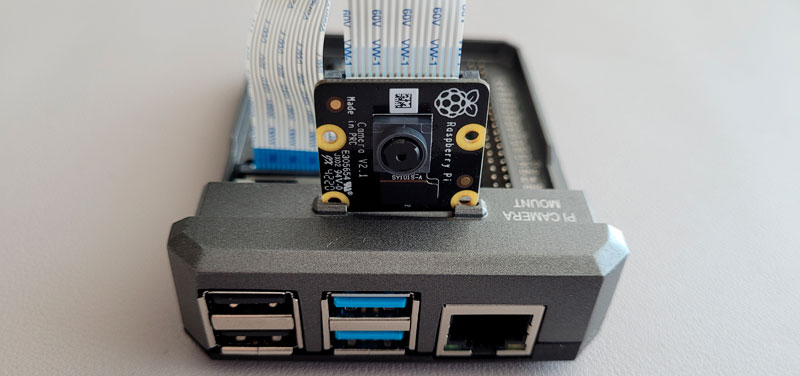
You can use a camera holder, or if you have the Argon Neo case like me (check my review here), there is a place where you can keep the camera module, so it stands correctly, but it’s not mandatory.
Power your Raspberry Pi and start it up again. The last step is to make sure the camera is detected and working as expected.
Make sure the camera is working (without Python)
Before typing any line of code, please verify that the camera is properly detected by the operating system.
On the latest Raspberry Pi OS versions, there are no longer additional steps at this point. The camera should work directly, it’s enabled by default on boot, and you can use it directly.
You can get a preview of the camera view with the command:libcamera-still -o test.jpg
Open a terminal and copy/paste this. You should get a preview like on the screenshot below, and it should create a file name “test.jpg” with the camera view.
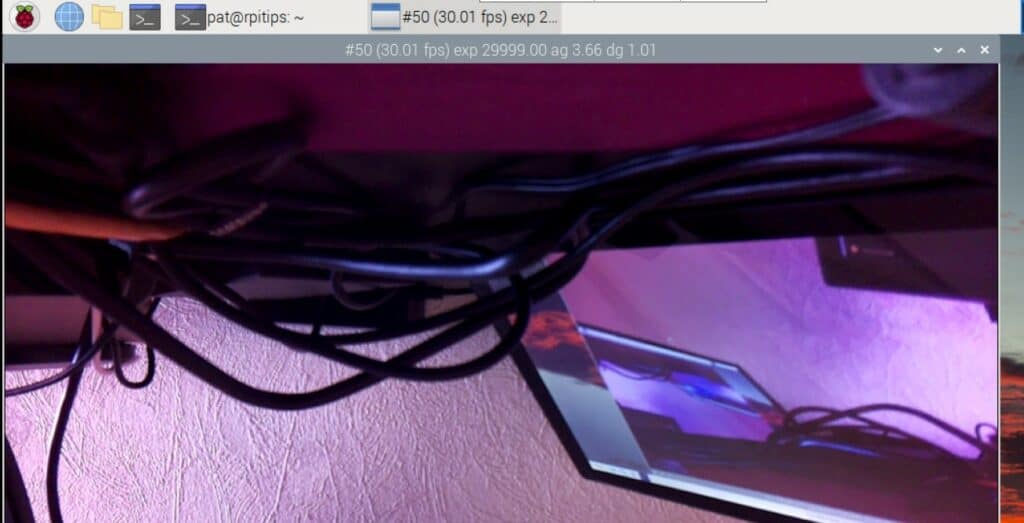
The only thing that matters here is that you can see something in the picture. We’ll play with the settings later, directly in Python (including the photo orientation). If you get something similar, it’s ok, you can move to the next part and start using Python to control it.
If you experience any issues at this stage and don’t get the camera preview, make sure to double-check everything. This step-by-step guide on how to set up the Raspberry Pi camera can also give you more details if needed, and I also have a troubleshooting article here for the camera module.
It's a free PDF guide containing every Raspberry Pi Linux command you should know!
Download now
Reminder: Remember that all the members of my community get access to this website without ads, exclusive courses and much more. You can become part of this community for as little as $5 per month & get all the benefits immediately.
Getting Started With The Raspberry Pi Camera Module In Python
Once the camera module is set up, Python can interact with it via the picamera2 library, which is pre-installed on Raspberry Pi OS.
In this section, I’ll give you some basic example scripts, so you can get started with them and understand the logic before using them in your own projects.
If like me, you always mix the languages syntax, download my cheat sheet for Python here!
Download now
Take a picture with Python
With the next version of the Picamera library (picamera2), even taking a simple picture requires more lines of code, but it’s an important step. As you’ll see later, the structure of your code will be the same for almost everything after that.
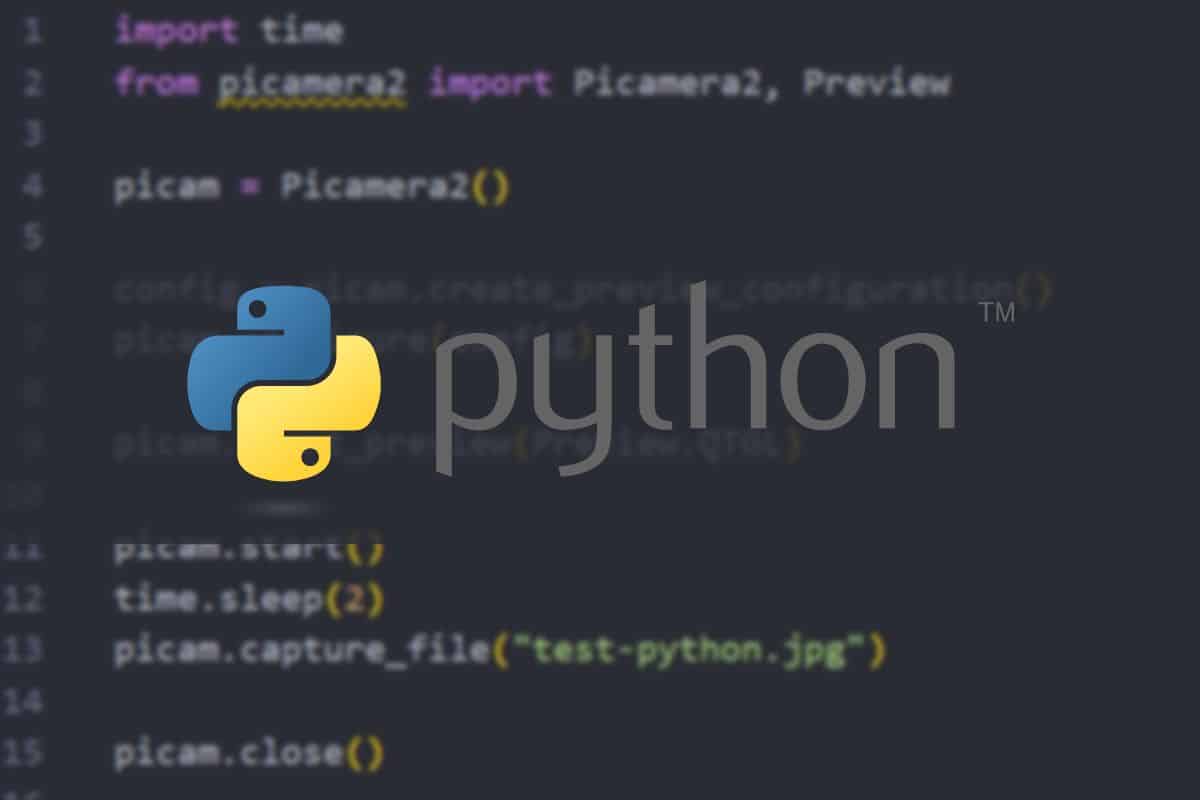
Let’s dive right in. Create a new Python script on your system (I recommended using Thonny at this stage), and copy/paste these lines into it:
import time
from picamera2 import Picamera2, Preview

picam = Picamera2()

config = picam.create_preview_configuration()
picam.configure(config)

picam.start_preview(Preview.QTGL)

picam.start()
time.sleep(2)
picam.capture_file("test-python.jpg")

picam.close()
You can use Thonny to save and run the script directly from the desktop environment.
Or save the file with your editor and run it in the command line with something like:python yourscript.py
Warning: This is not a beginner tutorial in Python, I would recommend reading a few articles first if you are new to this:
- How to Learn to Program in Python with a Raspberry Pi?
- 15 Fun Raspberry Pi Projects to Experiment with Python
Make sure you understand the basics before trying to use the camera module and the examples given here. I also have a step-by-step book to learn Python in a few days if you need more guidance. You can find all the details on this page.
So basically, here are the important steps in this first script:
- Import the required libraries. We need classes from Picamera2 (which is the main module you’ll use in all the examples). We also use the time to wait for the camera to adjust to the environment before saving the picture.
- Create a default configuration. We’ll add some variables later, but for now, the default settings are fine.
- We start the preview window (you’ll see what the camera sees on your screen) and we also start the camera.
- We wait 2 seconds (sleep) and save the picture in the current folder (“test-python.jpg”).
If everything is working as expected, you should find the “test-python.jpg” file in the same folder as your script, with the same picture seen on the preview when you ran the script.
Adjust the camera settings with Python
With the default settings, you might notice that the picture is upside/down (like on my previous screenshot), or that the picture is pretty small.
My camera module can get HD pictures, but the default settings are set to 640 x 320 pixels or something similar. Also, I want to rotate the picture to 180°, to get it in the correct direction directly.
There are two different things you can add to your code to do this, here is the code:
import time, libcamera
from picamera2 import Picamera2, Preview

picam = Picamera2()

config = picam.create_preview_configuration(main={"size": (1600, 1200)})
config["transform"] = libcamera.Transform(hflip=1, vflip=1)
picam.configure(config)- You can add configuration options inside the create_preview_configuration method to change the default settings.
In this example, I force the camera to display the preview in 1600×1200 pixels, instead of the default option. I’m using the same configuration for the recording, so the JPG file will be the same size. - You can use libcamera to rotate the picture.
Don’t forget to import it at the beginning, and then you can use the “Transform()” method to flip the picture either vertically, horizontally or both.
The entire script for this example looks like this:
import time, libcamera
from picamera2 import Picamera2, Preview

picam = Picamera2()

config = picam.create_preview_configuration(main={"size": (1600, 1200)})
config["transform"] = libcamera.Transform(hflip=1, vflip=1)
picam.configure(config)

picam.start_preview(Preview.QTGL)

picam.start()
time.sleep(2)
picam.capture_file("test-python.jpg")

picam.close()
You can change other settings by using the same strategy, you’ll find all the details in the documentation linked at the end of this article. I just want to show you some examples because it’s not really straightforward.
Create a timelapse in Python
Once you understand the basics, you can basically use your Python skills to do anything.
Let’s say you want to create a timelapse (meaning recording a picture every X seconds or minutes over a long period), you can do something like the followung:
import time
from picamera2 import Picamera2, Preview

picam = Picamera2()

config = picam.create_preview_configuration()
picam.configure(config)
picam.start()

for i in range(1,10):
    picam.capture_file(f"ts{i}.jpg")
    print(f"Captured image {i}")
    time.sleep(3)

picam.stop()
There is nothing new related to the camera module in this script. We just use some Python basics to create a loop and capture a photo every 3 seconds for 30 seconds.
Change the loop duration, the sleep time, and anything required to fit your needs.
For bigger projects, you can create a function that will take the picture, and only call it when needed to simply your main script.
You can then use ffmpeg to build a video with all your captured images. The command will look like that:ffmpeg -r 1 -pattern_type glob -i "ts*.jpg" -vcodec libx264 timelapse.mp4It’s also possible to do the same thing in Python, recording the video file directly. But it’s less flexible and more complicated (check this example if you want to give it a try).
Are you a bit lost in the Linux command line? Check this article first for the most important commands to remember and a free downloadable cheat sheet so you can have the commands at your fingertips.
Record a video in Python
The picamera2 library includes a ton of methods and goes beyond what you might be using in the previous version. It may look overwhelming when you check the documentation, but keep trying because it can save you a lot of time for typical applications.
For example, instead of using the previous timelapse method (manual way of creating a video with ffmpeg), you can directly record a video, doing everything in a short Python script:
import time

from picamera2 import Picamera2
from picamera2.encoders import H264Encoder

picam2 = Picamera2()
video_config = picam2.create_video_configuration()
picam2.configure(video_config)

encoder = H264Encoder(10000000)

picam2.start_recording(encoder, 'test.h264')
time.sleep(10)
picam2.stop_recording()
The code structure is basically the same as the first one we created to capture a JPG, but this time we enhance it with video capabilities.
Note the “create_video_configuration” method instead of “create_preview_configuration” and the H264encoder class. This script creates a short 10s video of your camera so you can play with VLC directly on Raspberry Pi OS (if you use a desktop version).
More examples
The Raspberry Pi Foundation provides the full documentation for the picamera2 module in PDF format (that you can download here). But the easiest way to get started and try new things is to check the script examples on their GitHub.
Find an example close to what you want to do, play with it, and then check the documentation to find the exact configuration options or methods you can use to move forward.
Remember that I have a ton of tutorials about Python and Raspberry Pi on this website that might be helpful for your next projects with a camera module. Here are a few examples:
- How to Install and Use Python Packages on Raspberry Pi?
- 11 Cool Projects Ideas for the Raspberry Pi Camera Module
- The Raspberry Pi GPIO Pinout: Diagram & Explanation
And if you want to try other great Python libraries for the Raspberry Pi, I have a selection for you on this link.
Whenever you’re ready, here are other ways I can help you:
The RaspberryTips Community: If you want to hang out with me and other Raspberry Pi fans, you can join the community. I share exclusive tutorials and behind-the-scenes content there. Premium members can also visit the website without ads.
Master your Raspberry Pi in 30 days: If you are looking for the best tips to become an expert on Raspberry Pi, this book is for you. Learn useful Linux skills and practice multiple projects with step-by-step guides.
The Raspberry Pi Bootcamp: Understand everything about the Raspberry Pi, stop searching for help all the time, and finally enjoy completing your projects.
Master Python on Raspberry Pi: Create, understand, and improve any Python script for your Raspberry Pi. Learn the essentials step-by-step without losing time understanding useless concepts.
You can also find all my recommendations for tools and hardware on this page.