Can pfSense run on Raspberry Pi? (and better alternatives)
pfSense is a powerful, open-source, BSD-based firewall, that provides all features we might need from a router firewall. I’ve been using it at work for many years, and it’s a great alternative to its expensive competitors. In this article, we’ll see how to get the same features on Raspberry Pi.
pfSense doesn’t have an official release for Raspberry Pi, it’s only available on AMD64 architecture, so there is no way to install it on a Raspberry Pi. Other solutions can be used instead to turn a Raspberry Pi into a router firewall.
Here we’ll learn other options available to use your Raspberry Pi as a firewall.
If you’re looking to quickly progress on Raspberry Pi, you can check out my e-book here. It’s a 30-day challenge where you learn one new thing every day until you become a Raspberry Pi expert. The first third of the book teaches you the basics, but the following chapters include projects you can try on your own.
Can pfSense Run on Raspberry Pi?
Even if FreeBSD runs well on Raspberry Pi and the pfSense source code is available, all pfSense releases are limited to the AMD64 architecture. There is no documentation or workaround to install it on a Raspberry Pi.
I’ve already installed FreeBSD on my Raspberry Pi (as you can read in this tutorial), but compiling pfSense on it is another level as it’s not intended to work, and I’m not an expert on BSD :).
There is a repository on the pfSense GitHub page including files about Raspberry Pi (here are the search results), so it’s probably not entirely a lost cause. However, the pfSense developers haven’t released a Raspberry Pi version yet. In 2019, one of the developers gave us hope that it would come one day, but no ETA was given (source).
In short, pfSense developers have seemed to consider the Raspberry Pi for a future release, but it isn’t currently available. If you are a BSD guru and not scared to compile it from source, you could try to install FreeBSD and download the whole pfSense repository in order to compile it from scratch. However, haven’t seen any indication in my research that this could work.
So for now, the best option is to look for an alternative.
Use a Raspberry Pi as a Router with a Firewall
There are several ways to use Raspberry Pi as a router with a firewall on your network. IPFire and OpenWRT have a release available for some Raspberry Pi models, but it’s also possible to configure Raspberry Pi OS to do this.
It's a free PDF guide containing every Raspberry Pi Linux command you should know!
Download now
How to install IPFire on Raspberry Pi
IPFire is an open-source firewall solution, that is often cited as an alternative to pfSense. IPFire has a firewall engine, but also has other interesting features like an intrusion detection system, and supports add-ons to add other features if needed (VPN, proxy, wireless access point, etc.).
I haven’t had the same experience with it, as I prefer pfSense when the hardware isn’t an issue. But, since they have an arm version available, we can test it. The installation is pretty straightforward, as the ARM image is available on their website.
Note: it doesn’t work on Raspberry Pi 4 / 400.
- Go to the download page on the IPFire website.
- Click on the ARM image to download it (you can use HTTP or Torrent to download it).
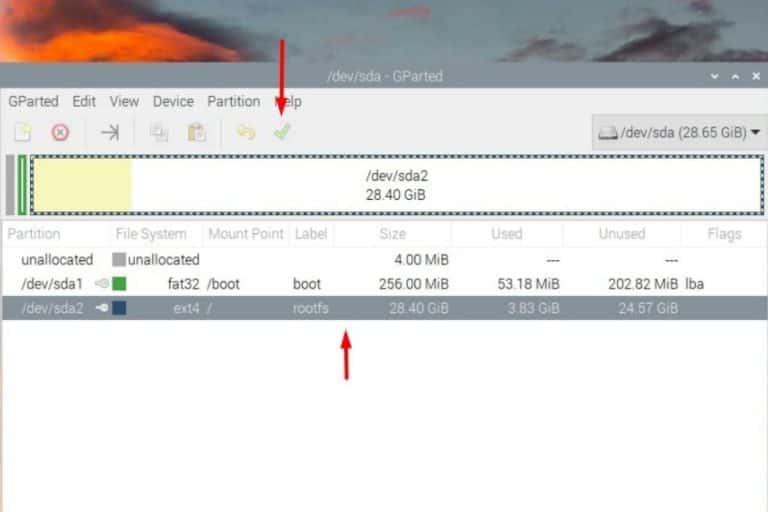
- Use Balena Etcher to flash it on your SD card:

- Once done, insert the SD card on your Raspberry Pi and start it.
The first boot is a bit long (a few minutes maybe), but it will be faster on the next boot.
On the first boot, you’ll get a setup wizard to configure the network settings. Then, you can use the web interface for everything else. Here is a short video to guide you through the first steps:

Join Our Community!
Connect, learn, and grow with other Raspberry Pi enthusiasts. Support RaspberryTips and enjoy an ad-free reading experience. Get exclusive monthly video tutorials and many other benefits.
Learn moreIf you’re interested, I can create a more in-depth tutorial on how to set this up. The process shouldn’t be overly complicated for a basic home network with two interfaces.
How to install OpenWRT on Raspberry Pi
Another alternative is OpenWRT. OpenWRT is another Linux operating system with router and firewall features, managed from a web interface. It’s often found on embedded devices like commercial routers, but can also be installed on a Raspberry Pi.
I give you the short version here, but I have a full step-by-step tutorial on how to install OpenWRT on Raspberry Pi on this website. Feel free to click on the link if you want to learn more and try it.
The good news with OpenWRT is that there is a version compatible with the Raspberry Pi 4/400 at work. It’s only available in the SNAPSHOT version, but it does work.
Here is a quick How-To that you can follow if you want to try it:
- Download OpenWRT firmware for your Raspberry Pi model.
Select the version on the right dropdown and type “Raspberry Pi” in the form.
You should get a page where you can download the image: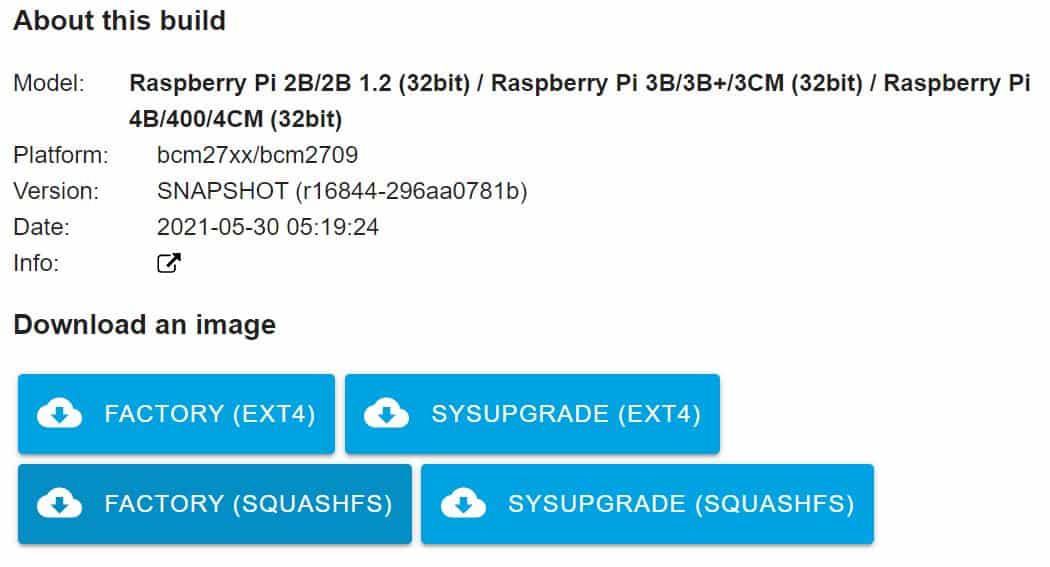
- Click on the first button to download the Factory (EXT4) file.
- Flash it with Etcher as explained in the last section.
And that’s it, insert the SD card in your Raspberry Pi, and it should boot (faster than IPFire). You can then access the web interface at http://192.168.1.1.
Unfortunately, there is no wizard to change it on boot, so you have to put your computer on this sub-network, even if you are on another network range.
Use Raspberry Pi OS to run a router with a firewall
Even if IPFire and OpenWRT are close to what pfSense can offer in terms of features, I don’t use them. I still recommend building your router (with a firewall) on a clean Linux distribution, like Raspberry Pi OS.
By doing this, you have the guarantee that the software will work perfectly, and you only have to add the routing/firewall layer on top of it.
It's a free PDF guide containing every Raspberry Pi Linux command you should know!
Download now
As the Raspberry Pi only has two network interfaces (Ethernet and Wi-Fi), the routing part will only take a few minutes to enable. Then you can use proven applications like IPTables to filter the traffic going through your router.
I have an entire step-by-step tutorial on how to do this on a Raspberry Pi, so I won’t give you more details here. But I think it’s the best option for now. IPFire and OpenWRT add Raspberry Pi support as a side project, that’s not their main focus, so you’ll probably have technical issues and lack documentation on how to fix them.
IPTables (and alternatives) work the same on a PC with Linux, so it will be easy to find help on how to configure it.
The tutorial linked above is focused on building a router with a firewall, but I also introduce other tools you can add to make your life easier. For example, Webmin will add a web interface on top, and Squid / Snort can improve the overall security of your network.
Improve your Network with a Raspberry Pi
Let’s take a few minutes to list the other tools you can install on a Raspberry Pi if your goal is to improve your network security. A Raspberry Pi can be very useful with this, even if pfSense is not available yet.
In addition to IPTables, Snort and Squid, keep ready for a few other services you should consider.
Fail2ban
Fail2ban is mainly an intrusion prevention tool, but not only. It works on the services log file, and uses the pattern to detect malicious activities. For example, you can check the SSH log file to list bad login and password attempts, and then block the IP address in your firewall.
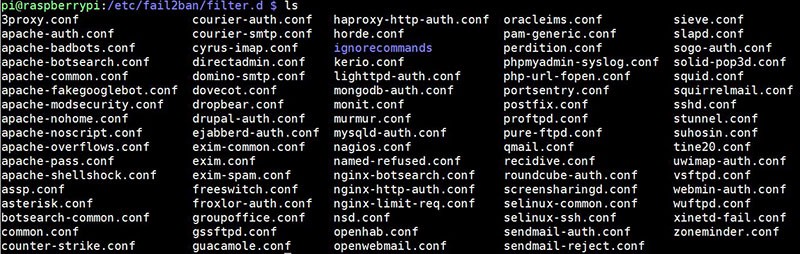
Fail2ban can be installed with apt, as for any Raspberry Pi OS package. Then, the configuration files are under /etc/fail2ban. Editing them allows for defining rules for each service hosted on the Raspberry Pi.
I have a tutorial here on how to install Fail2ban on your Raspberry Pi if needed.
VPN
A firewall will protect external access to your network (or even secure local networks), but a VPN can be a step further in some cases.
In fact, you can use a VPN in two ways:
- To hide your browsing data inside an encrypted tunnel. A solution like NordVPN will be perfect for this.
It works fine on Raspberry Pi, I have a tutorial here. - Or to give you remote access to your home network. In this case, OpenVPN will be the fastest way to set this up.
OpenVPN is available in the official repository, so it can be installed with apt as for any other package (more details here).
For the second option, WireGuard is another software you can try. You can read my comparison of OpenVPN vs WireGuard here.
Ad-Blocker
The last application is probably less important than VPN and Fail2ban, but that might be useful too for the same project.
Using a Raspberry Pi as an ad-blocker for the whole network is a popular project (you can use Pi-Hole to do this). Installing it on your router firewall is the easiest way, and shouldn’t require an additional device.
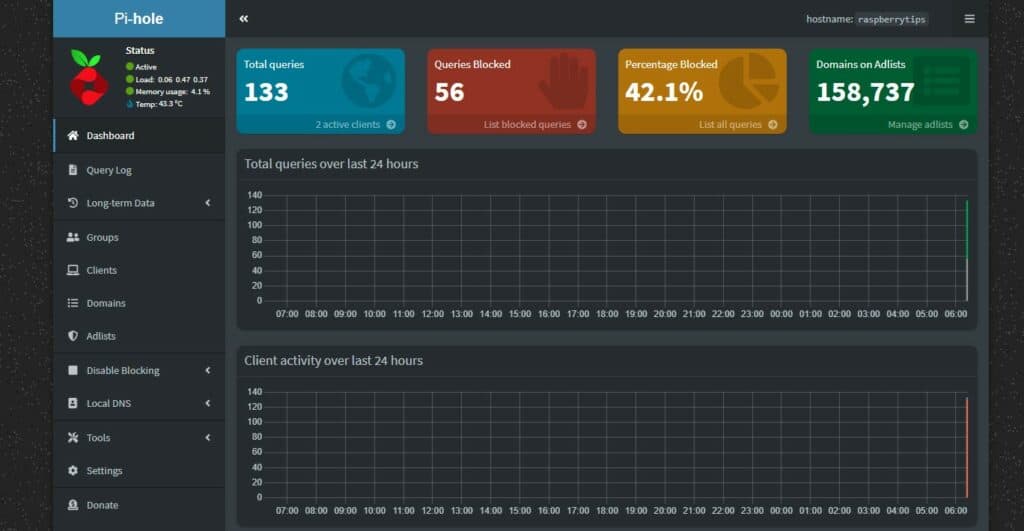
Once installed and configured as your primary DNS server on all your devices, ads will be a thing of the past.
If you don’t mind the ads, you can also use your Raspberry Pi as a DNS server only. This is a good alternative if Pi-Hole and the router/firewall create conflicts by having them on the same device.
It's a free PDF guide containing every Raspberry Pi Linux command you should know!
Download now
Recommended Hardware to Use Raspberry Pi as a Firewall
I haven’t written about this for now, but there is a major limitation in using a Raspberry Pi as a router/firewall: there is only one Ethernet port on it. In my tutorial, I’m using the Wi-Fi adapter to create a second interface, but maybe that’s not exactly what you need.
If you want other options, here are a few additional components you can consider:
- Ethernet HAT: Even if the Raspberry Pi board has only one Ethernet port, you can still add more by installing a HAT on top of it. This one on Amazon should be a great option. It’s the size of a Raspberry Pi Zero but can work with any model.
- USB to Ethernet adapter: I tried this a few years ago, and it worked fine. You can plug a USB to Ethernet adapter (like this one) into your Raspberry Pi and plug a second Ethernet cable into it. As there are many models, I can’t guarantee it will work with all the solutions we’ve discussed in this article, but my model was working on RPI OS.
- 4G Module: For specific scenarios, you can also use a 4G HAT to skip the need for another Ethernet adapter. You can plug this module, insert your SIM card in it and connect to the Internet from wherever you are. As for the last one, it will probably work on Raspberry Pi OS, but not sure about IPFire and OpenWRT support.
It's a free PDF guide containing every Raspberry Pi Linux command you should know!
Download now
Want to chat with other Raspberry Pi enthusiasts? Join the community, share your current projects and ask for help directly in the forums.
Final Thoughts
To sum it up, using a Raspberry Pi as a security device on your device is a great idea, but the software is not there yet. pfSense is not available on the ARM architecture and the other alternatives are not perfect.
For now, I still recommend using Raspberry Pi and configuring it as a router with a firewall, as explained in this article.
If you have other solutions, feel free to leave a comment in the community!
Whenever you’re ready, here are other ways I can help you:
The RaspberryTips Community: If you want to hang out with me and other Raspberry Pi fans, you can join the community. I share exclusive tutorials and behind-the-scenes content there. Premium members can also visit the website without ads.
Master your Raspberry Pi in 30 days: If you are looking for the best tips to become an expert on Raspberry Pi, this book is for you. Learn useful Linux skills and practice multiple projects with step-by-step guides.
The Raspberry Pi Bootcamp: Understand everything about the Raspberry Pi, stop searching for help all the time, and finally enjoy completing your projects.
Master Python on Raspberry Pi: Create, understand, and improve any Python script for your Raspberry Pi. Learn the essentials step-by-step without losing time understanding useless concepts.
You can also find all my recommendations for tools and hardware on this page.