WireGuard Installation on Raspberry Pi: Easy Setup Guide
If you have a Raspberry Pi running most of the time at home, setting up a VPN server on it might be a great way to keep access to your home network from anywhere in the world. In this article, I’ll show you how to set up WireGuard (one of the best options for this) in a record time.
WireGuard is a modern, secure and performant VPN solution that can be installed on a Raspberry Pi. The easiest way to do this is to use PiVPN, a script that takes care of all the installation and configuration steps for you.
Don’t worry, I’ll explain everything in more detail in this step-by-step tutorial. Even if this is your first time doing this, you’ll get it done, just follow along.
If you’re looking to quickly progress on Raspberry Pi, you can check out my e-book here. It’s a 30-day challenge where you learn one new thing every day until you become a Raspberry Pi expert. The first third of the book teaches you the basics, but the following chapters include projects you can try on your own.
Start here: Introducing VPNs and WireGuard
Let’s start with a short introduction of the words I’ll use throughout this tutorial to ensure we are on the same page.
What is a VPN?
VPN stands for “Virtual Private Network”, and basically the idea is to merge two networks.
For example, companies can use this to have employees on two different sites, but using the same resources from the main building (like a file share, for example).
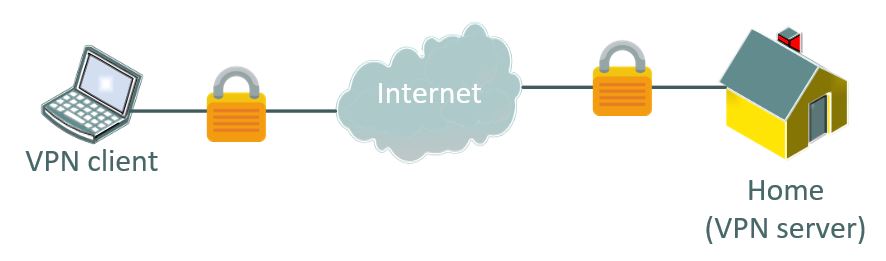
With a Raspberry Pi, we’ll generally use it to access a remote network from anywhere in the world. For example, you can access your security camera or home automation web page from your smartphone while travelling.
WireGuard is the software that will make this work. You’ll have the server part running on the Raspberry Pi at home and a client on your smartphone.
Note: A VPN can also be used the other way: connecting to the Internet via a provider like NordVPN or ExpressVPN that hides your data in a private tunnel. That’s not the point of this article, but you can’t read this one if interested: Best VPN Providers on Raspberry Pi (I Tested All).
Why WireGuard?
WireGuard is not the only software that you can use to build this, there are several options available, like OpenVPN, which is another popular solution. But to make it simpler, you can see WireGuard as an upgrade of OpenVPN.
WireGuard is better than OpenVPN for several reasons: better performance (in particular less latency), easier configuration, more modern protocols and lighter overall. In short, WireGuard is safer, more efficient and easier to maintain than OpenVPN.

I have a full comparison on the website if you want more details: Raspberry Pi: OpenVPN vs WireGuard, which one is the best?.
It's a free PDF guide containing every Raspberry Pi Linux command you should know!
Download now
I’ve been using OpenVPN forever, at work and at home, and the good news is that switching to WireGuard wasn’t complicated at all. They have many similarities for the end-user, so even if you are also familiar with OpenVPN, you should give it a try.
Role of PiVPN
I won’t lie, installing a VPN server from scratch can be tricky. Think of installing any software from the sources, add a level of complexity that comes with security protocols like VPN, and user management in the command line, and you can get an idea of what I mean :-).
Hopefully, we won’t do this, don’t worry. There is a magical script available, named PiVPN that will do the hard work for us.
PiVPN is an installation script that simplifies the installation and configuration of your VPN server. It works for OpenVPN and WireGuard and allows us to install the server and create the user in record time.
It looks a bit like “raspi-config” with simple menus, asking you one question each time, and I’ll guide you at each step, so you can do it, don’t worry.

Join Our Community!
Connect, learn, and grow with other Raspberry Pi enthusiasts. Support RaspberryTips and enjoy an ad-free reading experience. Get exclusive monthly video tutorials and many other benefits.
Learn morePart 1: WireGuard server installation
To make this tutorial easier to read, I split it into two parts:
- Server installation: the main part, that you need to do only once. You’ll use the PiVPN script for this, to install and configure WireGuard on the Raspberry Pi.
- Client installation: the part you’ll repeat for each user or device that needs access to your network (typically your phone and/or your laptop).
Let’s start with the server installation.
Server prerequisites
Hardware & software
On the hardware and software part, you don’t need anything special for this setup.
Here is what I’m using:
- A Raspberry Pi 4: But any model should be fine. If you have a Raspberry Pi running 24/7 as a file server or something like that, it’s perfect. You don’t even need to install another one.
- Raspberry Pi OS: I’m sure it works with other distributions. But just for your information, I tested with Raspberry Pi OS Lite (64 bits). Make sure you have done the system updates recently:
sudo apt update && sudo apt upgrade -y
Need help installing it? Install Raspberry Pi OS on Raspberry Pi. - (Optional) SSH enabled: I generally enable SSH for all projects, so I can do everything from my laptop. But it’s not mandatory. If you have a monitor & keyboard on the Raspberry Pi, it’s OK. You can find my SSH guide for Raspberry Pi here if needed.
Are you a bit lost in the Linux command line? Check this article first for the most important commands to remember and a free downloadable cheat sheet so you can have the commands at your fingertips.
Network
On the network side, it can be a bit trickier.
First, I highly recommend using an Ethernet cable and not a Wi-Fi connection. It generally gives better results in terms of speed and stability, which is crucial for a VPN server.
But the tricky part is your public IP address.
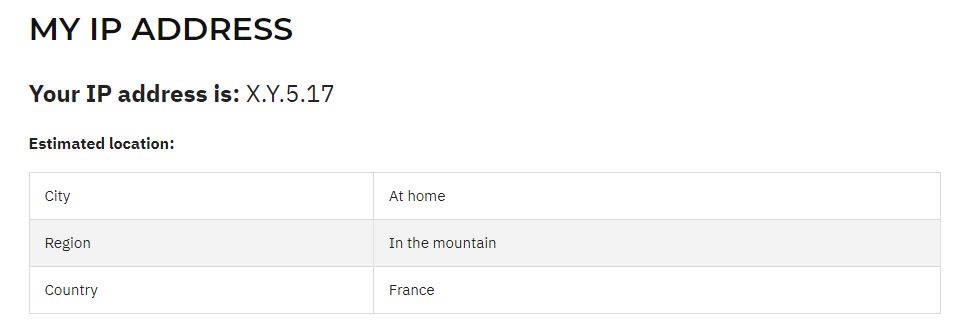
The public IP address is your IP when you browse the web, the one assigned to your router by your Internet provider (you can use this tool to see your current public IP address). We’ll use it to access the VPN server from outside.
The issue is that public IP addresses can be static or dynamic, depending on the provider.
If your IP changes every day, there is no way you’ll be able to access your server from outside.
If (like me), your public IP address changes regularly, you can use a service like No-IP to get a free domain name that will be redirected to your current IP address in (almost) real time. I explain everything in a separate article, that you should read if you are in this case:
Anyway, either get your real IP address (if you know it’s always the same), or set up a dynamic DNS provider like No-IP before moving on, and note your domain name somewhere. You’ll need this later.
Installing PiVPN
Now that the system is ready, we can move on with the software installation. As mentioned earlier, we’ll run a script named “PiVPN” for this. Here are the main steps of the installation for the WireGuard server:
It's a free PDF guide containing every Raspberry Pi Linux command you should know!
Download now
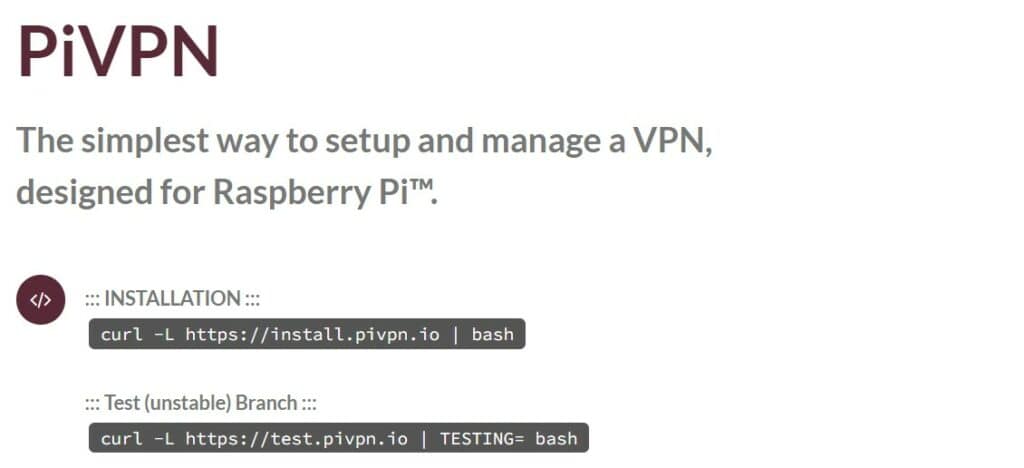
- Run the command given on the website:
curl -L https://install.pivpn.io | bashIt will install all the requirements automatically and start the installer. - In the first step, the installer recommends using a static IP address for the Raspberry Pi.
As for the public IP address I mentioned earlier, we don’t want the Raspberry Pi to change the IP address on the local network every day. There are several ways to do this (I have a full article on the topic here), but the easiest option is to let the installer do it for you.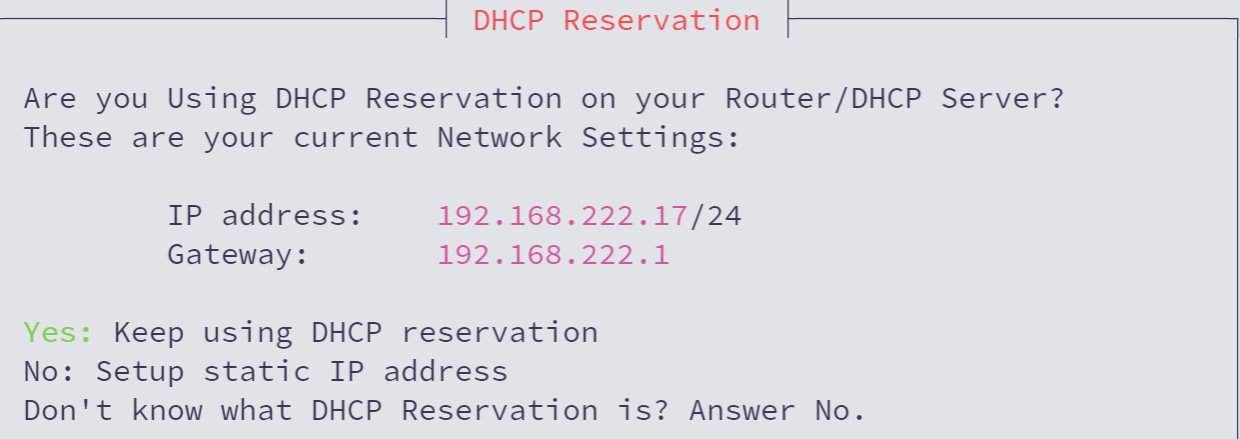
Take note of this IP, as you’ll probably need it to configure the port forwarding.
Unless you disabled IPv6, It will also most likely ask questions about IPv6, and keep the default answer (force routing IPv6). - Then, you’ll need to choose the local user that will hold the configuration, which is probably the current user (and in most cases, we only have one on Raspberry Pi).
So, just press Enter to confirm the default choice. - Then the interesting steps start, with the choice between WireGuard and OpenVPN.
If you’re reading this, I bet you’ll pick WireGuard, so keep the default option here: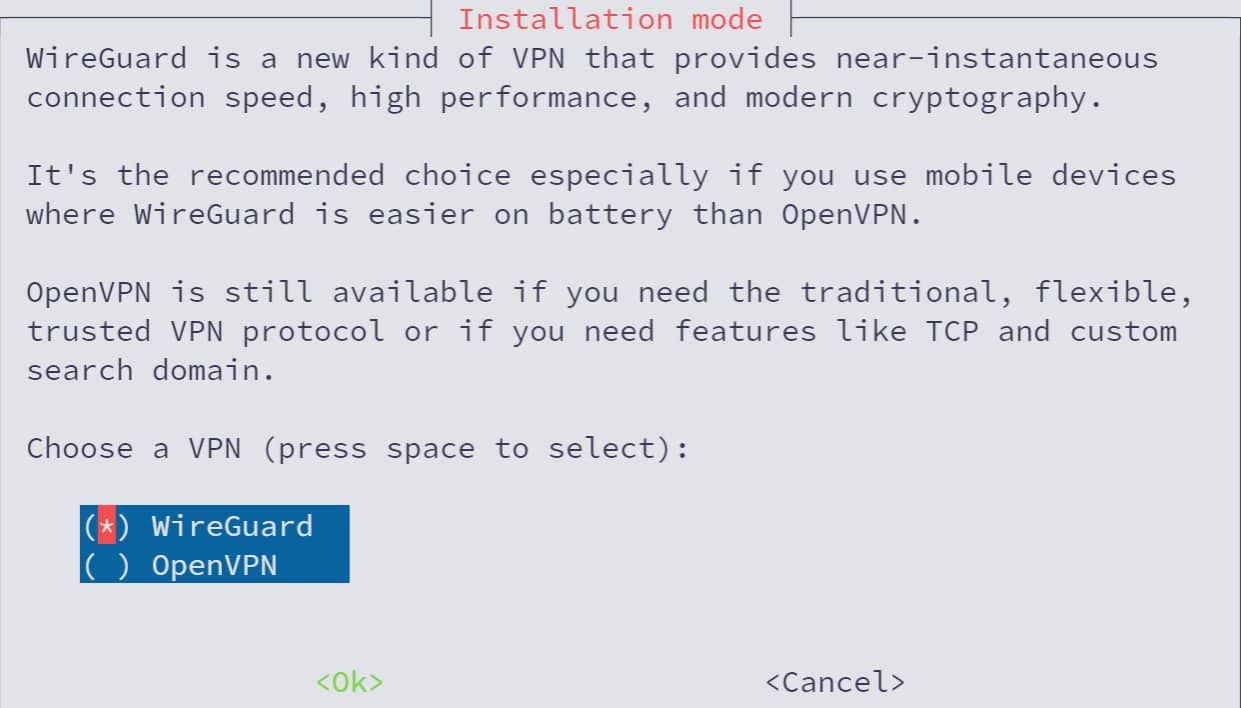
- You can then edit the default port if needed.
The default is 51820, and unless you host several VPN servers, there is no real reason to change it. - You can then decide which DNS provider will be used for the clients.
It’s not a big deal, it’s just which DNS server your client will use when they type “raspberrytips.com” in a web browser. There are a few popular servers listed, like Quad9, Open DNS or Google. All are serious solutions, keep the default or pick your favorite on the list:
It’s also possible to use a custom DNS server if you prefer, or have one DNS server setup on a Raspberry Pi, for example.
Use the up and down arrows to move in the list, and the space bar to select a different value. - In the next step, you need to set the IP address your clients will use.
If you have a static public IP address, you can keep the default, and use your current public IP.
If not, you need to follow the steps mentioned in the prerequisites and type your custom DNS entry there.
- After that step, the server keys are generated, and you get a warning about the system upgrades.
It’s recommended to enable the unattended upgrades to keep the server up-to-date automatically.
It’s pretty safe in general, it’s only security updates, so even if you host other services on the Raspberry Pi, you should probably enable it.
The installation is now complete, and a reboot is recommended. Do it if possible, so all services will be restarted with the new configuration.
If you have a strict firewall in place or need to configure the port forwarding, now is a good time to do it.
If you don’t know what port forwarding is or how to set it up, you can find a step-by-step guide at the end of the article I linked previously (setting up No-IP on Raspberry Pi). Even if you have a static public IP address, you need to do it.

In short, the idea of port forwarding is to redirect the traffic that comes to your router’s external interface (on a specific port, like 51820) to the Raspberry Pi WireGuard server port (51820 by default).
It's a free PDF guide containing every Raspberry Pi Linux command you should know!
Download now
Part 2: VPN client setup
The hard part is done, once the WireGuard server is set up, and the network traffic is properly redirected, you can finally create the configuration for your clients.
Create a new client configuration
It doesn’t matter which device or operating system you’ll use for your first client, it’s the same command to create a new VPN user:pivpn add
It will ask you for a name for this client, and will create the access:
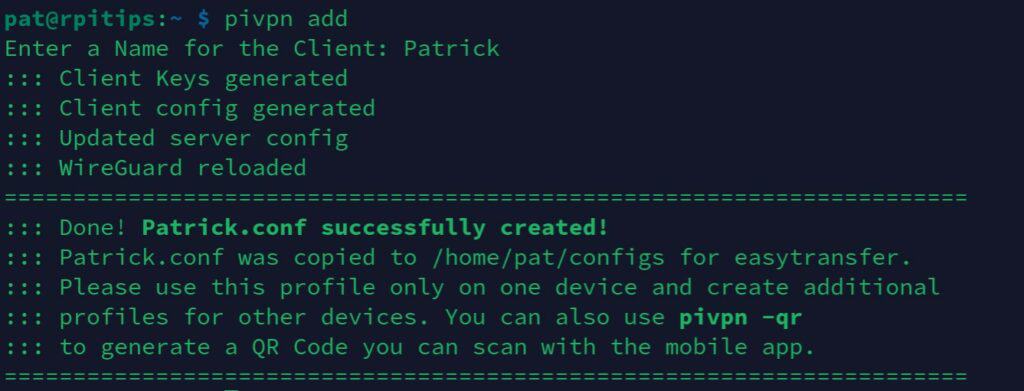
For each new user, a configuration file is generated, including everything (network, security and user settings). This file should be sent to the client system for installation.
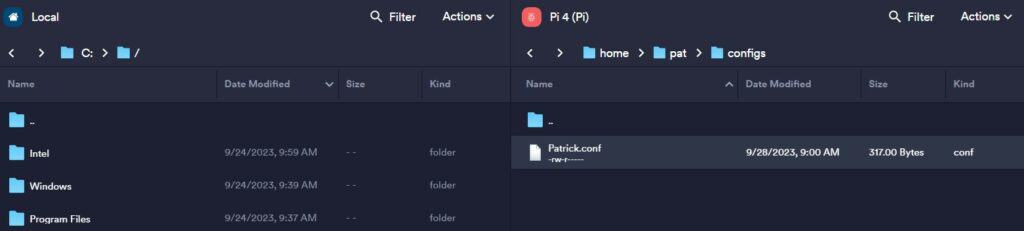
All files are stored on the Raspberry Pi, in a “configs” folder, created in the home directory of the main user you chose during the installation (ex: /home/pat/configs).
You can use an SFTP client to transfer it to your computer (I use Termius for SSH & SFTP):
Once on your computer, keep it in a safe location, or send it to the device that will use this profile.
If you want to install WireGuard on a smartphone, the easiest solution I have found is to send the configuration file via email and download it on the phone from your inbox.
Client installation on a computer
Installing WireGuard on a computer is pretty straightforward, it’s available for most systems (Windows, macOS, Linux), and can be downloaded from the official download page.
Follow the instructions on this page to install it if needed. For example, on Windows, you’ll get an installer (just double-click on it and click next several times), while for Ubuntu, it’s available directly via APT.
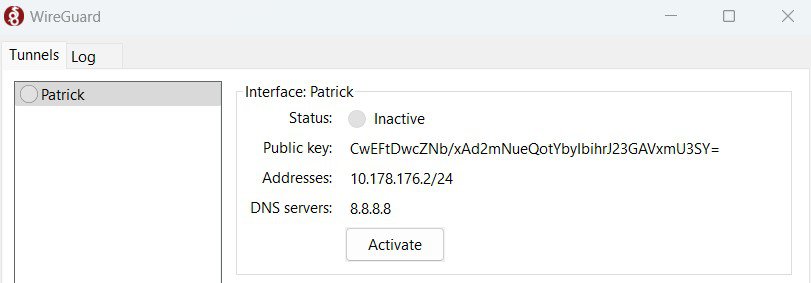
When you open the client for the first time, you’ll see an option to import a tunnel from a file. Click on it and select the file you just transferred from the Raspberry Pi. It will create everything for you, and you’ll just need to click on “Activate” to get connected:
For your tests, it’s better to be on a different network than the Raspberry Pi. You can, for example, share your smartphone connection to test as if you were outside.
Client installation on a smartphone
To install the WireGuard client on a smartphone, you’ll have similar steps:
- WireGuard is available on both app stores (iOS and Android).
Find it and install the app. - Start the application and click on the “+” icon.
You’ll have several options to create a profile:
If you have the configuration file on your phone, you can simply import it.
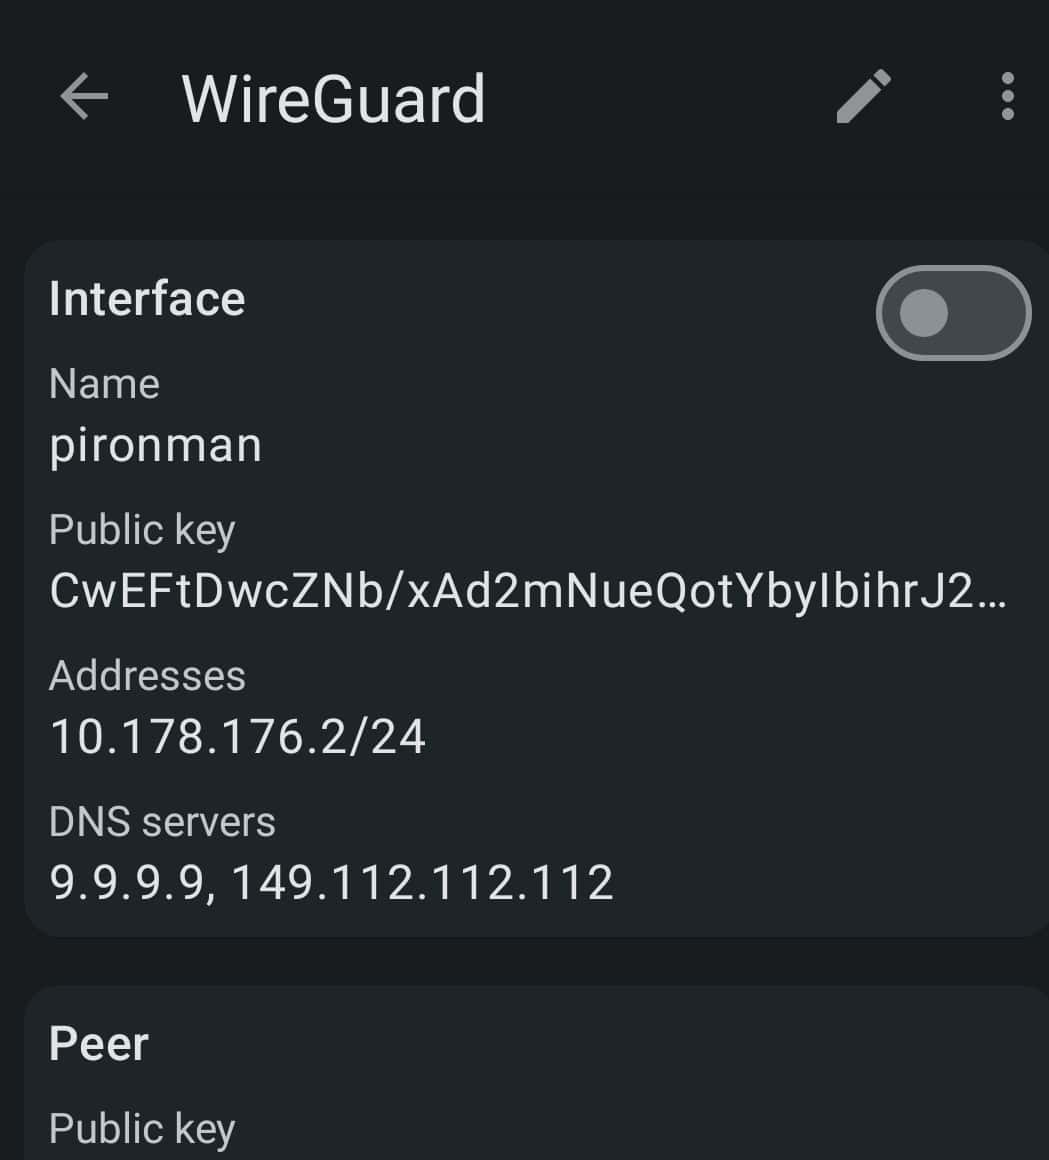
Another option is to use the QR code, which you can display via SSH on your computer, and scan on your phone:pivpn -qr - Once the profile is created, it’s just an on/off switch button to connect or disconnect:
Not that complicated, right?
I tested on Android, it might be slightly different on iOS, but you get the idea.
Overall, setting up a WireGuard server on Raspberry Pi is not that complicated. We have a script that does everything on the server, with a few commands to manage the server after that. And the clients are easy to use, even for non-tech-savvy users. So it’s great!
It's a free PDF guide containing every Raspberry Pi Linux command you should know!
Download now
If you are looking for exclusive tutorials, I post a new course each month, available for premium members only. Join the community to get access to all of them right now!
Related questions
How to keep the WireGuard server updated?
The WireGuard server is kept up-to-date via the usual package manager (apt). If you enabled the unattended upgrades during the installation, it will be done automatically.
And if in doubt, you can always run the updates manually with:sudo apt update
sudo apt upgrade
How to add more WireGuard clients after the initial setup?
To add more clients to the WireGuard VPN server, the same command can be used as often as needed: pivpn add. It will create a new configuration file in the “/configs/” folder, that can be used by this client to access the VPN.
How to check who is connected to my WireGuard VPN server?
Administrators can see which clients are connected to the WireGuard VPN server by using this command:pivpn -c
This command lists connected clients, their connection times and data usage.
How to remove access to a WireGuard client?
To remove access to a client to the WireGuard VPN server, you can use:pivpn -r
You’ll get a list of the existing clients and can enter their ID or name to remove the profile. After doing this, the client won’t be able to connect to this server anymore.
Whenever you’re ready, here are other ways I can help you:
The RaspberryTips Community: If you want to hang out with me and other Raspberry Pi fans, you can join the community. I share exclusive tutorials and behind-the-scenes content there. Premium members can also visit the website without ads.
Master your Raspberry Pi in 30 days: If you are looking for the best tips to become an expert on Raspberry Pi, this book is for you. Learn useful Linux skills and practice multiple projects with step-by-step guides.
The Raspberry Pi Bootcamp: Understand everything about the Raspberry Pi, stop searching for help all the time, and finally enjoy completing your projects.
Master Python on Raspberry Pi: Create, understand, and improve any Python script for your Raspberry Pi. Learn the essentials step-by-step without losing time understanding useless concepts.
You can also find all my recommendations for tools and hardware on this page.