

How to Install and Use No-IP on Raspberry Pi? (Dynamic DNS)
Whether you want to host a server on your Raspberry Pi (and share it with the world), or simply use No-IP to overcome the fact that you don’t have a static public IP address with your provider, this article is for you.
In my case, I don’t have a static IP address, so I use this service a lot, to link a domain name with my current IP.
Let’s see how to do the same thing on your side.
The No-IP client (DUC) source files are available to build this tool on Linux.
So it’s possible to install it, as usual, by compiling it on Raspberry Pi.
After that, there is a few configuration options, and port forwarding need to be enabled on the router.
In this tutorial, I will guide you step by step, by explaining what is No-IP exactly, how to install it and above all, how to configure the Raspberry Pi and your network to make it work.
What is No-IP?

Presentation
If you are here, you probably already know what No-IP is and what it does, so I’ll be quick here.
No-IP is a dynamic DNS service provider. The idea is to link a domain name (or a subdomain in the free plan), to your IP address.
It’s particularly useful if your public IP address change regularly. It gives you a way to access your home server from anywhere, even if you don’t have a static IP address.
Pricing Plans
No-IP offers two different service, with different pricing:
- A free plan: Probably the one you are interested in. It’s perfect to host a basic service like a website, SSH access, a Samba share or FTP server for example.
You can choose a subdomain (for example: raspberrytips.hopto.org) and link it to your IP address, so that you can use this subdomain to remotely access the service. - An enhanced plan: It’s a paid service, but you can define several hostnames (over 20 I think), have more choices for the domain names, and also no ads and no 30-day hostname confirmation required.
Yes, with the free plan, you need to log in every 30 days to re-enable the hostname.
I think there is also an advanced plan, where you can use your domain name, with all the features.
For example, I know that some of you tried No-IP free plan to host a mail server. In fact, it’s not possible as you can’t change the MX option in the DNS configuration on a free plan.
Basically, start with the free DDNS service, and you can always see later if you need more options to do what you want.
How it works?
The idea in that kind of architecture, is to use the No-IP service to get a hostname, that will always redirect to your public IP address.
Thanks to this provider, you can host any service you want at home (on your Raspberry Pi or not).
If you need a visual to better understand, here is how it works:
It's a free PDF guide containing every Raspberry Pi Linux command you should know!
Download now

The remote client can be anywhere in the world, and access the hostname created on No-IP (we’ll see how to create one just after that).
Your router at home, will redirect the traffic to the Raspberry Pi, or to another host on the network, depending on what you want to do.
To configure everything, there is 3 main steps, that I’ll explain in this tutorial:
- Create your account and choose a hostname
- Download & install the No-IP client on your Raspberry Pi
- Configure the port forwarding on your router, to redirect any access to your host.
If it’s still unclear, feel free to leave a comment in the community, and I will try to explain it another way 😉
Create an account
So, whatever your goal, the first step is to create an account and choose a hostname on NoIP.com:

Join Our Community!
Connect, learn, and grow with other Raspberry Pi enthusiasts. Support RaspberryTips and enjoy an ad-free reading experience. Get exclusive monthly video tutorials and many other benefits.
Learn more- Go to the No-IP website
- Click on “Sign Up” in the top menu
- Fill the form with your email address, password and choose a hostname:
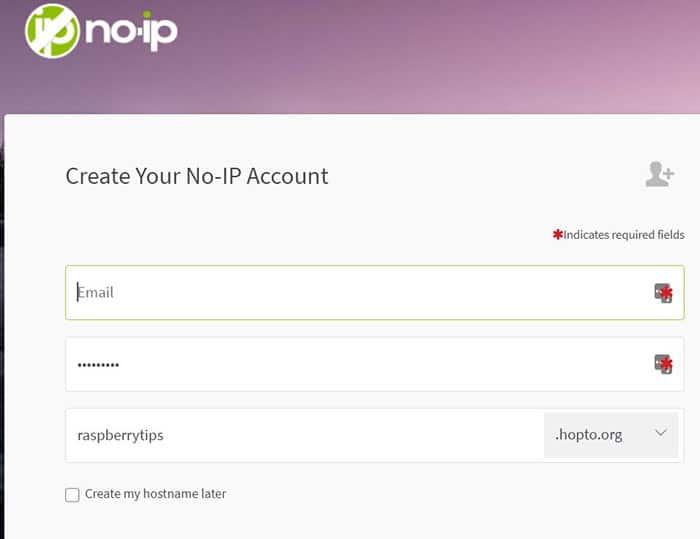
You might get a warning if you are using special characters in your password:
“Dynamic DNS enabled devices, such as routers, cameras, or DVR’s, often do not allow special characters and limit password length for Dynamic DNS passwords”
I have a few ones, and it works well on Raspberry Pi, so keep your strong password 🙂 - Click on “Free Sign Up” to create your account
- Then, you’ll need to confirm your email address, by clicking in the email:
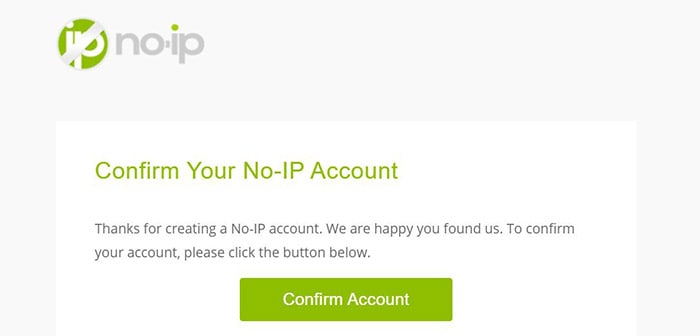
- Click on “Confirm Account”.
The website shows up, asking you to download the client. You can skip this step for now, as it’s probably not the one you need for Raspberry Pi.
We’ll see that later. - Then go into your account.
You need to set a username and choose a security question, or it will not work: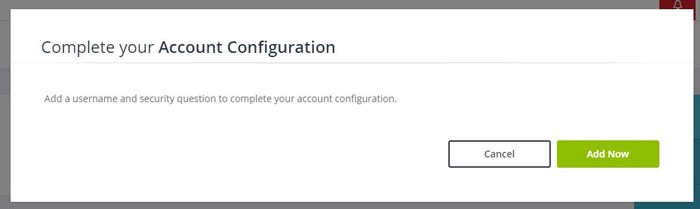
Click on “Add Now” and do this immediately. - In your account, you can also see that your hostname is not yet updated.
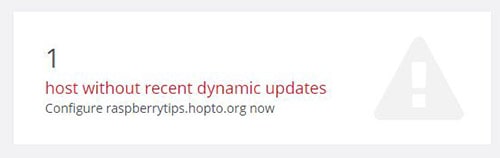
It can work though, as by default, the IP address is set to the one you used to create your account:
We need to install the client to sync your IP address and remove this warning (it’s the step 2 from my previous summary).
There are several options available. You can install it on your PC or even on some router (I’m using this method by the way). But today we’ll see how to install it on a Raspberry Pi.
Let’s do this now.
No-IP Installation Guide on Raspberry Pi
Install and Configure Raspberry Pi OS
I will do this tutorial on Raspberry Pi OS. I think it shouldn’t change so much if you are on another operating system, but just for your information.
So, the first step if you start from scratch is to install Raspberry Pi OS on your device.
I have a dedicated tutorial that explain how to do this the right way, so I’ll not repeat here. If you need help at some point, make sure to check this article here.
After the basic installation you need to set a strong password (especially if you plan to forward the SSH port), but in any case it’s a good practice.
Then, update your system to make sure there is no security breach open:sudo apt update
sudo apt upgrade
You may also need to install the service you want to share on the Internet with No-IP.
In this tutorial, I will do my tests with Apache, so:sudo apt install apache2
More details here on how to install a web server on Raspberry Pi.
Download & Install No-IP on Raspberry Pi
Let’s see how to install the No-IP client on Raspberry Pi!
I’m on Raspberry Pi OS Lite, if you are in the same case, you need to connect via SSH (more details here).
On Raspberry Pi OS with Desktop, you can use the terminal directly.
Either way, here is the procedure to install it:
- You need to choose a folder to download and compile No-IP.
I’m doing this in my home folder, but no matter where you download it.cd /home/pi
mkdir noip
cd noip - Download the archive with:
wget https://www.noip.com/client/linux/noip-duc-linux.tar.gz - Extract the files:
tar -zxvf noip-duc-linux.tar.gz - Go into the new folder created:
cd noip-2.1.9-1The version number in the folder name can change, so make sure to use the one corresponding to your extracted files.
Tip: “cd noip” + TAB will autocomplete the command 🙂 - Once in this folder, use the following commands to compile and install No-IP:
sudo make
sudo make install
It was quick to install it on my Raspberry Pi 4, so it should be done in a few seconds, whatever your device.
During the installation, you will be asked a few questions to configure the service.
It's a free PDF guide containing every Raspberry Pi Linux command you should know!
Download now
Note: I’m giving you the short version in this tutorial, but if you need more details on how to install a tar.gz file on Ubuntu (or other archives formats), it’s probably better to click on this link for more guidance.
Obviously, you need to enter your email address and password to link your device with your account, but also the update frequency (how often the client will update your IP address on No-IP).
It looks like this:
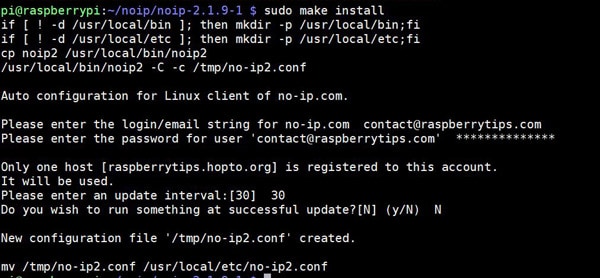
By the way, the update interval is set in minutes.
I didn’t test it as I don’t see the interest for now, but you can set an action to run on each update (a script I suppose, might be useful if you need to update something in your hosted service each time the public IP address change).
Once completed, your IP address should be updated on the website, and the second step is done, well done.
If your goal was just to link a domain name to your IP address, congrats it’s done 🙂
Note: For example, I’m using this to allow my IP address on some administration web pages. As I don’t have a static IP address, I can’t filter the access based on my current IP, but I can use my hostname to do the same thing.
For most of you, I suppose that you want to host a service on your Raspberry Pi. So, you need to check the last part of this tutorial!
It's a free PDF guide containing every Raspberry Pi Linux command you should know!
Download now
Bonus Tips
After using it for a few hours, I noticed several issues with the No-IP client on Raspberry Pi.
In this part, I will show you how to fix them, and also introduce the port forwarding configuration.
Edit the No-IP configuration
When you install No-IP, you can choose a few things in the wizard, but if something doesn’t work or you want to change anything, you can’t run “make install” again.
So, if you need to update something (your password or update interval for example), here are a few commands you can use.
The main command is:sudo noip2 <option>
Then, the following options are available:
- -C : create a new configuration (you need to stop No-IP before doing this)
- -c <path>: use another configuration file
- -S: display the current configuration
- -U <minutes>: change the update interval
- -u <username> -p <password>: update your account credentials
- -i <IP>: force a specific IP address
- -I <interface>: if you have Wi-Fi and Ethernet enabled for example, you can specify which interface to use
- -h: display all the options (help)
For example, I wanted to change the update interval for my tests, to see if it works correctly when I switch from one connection to another.
So, I have done this:sudo noip2 -U 5
Five is the minimum you can choose, default is 30 minutes.
Auto-Start No-IP on Boot
After my reboot, I noticed that the IP address doesn’t update anymore.
The No-IP client doesn’t start automatically on boot.
There are many ways to fix this (check this tutorial to see how to do with 4 different methods).
But I chose the easiest one:
- Open your crontab configuration:
sudo crontab -e - Paste this line in it:
@reboot /usr/local/bin/noip2
That’s it, No-IP will now start automatically on boot.
Enable Port Forwarding with No-IP
The last step is to configure your router or firewall to redirect one port to your Raspberry Pi service.
For now, your IP address is regularly updated in the domain name configuration, but you can’t access any service on the Raspberry Pi.
To allow this, you need to configure port forwarding on your Internet router.
The configuration will highly depend on your provider, and the router you have.
So, I’ll show you how it works in my case, but you probably don’t have the same hardware (at least if you are not in France with the same provider ^^).
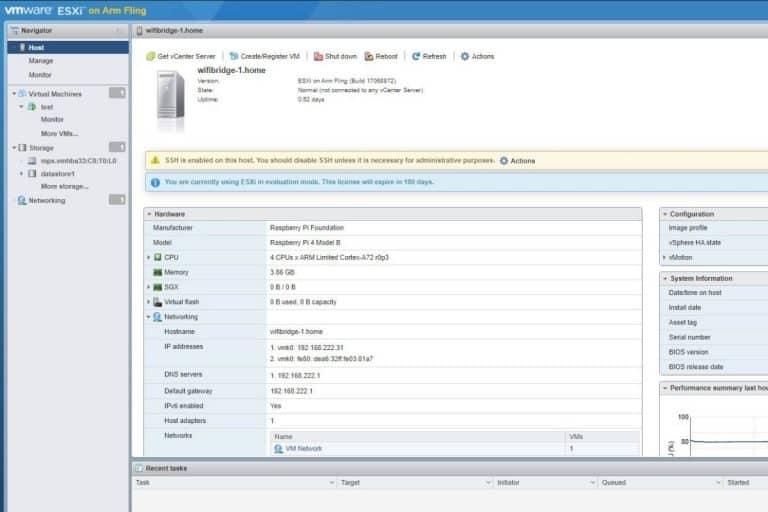
- Connect to your router IP address with a web browser.
The IP address depends on your provider, you can probably find it by looking at your gateway if you don’t know it.
On Raspberry Pi (or any Linux system), you will get it with:route -nFor example:
So in my case, I open http://192.168.222.1 - Then, make sure to use a static IP address on your Raspberry Pi.
There are two ways to do this:- You can assign the IP address on your router.
In my case, it’s in Advanced Settings > DHCP
By doing this, my local IP address will always be the same (but not the public IP obviously). - Or, you can configure it directly on the Raspberry Pi, I have a tutorial here about this.
- You can assign the IP address on your router.
- Once done, the last step is to forward an external port to your local device and port.
In my case, I want to allow access to Apache remotely.
So I need to redirect any port to the port 80 of my Raspberry Pi.
I can do this in Advanced Settings > NAT.
It looks like this:
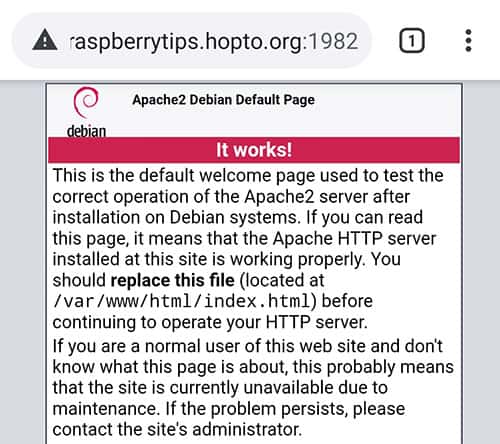
I can now access my domain name: http://raspberrytips.hopto.org:1982 and it should redirect me to the Apache default page.
I try this from my phone, disconnected from my Wi-Fi (it doesn’t work if you are on the same network), and yes, it works!
I hope you have found where the configuration can be done on your specific router.
If you need help, make sure to check your provider website, as they generally have a documentation to do this, for example:
It's a free PDF guide containing every Raspberry Pi Linux command you should know!
Download now
If you are looking for exclusive tutorials, I post a new course each month, available for premium members only. Join the community to get access to all of them right now!
Conclusion
That’s it, you now know how to install No-IP on a Raspberry Pi, but especially how to configure it to make it work the way you want.
I hope this tutorial was useful to you, and will allow you to start new projects, or improve them 🙂
By the way, if you want to host some services at home, but not for everyone in the world, the other option is to install a VPN server on your Raspberry Pi (click on the link to learn how to do this easily).
It will be more secure than opening a port on the web.
You can also check this post with a few tips to improve the security level on your Raspberry Pi.
As this topic might be a bit complicated for some of you, feel free to leave a comment in the community if you need further assistance at some point. I will try to help you the best I can.
Whenever you’re ready, here are other ways I can help you:
The RaspberryTips Community: If you want to hang out with me and other Raspberry Pi fans, you can join the community. I share exclusive tutorials and behind-the-scenes content there. Premium members can also visit the website without ads.
Master your Raspberry Pi in 30 days: If you are looking for the best tips to become an expert on Raspberry Pi, this book is for you. Learn useful Linux skills and practice multiple projects with step-by-step guides.
The Raspberry Pi Bootcamp: Understand everything about the Raspberry Pi, stop searching for help all the time, and finally enjoy completing your projects.
Master Python on Raspberry Pi: Create, understand, and improve any Python script for your Raspberry Pi. Learn the essentials step-by-step without losing time understanding useless concepts.
You can also find all my recommendations for tools and hardware on this page.


By the way, I did this once before and worked using External IP, but how about private IP? Because my ISP sometimes give me a Private IP rather than External One.
Thank you very much.