
How to Install and Configure Lakka on Raspberry Pi (Full guide)
Lakka is an interesting alternative to Retropie and other retro gaming systems. It’s now supported by most Raspberry Pi and is even included in the Raspberry Pi Imager’s OS list. Let’s see how to install it and get started, I’m sure you’ll enjoy it.
The easiest way to install Lakka on a Raspberry Pi is to use the official tool: Raspberry Pi Imager. Lakka is listed in the system options and can be flashed to an SD card in a minute. After booting, the interface is ready for initial configuration.
I’ll show you how to do this step-by-step and share with you a few tips I found to make the most of Lakka on your Raspberry Pi. As this tutorial is a complete how-to guide, if you already know Lakka, you can go directly to the section that interests you, using the table of contents below.
If you’re looking to quickly progress on Raspberry Pi, you can check out my e-book here. It’s a 30-day challenge where you learn one new thing every day until you become a Raspberry Pi expert. The first third of the book teaches you the basics, but the following chapters include projects you can try on your own.
Introduction
If you are new to Lakka, I recommend starting with this section.
I’ll introduce the Lakka system and explain what the differences are with other retro gaming systems like Retropie.
Lakka presentation
Lakka is a Linux distribution created for game emulation.
It will turn your Raspberry Pi into a retro gaming console.
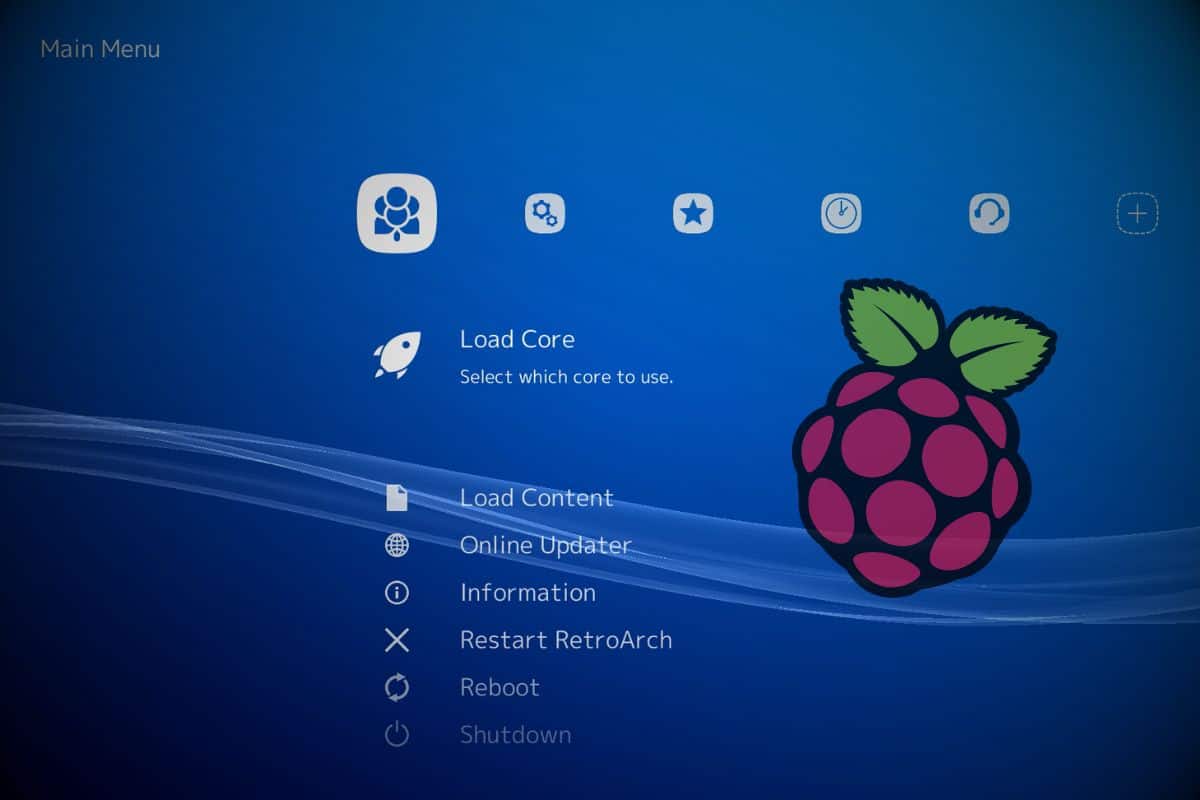
If you have played on a PlayStation before, you should be familiar with the interface.
Lakka is based on LibreElec (a tiny Linux distribution, mostly used for media center projects) and uses RetroArch for the graphical interface. It’s available for many single computer boards (like Raspberry Pi, Orange Pi, Banana Pi, or Tinkerboard), but you can also install it on a generic PC.
Lakka strengths
The first strength of Lakka is that it works right out of the box.
As I’ll show you in the next sections, once the SD card is ready, you can play almost right away.
You get to the main menu and there is no need to configure the controller, it works right away.
Configuration is also straightforward. If you want to enable a share to upload ROMs, there’s just one option to change (on/off) and it’s ready to go. You don’t have to think about user configuration, service start/stop, etc …
And the last thing I really like about it is that you can play PSP and PSX games right away too.
On Retropie, for example, you have to find and install the BIOS to make it work (and it’s not easy).
On Lakka it works right away, even without BIOS for some games.
Lakka vs Retropie
Lakka is different from Retropie because they use different technologies.
Lakka uses RetroArch over LibreElec while Retropie uses EmulationStation over Raspberry Pi OS.
Lakka highlights its user-friendly system (ready to play out of the box).
Lakka is also a lightweight system that works seamlessly on any platform, including all Raspberry Pi models.
RetroPie is more popular, with a bigger community, so you’ll find help quickly for any problem you have. Retropie also has a better front-end interface, where you can even run Kodi to use the same system as a media center.
In summary, both are good emulation systems. The best solution is to try both and pick the one that works best for you :-).
Get a list of my 24 favorites games (with links) to play on Retropie, Recalbox or Lakka
Download now
Related articles you might want to read:
- Best Retro-Gaming OS: Retropie, Recalbox, Batocera or Lakka?
- RetroPie: A Step-By-Step Beginner Guide (with pictures)
Installation guide
We can now move onto the installation process.
As I said in the introduction, installation is straightforward.
If you have already installed a system on your Raspberry Pi, it’s the same process.
Flash Lakka with Raspberry Pi Imager
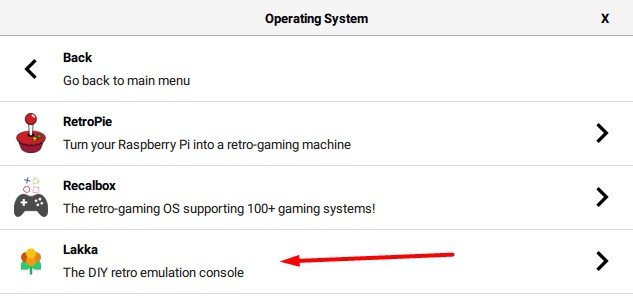
While it’s possible to download the image from the Lakka website, it’s now easier to use the Raspberry Pi Imager directly. Lakka is included in the OS list, you’ll find it under the “Emulation and game OS” category:
You’ll then get access to all the versions, one for each Raspberry Pi model:
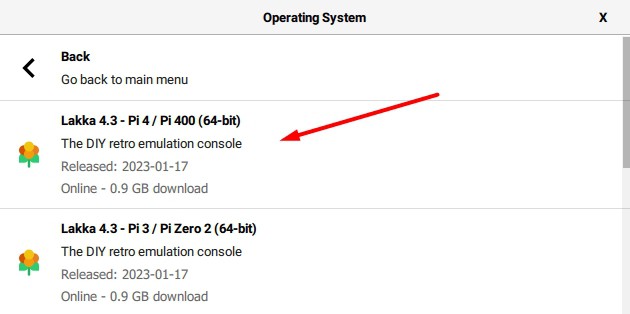
Pick the one corresponding to your device, and click “Next” to flash the system to your SD card.
First start
- Insert the SD card in your Raspberry Pi.
- Start the Raspberry Pi.
- The Lakka logo will appear in the background while the installation process starts.
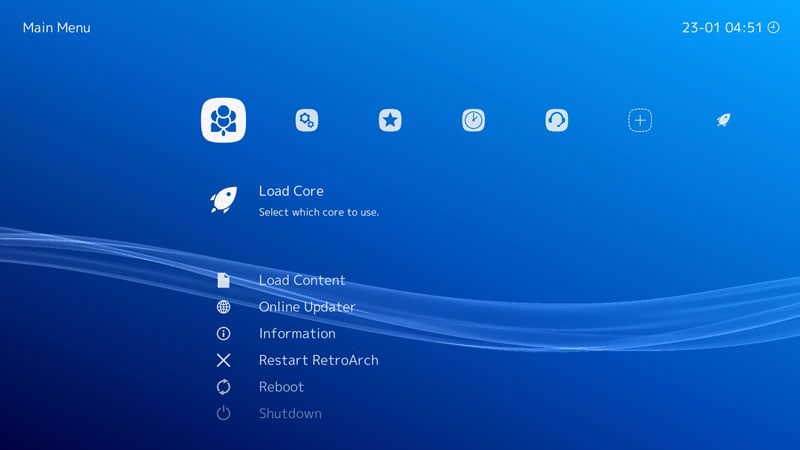
- After a few seconds, the Raspberry Pi will reboot and the Lakka main menu appears.
- Plug in a controller or a keyboard if not already done.
The system will enable and configure it automatically.
You can now move to the menu to discover Lakka.
In the next section, I’ll help you with the first configuration steps.

Join Our Community!
Connect, learn, and grow with other Raspberry Pi enthusiasts. Support RaspberryTips and enjoy an ad-free reading experience. Get exclusive monthly video tutorials and many other benefits.
Learn moreConfiguration tutorial
Now that our system is operational, we can customize the default configuration to get exactly what we want out of our retro gaming station.
Audio, Video and Languages settings
These settings are basic, so I’m not going to write a lot about it.
You just need to know that they are in the Settings menu.
But this is the first thing to do if you have any issues.
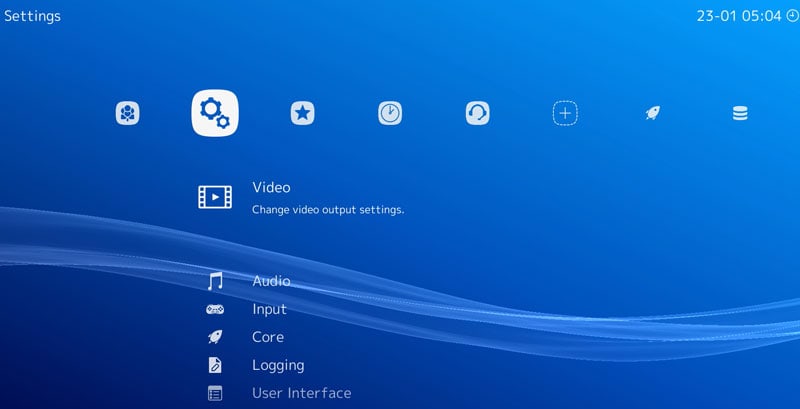
In the video settings, you’ll find everything you need to adjust the display to your screen.
In my case, everything was fine, so I didn’t try anything in the menu. I guess it’s only useful if you have a small screen (or an old one, maybe).
Audio settings are more traditional. You can enable or disable audio in-game and the menu.
Then you can adjust the volume or change the output device.
Finally, you can change the language in the Settings > User menu if needed.
Wireless configuration
Ethernet should work right away if you can plug your Raspberry Pi to your network. But if needed, you can use Wi-Fi easily.
Here’s how to configure Wi-Fi on your Raspberry Pi:
- From the main menu, select the Settings icon
- Scroll to the Wi-Fi item and click on it
- Click on “Connect to a network”
- After a few seconds, the interface displays all the available wireless networks
- Select the one you want to connect
- Enter the passphrase
- After a few seconds, Lakka adds an “Online” text in front of your Wi-Fi network
Adjust the controller settings
One of Lakka’s strengths is its ability to detect and configure almost any game controller automatically.
You can still check your controller settings, and set them differently if you want.
Here is how to do this:
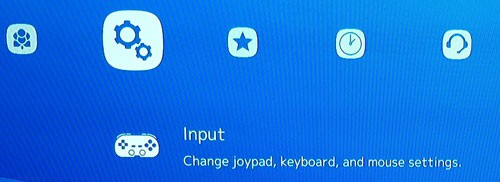
- From the main menu, navigate to the Settings submenu (second icon)
- Select the Input item and click on it (Button B or Enter)
- Now you get a submenu with several options:
- The Toggle Gamepad Combo: to get back to the main menu from a game
Mine was L3+R3 while I have a SNES controller without L3/R3 🙂 - The Swap OK & Cancel buttons: if you want to revert hit the ok and cancel buttons (A and B on a SNES controller)
- Hotkeys settings: there are a lot of hotkeys you can configure on your keyboard to do some actions. For example, F8 allows you to take a screenshot in a game
- And finally, the “Input User X Binds“, where you can configure each key to a specific action
This is where you can configure your controller as you want
It looks like this: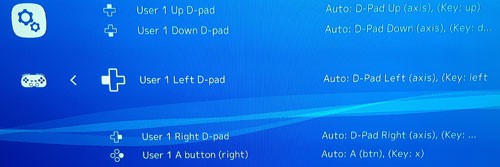
Set your favorite settings in the User 1 section and move forward.
- The Toggle Gamepad Combo: to get back to the main menu from a game
You can use a Bluetooth controller if you want. I’m often using my old PS4 controller or my 8Bitdo favorite. Both works great.
If you need help to configure them, you can check my tutorial about this.
Enable Samba
A feature I really like in Lakka is the ability to access the file system via a Samba share in one click.
Samba is a file share service that allows you to get access to the Raspberry Pi file system from another computer on the network.
But before doing this, you need to know the current IP address of your Raspberry Pi.
Get the current IP address
As a lot of things, finding the IP address on Lakka is easy.
- In the main menu, stay on the first item (with the Lakka berry icon)
- Scroll to the Information item and click on it
- Click on “Network information”
- You should have one line for each network interface, with the IP address.
I have three lines for example, but you may have only two (RJ45 or WiFi, not both).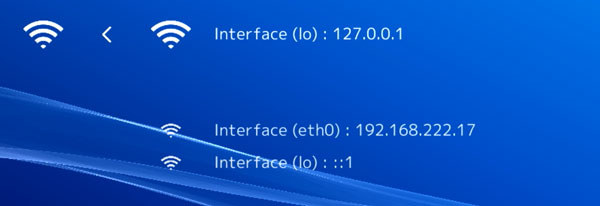
- lo: local interface, we don’t need it
- eth0: if you use a network cable, take this IP
- wlan0: if you are using a Wi-Fi connection, take this one
- An IP address has this format: A.B.C.D.
For example, my IP address on the eth0 line is 192.168.222.17.
You’ll need it to access the file share later.
Enable Samba
Samba is the file sharing service we’ll use to send files (games) to Lakka. It’s enabled by default in theory, but you can check the settings easily if needed:
Get a list of my 24 favorites games (with links) to play on Retropie, Recalbox or Lakka
Download now
- From the main menu, go to the Settings menu.
- Scroll down to the Services item, and click on it.
- In the list, find the line related to “SAMBA” and make sure it’s enabled, like this:
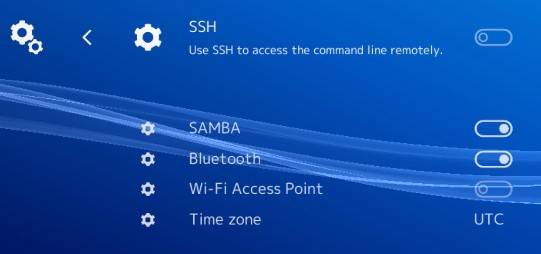
You can also enable SSH and Bluetooth in the same menu if you like.
For SSH access, the user is root and the default password is also root.
Try to access the file share
You can now access your file share over the network.
From your computer, follow this procedure:
- Open your file explorer program (for example explorer, finder, or nautilus depending on your system).
- Enter the file share in the URL field:
- Windows: \\<IP> (ex: \\192.168.222.17)
- Linux & Mac: smb://<IP> (ex: smb://192.168.222.17)
- You should now see all the shared folders on your screen.
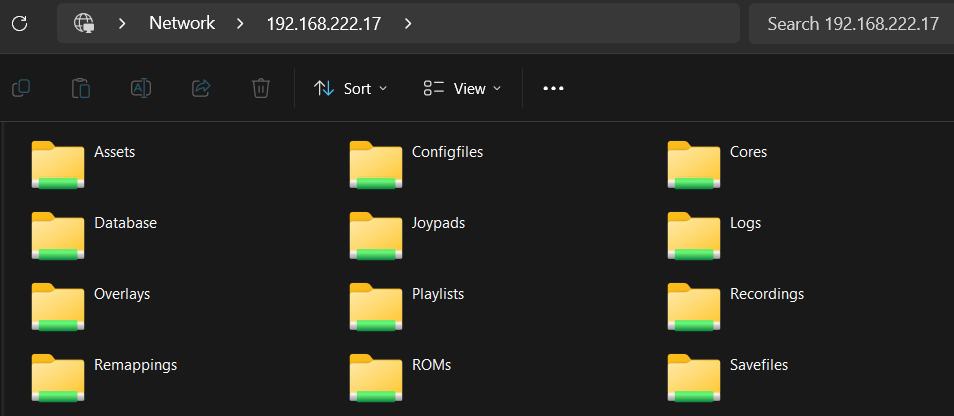
We’ll use it later to upload files to Lakka.
For now, you just need to check that this is working, then move to the next configuration option.
Customize the menu appearance
By default, the Lakka menu is fine, it’s similar to the PS4 menu, and you can use it like this.
But I’ll show you how you can configure it as you want in the settings.
From the main menu, go to the Settings section (second icon), and go to “User Interface”. From there, you’ll get access to many interesting options.
You can tweak a few options right away in this submenu, and you can also open the “Appearance” menu to get access to everything: background image, animations, shaders, etc.
Make all the changes and test you want, and we can now move to the most important part: How do you play a retro game on Lakka? 🙂
Playing games on Lakka
Once the basic configuration is done, we are ready to play our first game
In this section, I’ll teach you where to download ROMs and how to install them on Lakka. For this part, I’ll take an example to show you how to install a specific game step-by-step.
We’ll try to play “Sonic the Hedgehog 2” on Sega Master System.
Download ROMs
Downloading ROMs for any retro gaming system can be complex.
You need to avoid illegal stuff and malware while finding the game you want to play.
Where to download ROMs for Lakka?
I already wrote an article about where to download ROMs for Retropie.
It’s also valid for Lakka, as we need the same files for both.
I recommend using the RomHustler website to download your ROMs.
You’ll find a lot of them on this website and they seem to respect publisher rights, as a lot of ROMs are unavailable because of an ESA request (ESA = Entertainment Software Association).
Also, I had no issue with files downloaded from this website. They all work as expected and there is nothing suspect inside (no malware or anything else).
The download is fast, you just need to wait 10s for each ROM.
Download procedure
So, to start with my example, here is how to find and download the ROM we need for playing “Sonic The HedgeHog 2” on Sega Master System:
- Go to the RomHustler website
- In the top of the website, there is a list of all consoles.
Select the “Sega Master System” console in this list.
- When you scroll down, you have a list of ROMs for the Master System.
- Find “Sonic the Hedgehog 2” in this list.
At this time, this is the third game on the list. - Click on the game title.
- You are now on the game page.
You can check the screenshots to see if it’s really the game you wanted.
Then click on the download link: “Click here to download this ROM”. - After a 10s countdown, you can click again to download the ROM.
That’s it, you have your first game ready on your computer.
You now need to extract the files from the archive.
File formats reminder
The file format for each console is different:
- Most of the time you have one file for each game, so just extract this file and keep it for the next paragraph.
- Sometimes you can have several versions for one game.
For example [U], [J], and [EU] for US, Japanese and European versions of the game.
Only keep one, you don’t need to upload all of them to your Raspberry Pi. - And finally, you can have one game that needs different files.
For example, .iso and .cue files for PlayStation ROMs, or, as I already saw, files with .001, .002, …
In this case, create a folder with all of the files inside it and upload it to your Raspberry Pi.
Ok, so for my example, there is only one file, with a .sms extension, so it’s simple
But I need to upload it to Lakka to play Sonic The Hedgehog 2 🙂
Upload new games to Lakka
If you remember, earlier we enabled the Samba service on Lakka
And we will now use it to upload games to the Raspberry Pi.
That’s why I like the Samba features enabled in one click: it’s simple
- Go back to your file explorer, as for the Samba test (\\<IP> on Windows for example).
- In the folder list go to the ROMs folder.
- There is already a “downloads” folder inside.
I recommend creating a new folder for each console.
So you can know which emulator you need to use for each game.
For my example, create a “Sega Master System” folder, like this: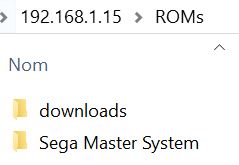
- Then copy and paste your ROM file into the new “Sega Master System” folder. That’s it, you have nothing else to do, the game can already work on Lakka. I’ll show you how to start this game in the next paragraph.
Start and play a game
The game file is now in the share folder, and on the SD card.
To play your first Lakka game, follow this procedure:
- From the main menu, click on the load content item.
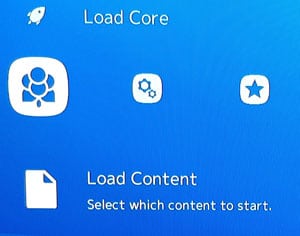
- You now need to select your ROM location.
Choose the “Start directory”.
And then select “Sega Master System” in the list.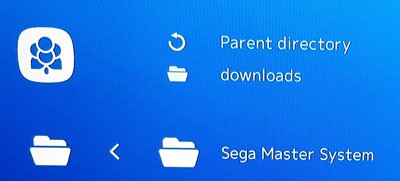
- Finally, select the ROM file
It should be something like “Sonic_the_Hedgehog_2_(UE)_[!].sms”. - When you click on it, Lakka will ask you which core system to use.
There are two available for Sega Master System.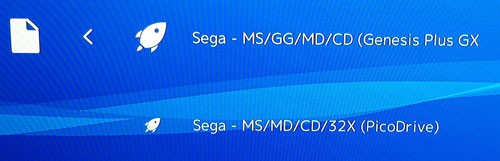
- Take the first one, I don’t really know the difference.
If it’s not working as expected, take the other one.
Sometimes you’ll have the choice between a lot of consoles, make sure to select the one which corresponds to your ROM system. - And eventually, your game will start.
![Sonic_the_Hedgehog_2_(UE)_[!]-190130-081407](https://raspberrytips.com/wp-content/uploads/2019/01/Sonic_the_Hedgehog_2_UE_-190130-081407.png)
You now know how to download, upload and start any game on Lakka.
You can restart this procedure with each game you want to play.
Have fun and enjoy the ease of use of the Lakka system.
Shaders
Another interesting feature on Lakka is the shaders option.
It allows you to improve the image quality (or change it at least).
To try this, use this short procedure:
- Start your game.
- While in the game, use your Toggle Combo to display the Lakka menu.
- Scroll down to Shaders (last item).
- Click on Load Shader Preset.
- Then choose a GLS shader in the list, for example, “bilinear.glslp” near the end.
- Return to your game.
- You should see a change in the game display.
You can try different shaders and even download them, to find the one you prefer.
This way, you can have a “cartoon aspect” instead of an old pixelated game.
Not everyone will like this feature, but it’s a possibility.
At the same time, you can note that there are a lot of options available in this “pause menu”.
You can:
- Take a screenshot
- Save your game even if the original game doesn’t offer this feature
- Record or stream your game
- Change game and controller options
- Use the rewind feature or change audio/video settings
That’s a big improvement compared to other retro gaming systems.
You can play the game like it was years ago, but you can also use these features to play it differently.
Related questions
What is the netplay host in the main menu? Basically, it’s a multi-player game mode. You can host a game on your Raspberry Pi and allow other players to join you. The host chooses “Start netplay host” and the other players have to choose “Connect to netplay host”. I didn’t try it, so I can’t tell you more about this.
Is it possible to use PS3/PS4/Xbox controllers on Lakka? Yes, Lakka supports almost all controllers. To use it with the cable it’s plug and play, working directly. To make it work wirelessly, you can check the documentation page, it depends on each controller.
What is the achievements feature? The achievements setting allows you to enable a PS-like achievement system by giving you rewards and badges when you make a specific action in a specific game. If you want to learn more about it, I recommend checking out the retroachievements.org website. You must create an account on this website to use the feature on Lakka.
It's a free PDF guide containing every Raspberry Pi Linux command you should know!
Download now
Video
If you need a step-by-step demonstration, I have recorded a video on the topic. You can watch it here:
Subscribe to the RaspberryTips YouTube channel to receive new videos in your feed:
It's a free PDF guide containing every Raspberry Pi Linux command you should know!
Download now
If you are looking for exclusive tutorials, I post a new course each month, available for premium members only. Join the community to get access to all of them right now!
Conclusion
That’s it, now you know everything you need to use Lakka on your Raspberry Pi.
Personally, I really like this RetroPie alternative, it’s easy to use and works well.
Maybe it has fewer features but do we really need more?
If you like retro gaming, feel free to check out my other articles on this subject:
This is everything I struggled with condensed into an incredibly readable guide. Wish I stumbled across this first!
I suggest a small paragraph on the power of playlists and scanning directories, setting default playlist cores and such.
Thanks!
At least for my Raspberry 4 i am happy with Lakka, you have to get the correct SPLIT rom set for FBA NEO or the roms and scrapper will not work; the version 0.2.97.38 is in the archive.org for the Arcade games.
Thank you for taking the time to make this tutorial, it helped me a lot.
What about the different BIOS files? How do you get those? I know that the N64 one can be downloaded using RetroArch’s Online Updater. What about the rest?
Only “con” I know it’s hart to put custom roms for SNES
what cores should I download with the updater? as in what Linux ones on buildbot will work on a Raspberry Pi Zero? ARMV7 or ARMHF?
Is anyone having issues with Audio on the RP4 running Lakka,I cant get audio from HDMI or 3.5mm jack