Transfer Your Python Code To Raspberry Pi (5 easy ways)
Whether you’re used to coding on your computer, or have an old Python project you want to transfer to your Raspberry Pi, this article will give you a few ways to do this. It doesn’t have to be complicated, but as always with Linux, it’s not necessarily straightforward.
Here are 5 solutions you can use to transfer your scripts from your computer to a Raspberry Pi. I’ll explain each step-by-step, so you’ll get it on your first try. Each solution applies in certain conditions (number of files, regular updates or one shot, etc.), so make sure to check the full list before picking one.
By the way, if you get overwhelmed as soon as Python is required for a project, I recommend checking out my e-book “Master Python on Raspberry Pi“. It will guide you step-by-step to learn the essential concepts (and only the essential concepts) required to achieve any project in the future. Raspberry Pi without Python is like a car without an engine, you miss all the fun parts. Get 10% off by downloading it today!
1 – Copy/paste your Python code via SSH
If you only have one script you want to transfer to your Raspberry Pi, the easiest and most natural way of doing it is to use any SSH client and copy/paste your code into it. Here is how to do this.
Prerequisites
Before copying the Python script to the Raspberry Pi, here are a few things you need to do. I assume you already have the system installed (Raspberry Pi OS in my example) and the Raspberry Pi is connected to your network.
Here are the next steps:
- Get the Raspberry Pi IP address.
If you have a desktop interface, you can find it by hovering your mouse over the network icon in the top-right corner.
Another way is to open a terminal and type this command:ip aIf you need more guidance, I explain everything in this article: How to Find the Current IP Address of a Raspberry Pi? - Enable SSH.
It’s the protocol we’ll use to connect to the Raspberry Pi.
On the Desktop version, there is an option in the Raspberry Pi Configuration tool.
With the Lite version, you can use raspi-config to enable it:sudo raspi-configI have a complete guide about SSH on Raspberry Pi if needed. - Get an SSH client on your computer.
It’s possible to use the included terminal with most operating systems (even Windows!), but it’s generally more comfortable to use a tool created for this. Putty is the most popular, but I prefer Termius and use it all the time.
Pick one, it doesn’t matter that much, and you’re ready.
Once you have everything, make sure you can connect to the Raspberry Pi via SSH (read this guide if needed), and you can move to the next step.
Are you a bit lost in the Linux command line? Check this article first for the most important commands to remember and a free downloadable cheat sheet so you can have the commands at your fingertips.
How to use this method
The goal of this method will be to get access to a terminal on the Raspberry Pi (via SSH) and use the built-in text editor (Nano) to copy the Python code.
Here is how to do this:
- Connect to the Raspberry Pi via SSH.
If you follow the previous part, you’re probably already connected. - Optional: create a new folder for your Python script and move into it.
mkdir python
cd python - Create a new empty file:
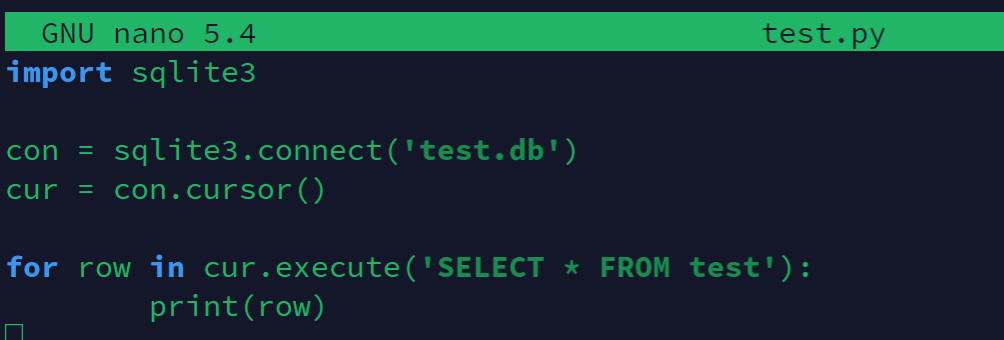
nano myscript.py - Copy and paste your code into it.
Open the script on your computer, select the entire code and copy (CTRL+C on PC).
Back in Nano via your SSH client, paste the code content (right-click > paste in most cases). - Save and exit (CTRL+O, Enter, CTRL+X).
That’s it! You should now have your script on the Raspberry Pi.
If you want to try it, you can run it from the SSH session with:python myscript.pyOr something similar.
If you need specific help with Python basics, I have several articles on the website you should read after that:
If like me, you always mix the languages syntax, download my cheat sheet for Python here!
Download now
- How to Learn to Program in Python with a Raspberry Pi?
- How To Create A New Python File In Terminal On Raspberry Pi
- How to Install and Use Python Packages on Raspberry Pi?
Summary
As a whole, this first method is pretty easy if you already know how to use SSH, and it works best if you only have a couple of files to transfer. Other options are more efficient for bigger projects, as we’ll see later.
| Difficulty level | ⭐⭐ |
| Best use case | Recovering one file from your computer. |
| Project size | Very small |
2 – Transfer the Python files via SFTP
Transferring Python files via SFTP is a great solution when you have many files to send to the Raspberry Pi. It’ll be way faster than copying/pasting the script’s content one by one.
Prerequisites
The prerequisites are almost the same as in the previous method, so I won’t repeat the details here, please check the beginning of this article for more details.
Here is what you need:
- A Raspberry Pi, with Linux installed and connected to the same network as your computer.
- The Raspberry Pi IP address.
- SSH enabled.
- An SSH client with SFTP features, or an SFTP client directly.
If, like me, you use Termius, there is an “SFTP” tab in it where you can browse the remote files.
Another option is to use tools like FileZilla or WinSCP that are built for this.
I have a list of FTP clients here if you don’t know which one to use.
How to use this method
If you use FileZilla, you can create a new site in the site manager with the Raspberry Pi information.
It’s the first icon in the top bar.
Once opened and a new site is created, it looks like:
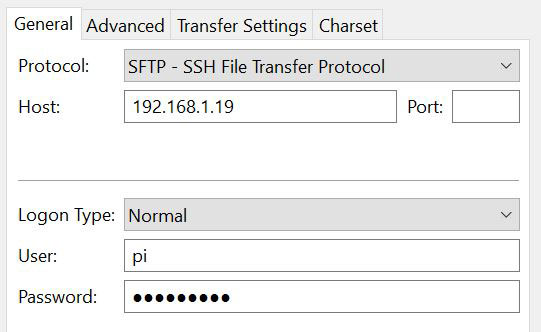
Choose the SFTP protocol and enter the Raspberry Pi IP address. Then add the user and password you are using on the Raspberry Pi.

Join Our Community!
Connect, learn, and grow with other Raspberry Pi enthusiasts. Support RaspberryTips and enjoy an ad-free reading experience. Get exclusive monthly video tutorials and many other benefits.
Learn moreClick “Connect”, and you’ll get a window split vertically: your computer files on the left and the Raspberry Pi home directory on the right.
Move to the directory you want on each side, and just drag and drop the files from one side to another.
You can also right-click on a file or a selection of files to transfer them to the Raspberry Pi.
If you use Termius, go into the “SFTP” tab in the left menu. It’s almost the same thing.
On the left, you have your computer files and on the right, you can pick a host from your list and connect to it:

Once connected, you can transfer the files from one side to another, in the same way as with FileZilla.
Summary
This is the best option if you have a folder on your computer with many scripts you want to transfer back to the Raspberry Pi (after a reinstallation, for example). You can also use this if you prefer typing the code on the computer instead of the Raspberry Pi, but I have better solutions later in this case.
| Difficulty level | ⭐ |
| Best use case | Recovering old files or working from the computer from time to time. |
| Project size | Any |
3 – Sync one folder with the Raspberry Pi (VSCode)
If you’re a serious coder and want to use your computer to type everything, even for bigger projects that need plenty of edits, then you’ll love this solution.
The idea is basically to automate the previous solution, syncing the files between your computer and the Raspberry Pi each time you change something on the computer.
Prerequisites
The main prerequisites are the same as always, so check the first method for details and additional links.
You need: a Raspberry Pi with SSH enabled on it, the IP address and its username and password.
On the computer, you need to install Visual Studio Code (VSCode).
Maybe other editors have a similar feature, but that’s the one I’m using, so I’ll show you it.
It’s a great editor for developers.
One of the interesting things about this editor is that you can install extensions to add even more features. In this case, you’ll need an extension named “PRO Deployer – SFTP/FTP deployer”:

I guess there are other ways to do the same thing, but I’ll show you with it, as it’s the one I use for all my big projects.
If like me, you always mix the languages syntax, download my cheat sheet for Python here!
Download now
You might be interested: How To Install Visual Studio Code On Raspberry Pi
How to use this method
Open an existing project, or create a new folder.
We’ll create a configuration for this project. If you have several projects in VSCode, you’ll need to repeat this procedure for each of them.
Here is how to generate a configuration file for PRO Deployer:
- Press CTRL+Shift+P.
On Mac, it should be Cmd+Shift+P. - Search “PRO Deployer: Generate config file” in the list and run it.

- It will create a subfolder with a default configuration.

The configuration tells VSCode the actions to do, the files to ignore, the server where you want to transfer the files, etc. You can keep most of the default options for your first test, we’ll just configure it to send the files to the Raspberry Pi.
Edit the configuration:
- Remove the FTP section, we won’t use FTP in this example.
- Change the default values in the SFTP section.
You basically need to change the host, user and password.
And probably the name and destination directory. - Replace the “activeTargets” variable with the new SFTP configuration name (if you changed it).
If you’re a bit lost at this point, here is an example with a configuration I tested for you:
{
	"uploadOnSave": true,
	"autoDelete": true,
	"checkGitignore": false,
	"activeTargets": [
		"Raspberry Pi"
	],
	"concurrency": 5,
	"ignore": [
		".git/**/*",
		".vscode/**/*"
	],
	"targets": [
		{
			"name": "Raspberry Pi",
			"type": "sftp",
			"host": "192.168.222.3",
			"port": 22,
			"user": "pi",
			"password": "raspberry",
			"dir": "/home/pi/test-python",
			"privateKey": null,
			"passphrase": null
		}
	]
}
Feel free to change the other options if needed, but in most cases it should be enough.
Maybe you have some subfolders you don’t want to sync. Update the “ignore” section if needed.
Once the configuration is complete, each time you save a file (with CTRL+S on Windows), it will transfer it automatically to the Raspberry Pi. You’ll get something like that in the bottom-right corner:
And if it’s working correctly, the file will be transferred or updated on the Raspberry Pi immediately:
I often use this method for projects where I’m the only developer and that don’t necessarily require a history of all the versions (as I’ll show you with the last method in this article). If you regularly work on the file on your computer and don’t want to waste time transferring the files manually, it’s great.
The issue is that there is no test mode, so it’s not really good practice for critical applications in production. It updates the file on the destination server as soon as you save it, which means it might be incomplete (or include bugs) when it transfers.
Summary
In summary, this is a great option if you are working solo on bigger projects and want to type on your computer instead of the Raspberry Pi. Bonus point if you are already using VSCode, as there is almost nothing more to do.
| Difficulty level | ⭐⭐ |
| Best use case | Working from the computer all the time. |
| Project size | Any |
It's a free PDF guide containing every Raspberry Pi Linux command you should know!
Download now
4 – Transfer the Python files with a USB drive
If for any reason using SSH to transfer the files is not possible, or seems too complicated, it’s always possible to transfer your Python files the old way: with a USB drive.
Prerequisites
There are almost no prerequisites in this case. You just need a USB drive, preferably formatted in FAT32 so it works on all systems.
If you need help formatting it, you can check this article: How to Format and Mount a USB drive on Raspberry Pi.
How to use this method
- Plug the USB drive into your computer.
- Copy your Python scripts on it.
- Safely eject the USB drive.
Then, plug the USB drive into the Raspberry Pi.
If you have a desktop environment and are using a supported file system, it should detect it automatically, and you’ll get a pop-up like:
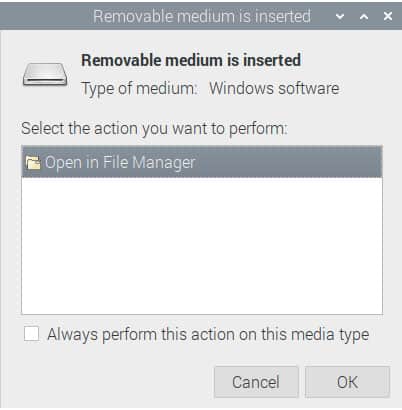
Open the USB drive in the file manager and copy/paste your files wherever you want on the Raspberry Pi. Nothing complicated with this method.
If you are using a minimal operating system without a graphic interface (like RPI OS Lite), I recommend checking the guide I linked in the prerequisites, as you may need help with the command line to find, mount and copy the files.
Summary
Using a USB drive is an easy solution to copy files or an entire folder at one time. It’s not really convenient to do transfer all the time, but it’s great to recover an old backup.
| Difficulty level | ⭐ |
| Best use case | Recovering an old folder with many files. You’ll then code directly on the Raspberry Pi. |
| Project size | Big |
It's a free PDF guide containing every Raspberry Pi Linux command you should know!
Download now
If you are looking for exclusive tutorials, I post a new course each month, available for premium members only. Join the community to get access to all of them right now!
5 – Use version control systems (Git or SVN)
The last solution is for serious developers. If you work in a team or want to use different computers to code, most of the previous solutions won’t work well.
The idea is to have a central server that hosts your code (it can be a Raspberry Pi or something in the cloud), and each time a change is made, the server will make the edit with the code hosted on it. So, even if two developers change the same file, it shouldn’t create conflicts.
Prerequisites
For this solution, you need to have a version control system. Most teams are using Git or SVN. And in both cases, you’ll likely need a server (can simply GitHub, or something on your local network), and a client on each device you’ll use to code.
I won’t get into many details about this solution, as many things depend on your organization, the protocol you chose, etc. But you’ll easily find help on the Internet. I just want to introduce this method.
How to use this method
Once the main organization is set up, you’ll simply use the Raspberry Pi as an additional client. It’ll connect to the server and sync the files regularly (automatically or manually) so you always run the latest version available.
Git and SVN are available in the default repository, so they are easy to install on Raspberry Pi OS.
If you use APT, it will be one of these commands:sudo apt install git
sudo apt install subversion
The configuration will be the same as on any client.
For example, with SVN, you’ll do a checkout of the main server, type the username and password and download all the files.
Then, you’ll use “svn update” from time to time to get the latest changes.
You can do it manually after a big update, or configure a cron to schedule the task automatically.
Summary
This is probably the most complicated option in this list, but it’s almost the only way to do it correctly if you have a team of developers.
| Difficulty level | ⭐⭐⭐ |
| Best use case | A lot of files and/or several developers. |
| Project size | Big |
Whenever you’re ready, here are other ways I can help you:
The RaspberryTips Community: If you want to hang out with me and other Raspberry Pi fans, you can join the community. I share exclusive tutorials and behind-the-scenes content there. Premium members can also visit the website without ads.
Master your Raspberry Pi in 30 days: If you are looking for the best tips to become an expert on Raspberry Pi, this book is for you. Learn useful Linux skills and practice multiple projects with step-by-step guides.
The Raspberry Pi Bootcamp: Understand everything about the Raspberry Pi, stop searching for help all the time, and finally enjoy completing your projects.
Master Python on Raspberry Pi: Create, understand, and improve any Python script for your Raspberry Pi. Learn the essentials step-by-step without losing time understanding useless concepts.
You can also find all my recommendations for tools and hardware on this page.