Pironman 5 Review: The Ultimate Case for Your Raspberry Pi 5
The Pironman is the case I have used the most for my Raspberry Pi 4. It has been running as my main Raspberry Pi server at home for years. So I was excited to hear about the new version available for the Raspberry Pi 5. In this article, I’ll share my first impressions with you.
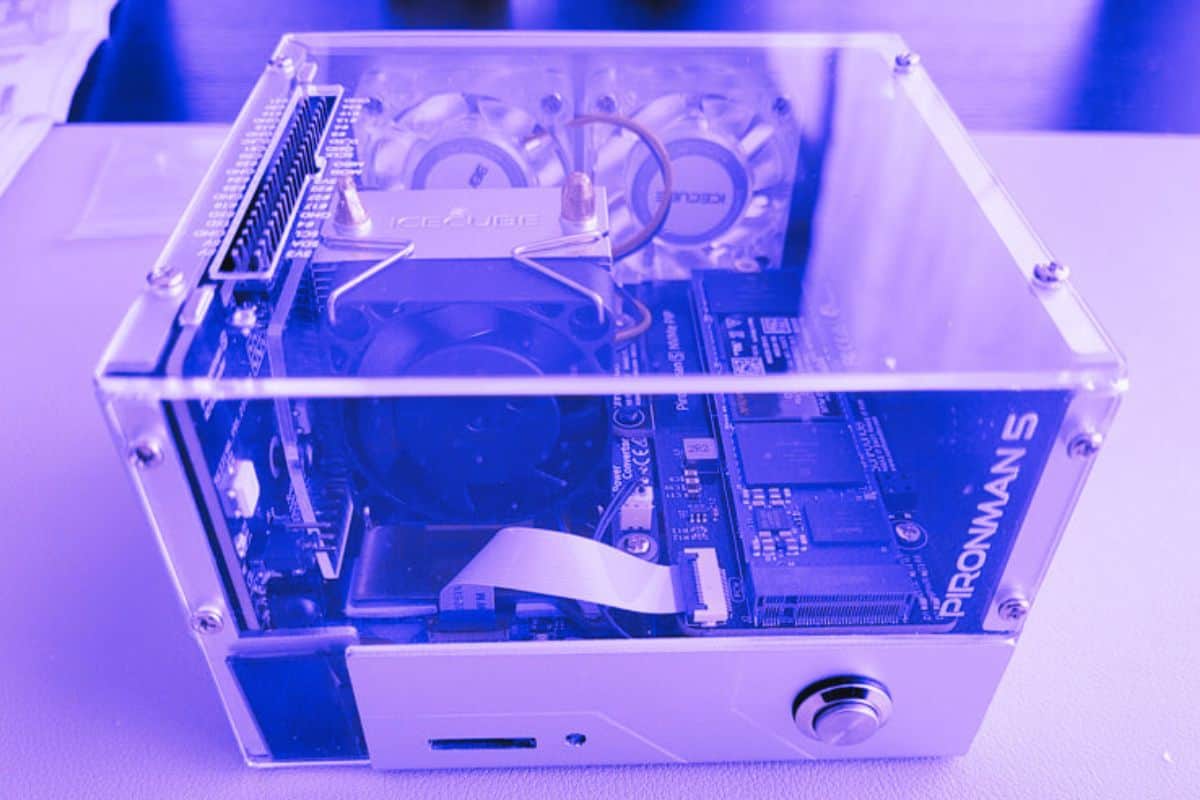
The Pironman 5 is a beautiful Raspberry Pi case that makes your Pi look like a gaming PC (transparent case with RGB LEDs). It’s compatible with the Raspberry Pi 5 and has the ultimate cooling system and a slot for an M.2 SSD.
Let’s start with an overview of the specs so you know if it’s a good fit for your projects, and I’ll give you my honest review at the end.
Want to give it a try? You can get the Pironman 5 from the SunFounder official website here.
Pironman 5 specifications
If you’re familiar with the previous version of the Pironman (tested here), you’ll notice some similarities: transparent case, LEDs, giant heat sink and fan, etc. But it’s like they’ve pushed it to the next level.
Here’s what the beast looks like:
If you are lost in all these new words and abbreviations, request my free Raspberry Pi glossary here (PDF format)!
Download now
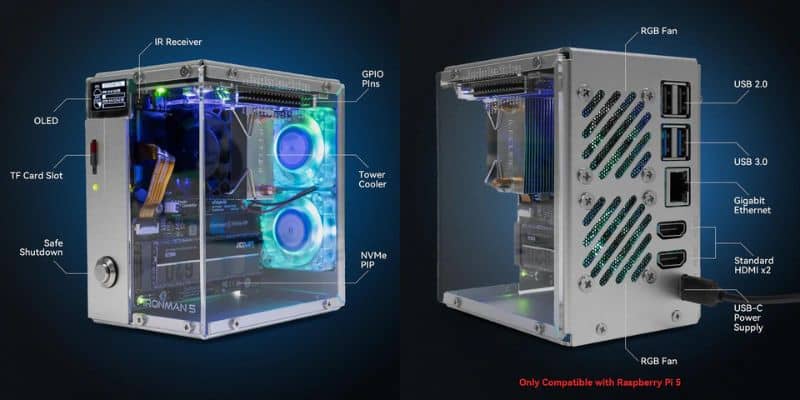
Here are the main elements of this futuristic case for your Raspberry Pi 5:
- Tower cooler + 2 fans (similar to the Ice Tower).
- Support for M.2 SSD (NVMe, compatible with 2230, 2242, 2260 and 2280 series).
The drive is connected to the PCIe, so you get the fastest speed (Gen 2.0 certified, but can be forced to Gen 3.0). - OLED display on the front of the case.
- The power button and SD card slot are also on the front.
- You can access the Raspberry Pi ports + 2x standard HDMI on the back.
- It is USB-C powered.
- GPIO pins are accessible on the side of the case.
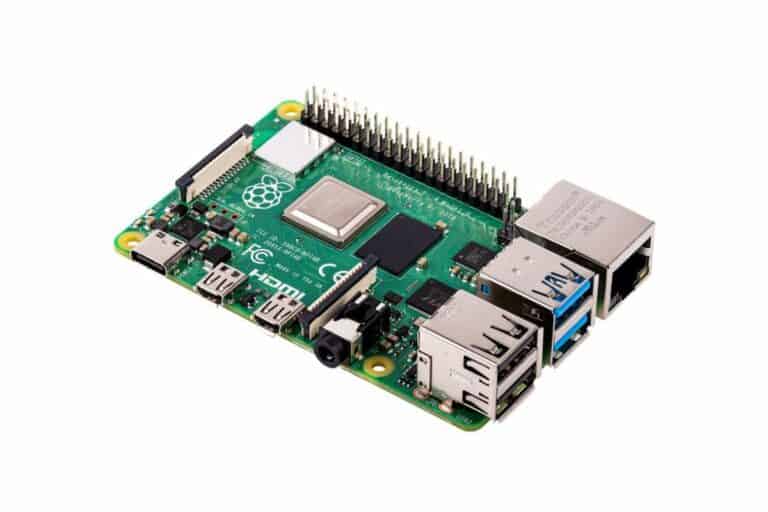
This case is only compatible with the Raspberry Pi 5 (not included) and the only other thing you need is an M.2 SSD. Everything else is included (see below). I tested it with this SSD from SanDisk (link to Amazon), but it’s compatible with various models. There is a list on the official website if you have any doubts.
At the time of the release, the Pironman 5 was priced at $79, which is the same price as the previous model. I think it’s fine, not cheap but still affordable for a high-end product. Check the current price on the website, as it may change over time.
It's a free PDF guide containing every Raspberry Pi Linux command you should know!
Download now
Assembling the Pironman 5
Like most high-end cases for Raspberry Pi, this one comes as a kit, so you’ll have to do a bit of work. But this is Sunfounder, so everything is well thought out, so it shouldn’t be a problem. Here’s what to expect.
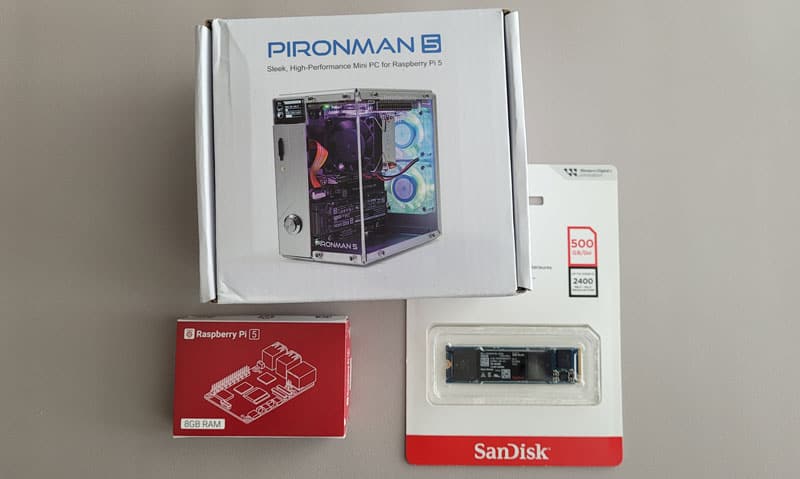
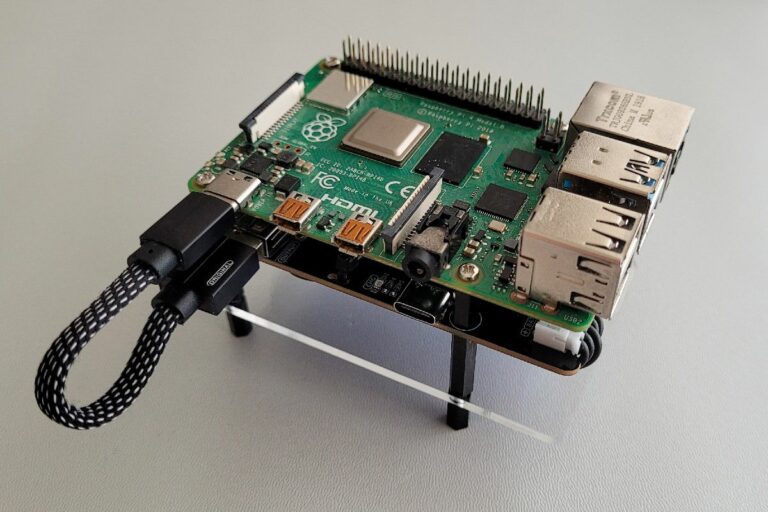
As I knew I’d probably keep it running after the test, I bought a Raspberry Pi 5 and a good SSD dedicated to this project. The SSD is not mandatory, but it would be a shame not to use one, as it will likely improve performance for any project.
Note: To be completely transparent, SunFounder sent me this product free of charge during the beta test. Things may have improved since I tested it. I’m sharing my honest opinion in this article.
As expected with Sunfounder products, the box will include many parts, and you’ll have to figure out how to assemble it. But don’t worry, everything is labelled well, assembly tools are included, and there’s a full-color, step-by-step manual to guide you along the way.
If you are lost in all these new words and abbreviations, request my free Raspberry Pi glossary here (PDF format)!
Download now


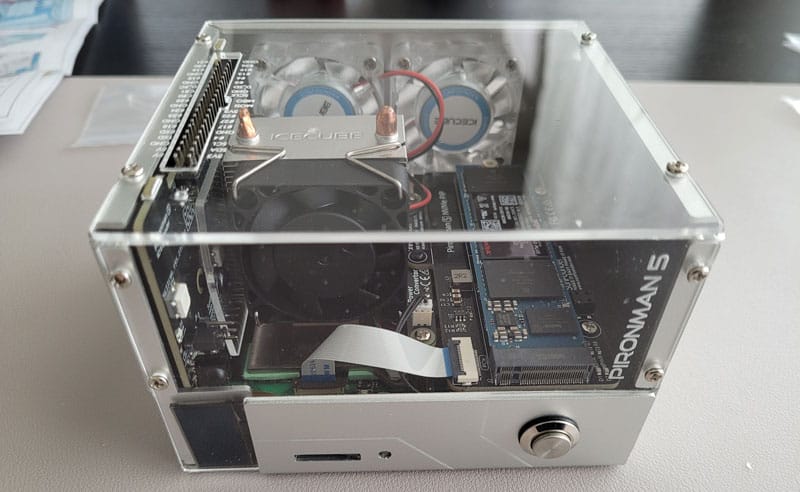
I’m not good at these types of LEGO projects, but I did it quickly. I found it easier to assemble than the previous model (more space, and a cube is easier to assemble than an octagon). The instructions are clear, and it’s only for Pi 5, so there is no doubt of what you should do or not.
Here are a few pictures of the steps, so you get an idea of what to expect:


After about an hour, everything is in the box and we’re ready to move on to the next part. I always get a little nervous at this point because you don’t test anything until the end (so it’s not funny if just one cable is connected wrong), but everything worked on the first try. Yay!
I won’t bother you with the software part as Sunfounder has a great documentation page, that will be more up-to-date than my article. But there are two things you need to do after that:
- Install the operating system: install as usual if using an SD card.
With an SSD, the easiest way is to plug a USB adapter into a computer to install RPI OS on the Raspberry Pi.
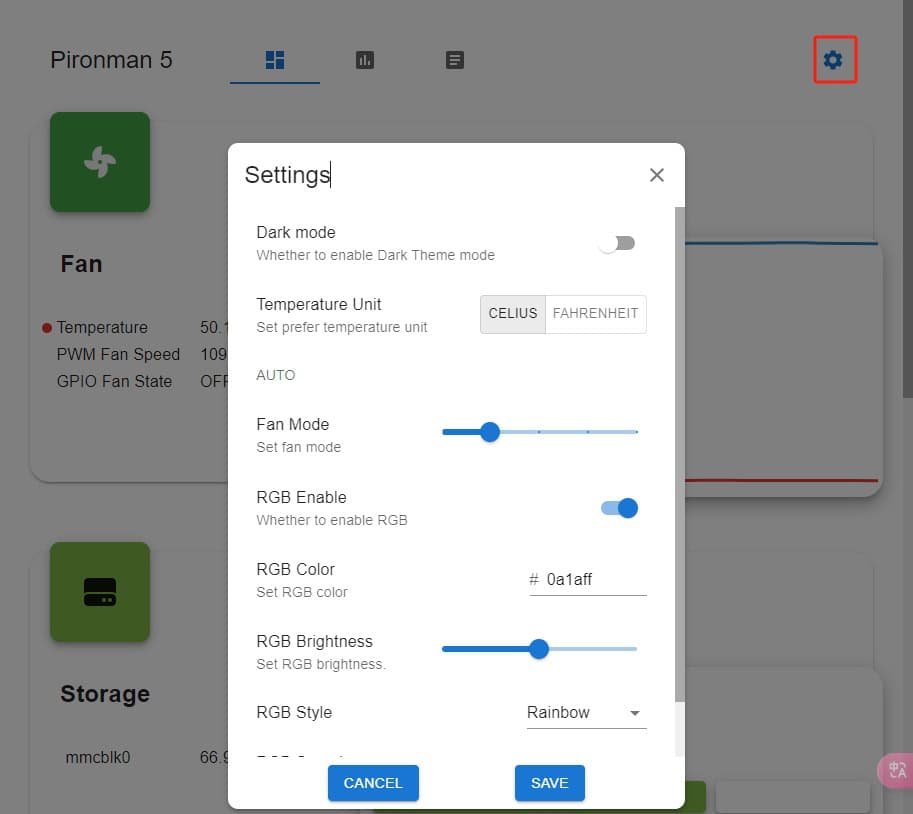
By the way, make sure your firmware is up-to-date to support the NVMe boot. - Set up the Pironman 5: This case has some Python requirements and packages to install to control everything. It even has a web interface! It will detect and manage all the accessories (OLED display, LEDs colors, fans, etc.). Check the instructions in the documentation, it’s commands to copy and paste, and then you can do everything from the dashboard:
Interested? Order the Pironman 5 here.
It's a free PDF guide containing every Raspberry Pi Linux command you should know!
Download now
Want to chat with other Raspberry Pi enthusiasts? Join the community, share your current projects and ask for help directly in the forums.
Who is the Pironman 5 for?
Overall, the Pironman 5 is great for many use cases: desktop, home server (like a NAS), or media center. It looks nice on your desk or next to your TV, it’s quiet most of the time, and you get the best performance for your Raspberry Pi 5.
I’m using mine as a home server, with Nextcloud, a Minecraft server and my VPN running on it (I use WireGuard). It has been running for months without any issues and I’ve replaced my previous Pironman with it.
I unplugged the fans after the assembly because the script wasn’t working, and they were running continuously. It has been fixed since then (and with my use, they rarely run). I didn’t have a sticker for the OLED display, but it was probably due to the beta version.
The price may seem a bit steep, but when you consider what’s included, it’s not too bad. Most NVMe-compatible cases are over $50 and usually don’t look as good or have the same cooling system. So it’s a toss-up, but I think it’s worth it if your Pi will run all the time.
I want to mention that once the thing is assembled, it’s not easy to get the Raspberry Pi out of the case. So if you only have one Pi and want to be able to use it with robot kits, electronic circuits or other cases, it’s probably not for you. That’s why I bought a Pi 5 specifically for this case. I know that once it’s in there, I’ll never use it for anything else.
Except for those small caveats, I highly recommend this case. It’s well done, and you won’t regret it. Remember, you can get yours from the Sunfounder website here.
Whenever you’re ready, here are other ways I can help you:
The RaspberryTips Community: If you want to hang out with me and other Raspberry Pi fans, you can join the community. I share exclusive tutorials and behind-the-scenes content there. Premium members can also visit the website without ads.
Master your Raspberry Pi in 30 days: If you are looking for the best tips to become an expert on Raspberry Pi, this book is for you. Learn useful Linux skills and practice multiple projects with step-by-step guides.
The Raspberry Pi Bootcamp: Understand everything about the Raspberry Pi, stop searching for help all the time, and finally enjoy completing your projects.
Master Python on Raspberry Pi: Create, understand, and improve any Python script for your Raspberry Pi. Learn the essentials step-by-step without losing time understanding useless concepts.
You can also find all my recommendations for tools and hardware on this page.